IBM 7379E2U User Manual - Page 103
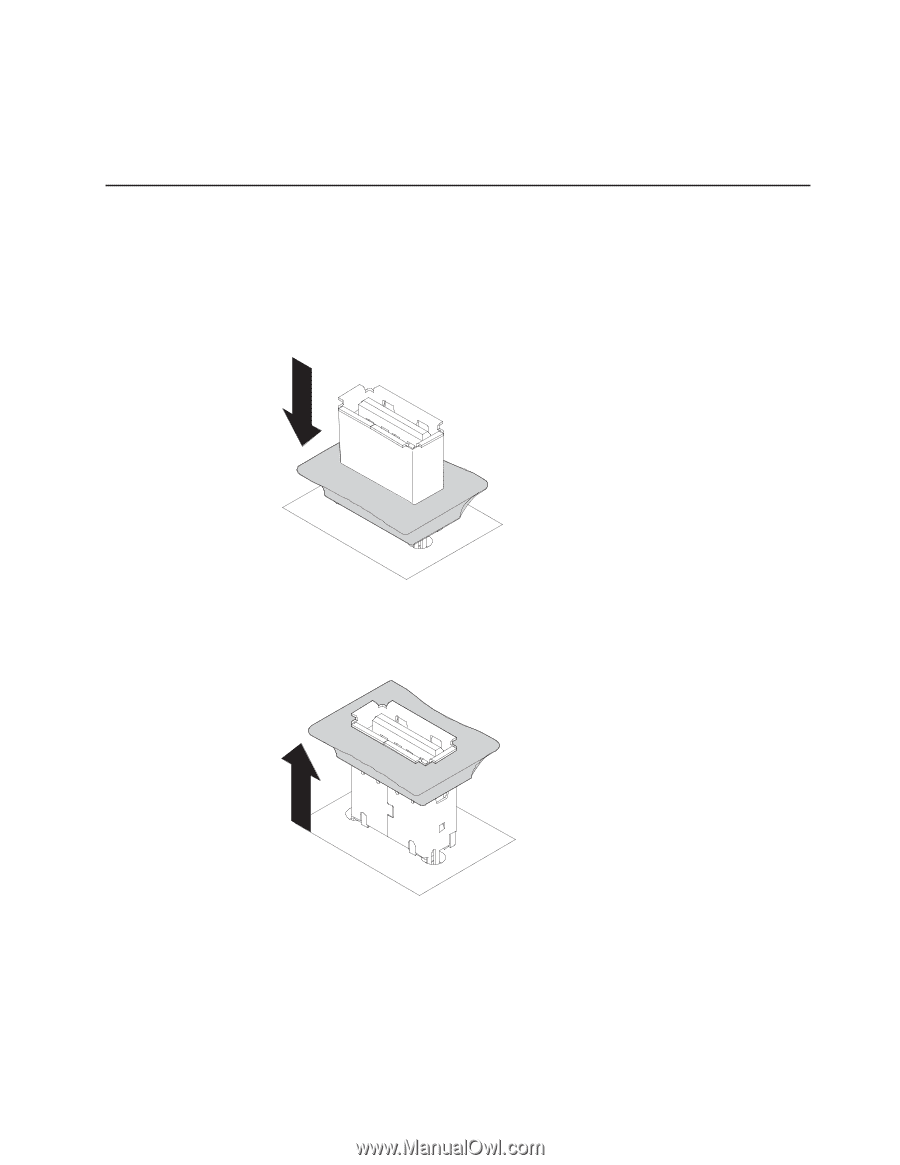
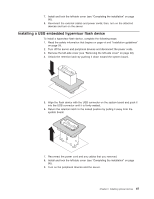
Installing a USB embedded hypervisor flash device, into the USB connector until it is firmly seated.
 |
View all IBM 7379E2U manuals
Add to My Manuals
Save this manual to your list of manuals |
Page 103 highlights
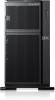
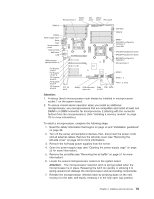
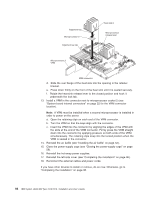
7. Install and lock the left-side cover (see "Completing the installation" on page 96). 8. Reconnect the external cables and power cords; then, turn on the attached devices and turn on the server. Installing a USB embedded hypervisor flash device To install a hypervisor flash device, complete the following steps: 1. Read the safety information that begins on page vii and "Installation guidelines" on page 28. 2. Turn off the server and peripheral devices and disconnect the power cords. 3. Remove the left-side cover (see "Removing the left-side cover" on page 48). 4. Unlock the retention latch by pushing it down toward the system board. 5. Align the flash device with the USB connector on the system board and push it into the USB connector until it is firmly seated. 6. Return the retention latch to the locked position by pulling it away from the system board. 7. Reconnect the power cord and any cables that you removed. 8. Install and lock the left-side cover (see "Completing the installation" on page 96). 9. Turn on the peripheral devices and the server. Chapter 2. Installing optional devices 87
-
 1
1 -
2
-
3
-
4
-
5
-
6
-
7
-
8
-
9
-
10
-
11
-
12
-
13
-
14
-
15
-
16
-
17
-
18
-
19
-
20
-
21
-
22
-
23
-
24
-
25
-
26
-
27
-
28
-
29
-
30
-
31
-
32
-
33
-
34
-
35
-
36
-
37
-
38
-
39
-
40
-
41
-
42
-
43
-
44
-
45
-
46
-
47
-
48
-
49
-
50
-
51
-
52
-
53
-
54
-
55
-
56
-
57
-
58
-
59
-
60
-
61
-
62
-
63
-
64
-
65
-
66
-
67
-
68
-
69
-
70
-
71
-
72
-
73
-
74
-
75
-
76
-
77
-
78
-
79
-
80
-
81
-
82
-
83
-
84
-
85
-
86
-
87
-
88
-
89
-
90
-
91
-
92
-
93
-
94
-
95
-
96
-
97
-
 98
98 -
 99
99 -
 100
100 -
 101
101 -
 102
102 -
 103
103 -
 104
104 -
 105
105 -
 106
106 -
 107
107 -
 108
108 -
109
-
110
-
111
-
112
-
113
-
114
-
115
-
116
-
117
-
118
-
119
-
120
-
121
-
122
-
123
-
124
-
125
-
126
-
127
-
128
-
129
-
130
-
131
-
132
-
133
-
134
-
135
-
136
-
137
-
138
-
139
-
140
-
141
-
142
-
143
-
144
-
145
-
146
-
147
-
148
-
149
-
150
-
151
-
152
 |
 |