IBM 7379E2U User Manual - Page 89
optical power cable and the power connector on the RDX tape drive.
 |
View all IBM 7379E2U manuals
Add to My Manuals
Save this manual to your list of manuals |
Page 89 highlights
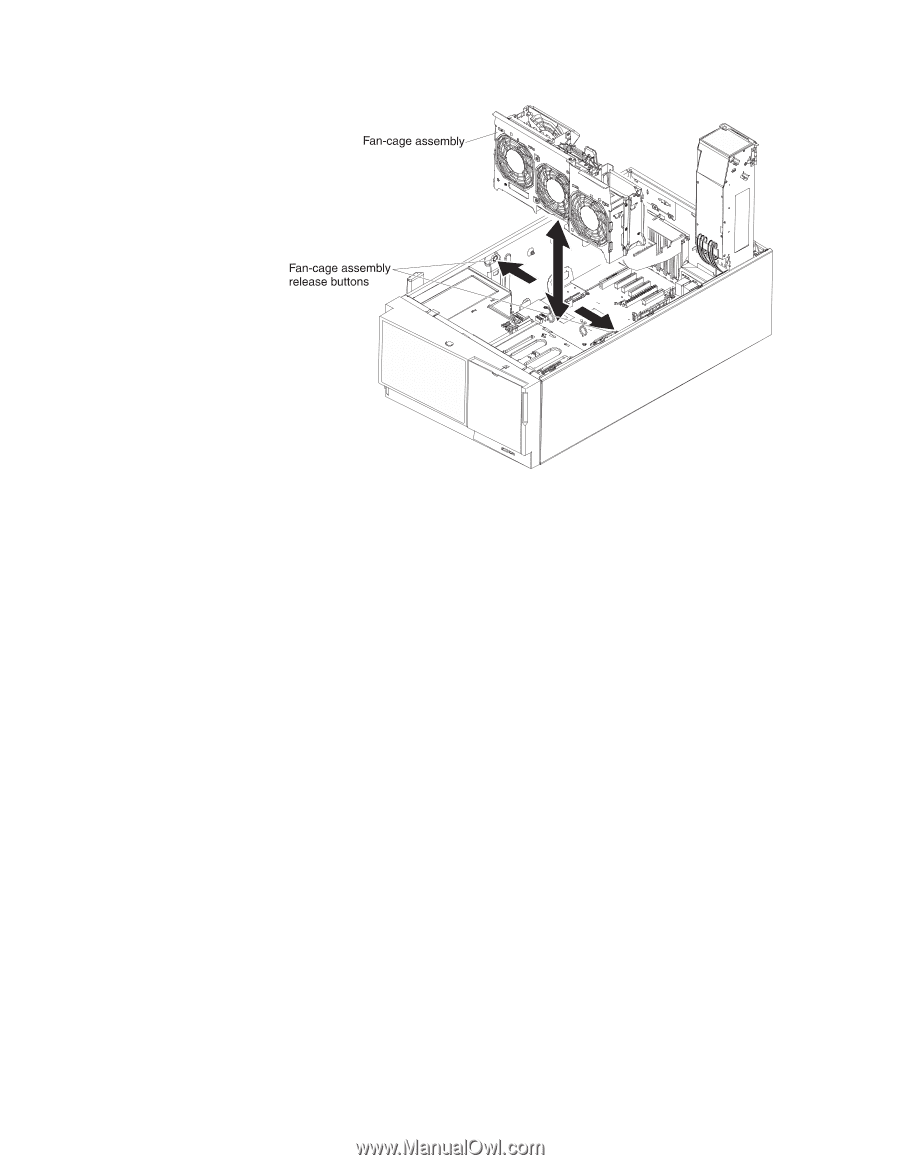
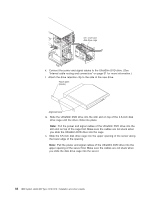
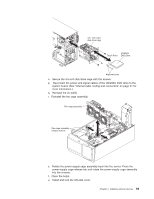
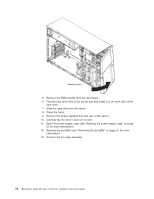
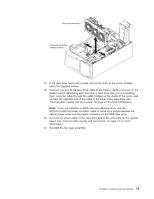
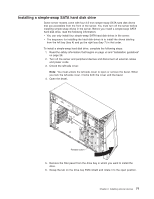
14. If the tape drive came with screws, secure the drive to the server chassis, using the supplied screws. 15. Connect one end of the tape drive cable to the USB or SATA connector on the system board, depending upon the type of tape drive that you are installing; then, route the cable through the cable holders on the inside of the server and connect the opposite end of the cable to the back of the tape drive (see "Internal cable routing and connectors" on page 31 for more information.) Note: If you are installing an RDX internal USB tape drive, use the SATA-to-traditional power converter cable to serve as a bridge between the optical power cable and the power connector on the RDX tape drive. 16. Connect the power cable to the tape drive and to the connector on the system board (see "Internal cable routing and connectors" on page 31 for more information.) 17. Reinstall the fan cage assembly. Chapter 2. Installing optional devices 73
-
 1
1 -
2
-
3
-
4
-
5
-
6
-
7
-
8
-
9
-
10
-
11
-
12
-
13
-
14
-
15
-
16
-
17
-
18
-
19
-
20
-
21
-
22
-
23
-
24
-
25
-
26
-
27
-
28
-
29
-
30
-
31
-
32
-
33
-
34
-
35
-
36
-
37
-
38
-
39
-
40
-
41
-
42
-
43
-
44
-
45
-
46
-
47
-
48
-
49
-
50
-
51
-
52
-
53
-
54
-
55
-
56
-
57
-
58
-
59
-
60
-
61
-
62
-
63
-
64
-
65
-
66
-
67
-
68
-
69
-
70
-
71
-
72
-
73
-
74
-
75
-
76
-
77
-
78
-
79
-
80
-
81
-
82
-
83
-
 84
84 -
 85
85 -
 86
86 -
 87
87 -
 88
88 -
 89
89 -
 90
90 -
 91
91 -
 92
92 -
 93
93 -
 94
94 -
95
-
96
-
97
-
98
-
99
-
100
-
101
-
102
-
103
-
104
-
105
-
106
-
107
-
108
-
109
-
110
-
111
-
112
-
113
-
114
-
115
-
116
-
117
-
118
-
119
-
120
-
121
-
122
-
123
-
124
-
125
-
126
-
127
-
128
-
129
-
130
-
131
-
132
-
133
-
134
-
135
-
136
-
137
-
138
-
139
-
140
-
141
-
142
-
143
-
144
-
145
-
146
-
147
-
148
-
149
-
150
-
151
-
152
 |
 |