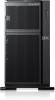
IBM 7379E2U User Manual - Page 93
Installing a simple-swap SATA hard disk drive, Unlock the left-side cover.
 |
View all IBM 7379E2U manuals
Add to My Manuals
Save this manual to your list of manuals |
Page 93 highlights
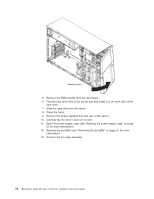
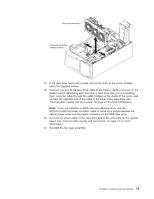
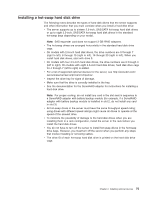
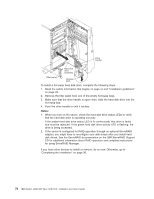
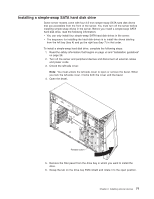
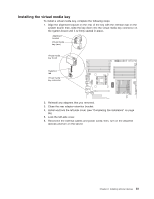
Installing a simple-swap SATA hard disk drive Some server models come with four 3.5-inch simple-swap SATA hard disk drives that are accessible from the front of the server. You must turn off the server before installing simple-swap drives in the server. Before you install a simple-swap SATA hard disk drive, read the following information: v You can only install four simple-swap SATA hard disk drives in the server. v The sequence for installing the hard disk drives is to install the drives starting from the left bay (bay 4) and go the right bay (bay 7) in that order. To install a simple-swap hard disk drive, complete the following steps: 1. Read the safety information that begins on page vii and "Installation guidelines" on page 28. 2. Turn off the server and peripheral devices and disconnect all external cables and power cords. 3. Unlock the left-side cover. Note: You must unlock the left-side cover to open or remove the bezel. When you lock the left-side cover, it locks both the cover and the bezel. 4. Open the bezel. 5. Remove the filler panel from the drive bay in which you want to install the drive. 6. Grasp the tab on the drive bay EMC shield and rotate it to the open position. Chapter 2. Installing optional devices 77
-
 1
1 -
2
-
3
-
4
-
5
-
6
-
7
-
8
-
9
-
10
-
11
-
12
-
13
-
14
-
15
-
16
-
17
-
18
-
19
-
20
-
21
-
22
-
23
-
24
-
25
-
26
-
27
-
28
-
29
-
30
-
31
-
32
-
33
-
34
-
35
-
36
-
37
-
38
-
39
-
40
-
41
-
42
-
43
-
44
-
45
-
46
-
47
-
48
-
49
-
50
-
51
-
52
-
53
-
54
-
55
-
56
-
57
-
58
-
59
-
60
-
61
-
62
-
63
-
64
-
65
-
66
-
67
-
68
-
69
-
70
-
71
-
72
-
73
-
74
-
75
-
76
-
77
-
78
-
79
-
80
-
81
-
82
-
83
-
84
-
85
-
86
-
87
-
 88
88 -
 89
89 -
 90
90 -
 91
91 -
 92
92 -
 93
93 -
 94
94 -
 95
95 -
 96
96 -
 97
97 -
 98
98 -
99
-
100
-
101
-
102
-
103
-
104
-
105
-
106
-
107
-
108
-
109
-
110
-
111
-
112
-
113
-
114
-
115
-
116
-
117
-
118
-
119
-
120
-
121
-
122
-
123
-
124
-
125
-
126
-
127
-
128
-
129
-
130
-
131
-
132
-
133
-
134
-
135
-
136
-
137
-
138
-
139
-
140
-
141
-
142
-
143
-
144
-
145
-
146
-
147
-
148
-
149
-
150
-
151
-
152
 |
 |
