IBM HC10 Service Guide - Page 20
Blade, workstation, controls - drivers
 |
UPC - 883436017671
View all IBM HC10 manuals
Add to My Manuals
Save this manual to your list of manuals |
Page 20 highlights
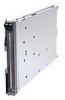
Blade workstation controls and LEDs This section describes the controls and LEDs on the blade workstation. Note: The control panel door is shown in the closed (normal) position in the following illustration. To access the power-control button, you must open the control panel door. KVM Media-tray select button select button CD Activity LED Location LED Information LED Blade-error LED Power-control button Power-on LED Sleep-mode LED KVM select button: Press this button to associate the shared BladeCenter unit keyboard, video, and mouse (KVM) with the blade workstation. The LED on this button flashes while the request is being processed and then is lit when the ownership of the keyboard, video, and mouse has been transferred to the blade workstation. It can take approximately 20 seconds to switch the keyboard, video, and mouse control from one blade workstation to another. Using a keyboard that is directly attached to the management module, you can also press keyboard keys in the following sequence to switch KVM control between blade workstations: NumLock NumLock bay_number Enter (bay_number is the two-digit number of the blade bay in which the blade workstation is installed.) Only USB keyboard, video, and mouse are supported. The operating system in the blade workstation must provide USB support for the blade workstation to recognize and use the keyboard and mouse. When you are not running an operating system that has USB device drivers, such as in the following situations, the keyboard responds very slowly: v Running the blade workstation integrated diagnostics v Running a BIOS update diskette on a blade workstation v Updating the diagnostics on a blade workstation v Running the Broadcom firmware CD for a blade workstation If there is no response when you press the KVM select button, you can use the management-module Web interface to determine whether local control has been disabled on the blade workstation. Media-tray select button: Press this button to associate the shared BladeCenter unit media tray (removable-media drives and front-panel USB ports) with the blade workstation. The LED on the button flashes while the request is being processed, and then is lit when the ownership of the media tray has been transferred to the blade workstation. It can take approximately 20 seconds for the operating system in the blade workstation to recognize the media tray. 4 BladeCenter HC10 Type 7996: Problem Determination and Service Guide
-
 1
1 -
2
-
3
-
4
-
5
-
6
-
7
-
8
-
9
-
10
-
11
-
12
-
13
-
14
-
 15
15 -
 16
16 -
 17
17 -
 18
18 -
 19
19 -
 20
20 -
 21
21 -
 22
22 -
 23
23 -
 24
24 -
 25
25 -
26
-
27
-
28
-
29
-
30
-
31
-
32
-
33
-
34
-
35
-
36
-
37
-
38
-
39
-
40
-
41
-
42
-
43
-
44
-
45
-
46
-
47
-
48
-
49
-
50
-
51
-
52
-
53
-
54
-
55
-
56
-
57
-
58
-
59
-
60
-
61
-
62
-
63
-
64
-
65
-
66
-
67
-
68
-
69
-
70
-
71
-
72
-
73
-
74
-
75
-
76
-
77
-
78
-
79
-
80
-
81
-
82
-
83
-
84
-
85
-
86
-
87
-
88
-
89
-
90
-
91
-
92
-
93
-
94
-
95
-
96
-
97
-
98
-
99
-
100
-
101
-
102
-
103
-
104
-
105
-
106
-
107
-
108
-
109
-
110
-
111
-
112
-
113
-
114
 |
 |
