Kyocera 9530DN Operation Guide - Page 149
Secure Formatting, Security, >Secure Format, >Secure, Formatting
 |
View all Kyocera 9530DN manuals
Add to My Manuals
Save this manual to your list of manuals |
Page 149 highlights
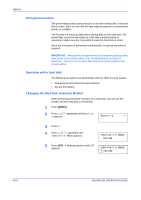
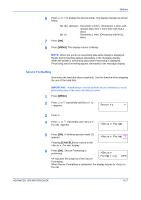
Options 6 Press U or V to display the desired mode. The display changes as shown below. Normal (default) : Overwrites 3 times. (Overwrites 2 times with random data, then 1 more time with NULL data.) Quick : Overwrites 1 time. (Overwrites with NULL data.) 7 Press [OK]. 8 Press [MENU]. The display returns to Ready. NOTE: When the printer is overwriting data while Ready is displayed, Ready and Overwriting appear alternately in the message display. When the printer is overwriting data while Processing is displayed, Processing and Overwriting appear alternately in the message display. Secure Formatting Overwrites the hard disk data completely. Use this function when stopping the use of the hard disk. IMPORTANT: Administrator need to perform secure formatting to avoid eliminating data of the hard disk without notice. 1 Press [MENU]. 2 Press U or V repeatedly until Security > appears. Security > 3 Press Z. 4 Press U or V repeatedly until >Secure Format appears. >Secure Format 5 Press [OK]. A blinking question mark (?) appears. >Secure Format ? Pressing [CANCEL] here returns to the >Secure Format display. 6 Press [OK]. Secure Formatting is performed. >Secure Formatting ##% ## indicates the progress of the Secure Formatting. When Secure Formatting is completed, the display returns to >Secure Format. ADVANCED OPERATION GUIDE 4-17
-
 1
1 -
2
-
3
-
4
-
5
-
6
-
7
-
8
-
9
-
10
-
11
-
12
-
13
-
14
-
15
-
16
-
17
-
18
-
19
-
20
-
21
-
22
-
23
-
24
-
25
-
26
-
27
-
28
-
29
-
30
-
31
-
32
-
33
-
34
-
35
-
36
-
37
-
38
-
39
-
40
-
41
-
42
-
43
-
44
-
45
-
46
-
47
-
48
-
49
-
50
-
51
-
52
-
53
-
54
-
55
-
56
-
57
-
58
-
59
-
60
-
61
-
62
-
63
-
64
-
65
-
66
-
67
-
68
-
69
-
70
-
71
-
72
-
73
-
74
-
75
-
76
-
77
-
78
-
79
-
80
-
81
-
82
-
83
-
84
-
85
-
86
-
87
-
88
-
89
-
90
-
91
-
92
-
93
-
94
-
95
-
96
-
97
-
98
-
99
-
100
-
101
-
102
-
103
-
104
-
105
-
106
-
107
-
108
-
109
-
110
-
111
-
112
-
113
-
114
-
115
-
116
-
117
-
118
-
119
-
120
-
121
-
122
-
123
-
124
-
125
-
126
-
127
-
128
-
129
-
130
-
131
-
132
-
133
-
134
-
135
-
136
-
137
-
138
-
139
-
140
-
141
-
142
-
143
-
 144
144 -
 145
145 -
 146
146 -
 147
147 -
 148
148 -
 149
149 -
 150
150 -
 151
151 -
 152
152 -
 153
153 -
 154
154 -
155
-
156
-
157
-
158
-
159
-
160
-
161
-
162
-
163
-
164
-
165
-
166
-
167
-
168
-
169
-
170
 |
 |
