Lenovo ThinkPad 560 Thinkpad 560 User's Guide - Page 103
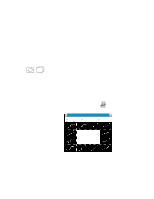
Personal Data Entry window., Close Paintbrush.
 |
View all Lenovo ThinkPad 560 manuals
Add to My Manuals
Save this manual to your list of manuals |
Page 103 highlights
Using the Personalization Feature Notes: Press Tab to move the cursor to the next field. You can change the color of the text background from black to white using the Black background option. 7 Fill in each field with your own information at the Personal Data Entry window. 8 Select OK. Next, create the background bitmap as follows: 9 Select Background in the Personalization Editor window. Windows Paintbrush automatically opens. Note: A sample bitmap file 10 Draw an image or color the background. (BACKSAMP.BMP) is available on Utility Diskette 2. Your bitmap size must be 160 by 100 pels. To change the size, select Options and then Image Attributes. Specify Width as 160, Height as 100, and Units as pels. 11 Select File and Save As to save and name your drawing as a 16-color bitmap file on the backup copy of Utility Diskette 2. 12 Close Paintbrush. 13 When the opening file window appears, enter the name of your bitmap file that you have just created on Utility Diskette 2. 14 Select Preview to preview the actual full-screen size of the personal information screen. To return to the previous screen, press Enter. To save your personalized screen in the nonvolatile memory in the computer: 15 Close all applications; then turn off the computer. 16 Insert the backup copy of the Utility Diskette 2 into the diskette drive; then turn on the computer. Chapter 5. Protecting Your Computer 85
-
 1
1 -
2
-
3
-
4
-
5
-
6
-
7
-
8
-
9
-
10
-
11
-
12
-
13
-
14
-
15
-
16
-
17
-
18
-
19
-
20
-
21
-
22
-
23
-
24
-
25
-
26
-
27
-
28
-
29
-
30
-
31
-
32
-
33
-
34
-
35
-
36
-
37
-
38
-
39
-
40
-
41
-
42
-
43
-
44
-
45
-
46
-
47
-
48
-
49
-
50
-
51
-
52
-
53
-
54
-
55
-
56
-
57
-
58
-
59
-
60
-
61
-
62
-
63
-
64
-
65
-
66
-
67
-
68
-
69
-
70
-
71
-
72
-
73
-
74
-
75
-
76
-
77
-
78
-
79
-
80
-
81
-
82
-
83
-
84
-
85
-
86
-
87
-
88
-
89
-
90
-
91
-
92
-
93
-
94
-
95
-
96
-
97
-
 98
98 -
 99
99 -
 100
100 -
 101
101 -
 102
102 -
 103
103 -
 104
104 -
 105
105 -
 106
106 -
 107
107 -
 108
108 -
109
-
110
-
111
-
112
-
113
-
114
-
115
-
116
-
117
-
118
-
119
-
120
-
121
-
122
-
123
-
124
-
125
-
126
-
127
-
128
-
129
-
130
-
131
-
132
-
133
-
134
-
135
-
136
-
137
-
138
-
139
-
140
-
141
-
142
-
143
-
144
-
145
-
146
-
147
-
148
-
149
-
150
-
151
-
152
-
153
-
154
-
155
-
156
-
157
-
158
-
159
-
160
-
161
-
162
-
163
-
164
-
165
-
166
-
167
-
168
-
169
-
170
-
171
-
172
-
173
-
174
-
175
-
176
-
177
-
178
-
179
-
180
-
181
-
182
-
183
-
184
-
185
-
186
-
187
-
188
-
189
-
190
-
191
-
192
-
193
-
194
-
195
-
196
-
197
-
198
-
199
-
200
-
201
-
202
-
203
-
204
-
205
-
206
-
207
-
208
-
209
-
210
-
211
-
212
-
213
-
214
-
215
-
216
-
217
-
218
-
219
-
220
-
221
-
222
-
223
-
224
-
225
-
226
-
227
-
228
-
229
-
230
-
231
-
232
-
233
-
234
-
235
-
236
-
237
-
238
-
239
-
240
-
241
-
242
-
243
-
244
-
245
-
246
-
247
-
248
-
249
-
250
-
251
-
252
-
253
-
254
-
255
-
256
-
257
-
258
-
259
-
260
-
261
-
262
-
263
 |
 |
