Magnavox MDR868H Owners Manual - Page 43
NETWORK, Network Settings
 |
View all Magnavox MDR868H manuals
Add to My Manuals
Save this manual to your list of manuals |
Page 43 highlights
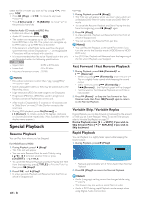
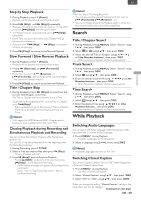
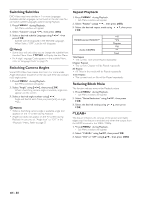
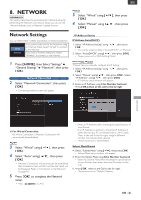
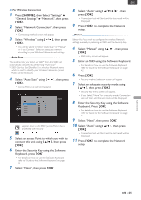
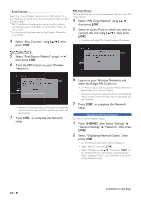
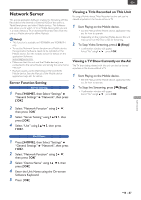
EN 8. NETWORK MDR868/867H This section describes the procedures for Network setup. By performing the Network Connection setup, you can use the Network features, such as Network Update function. Network Settings You can Select either wireless Connection or Wired Connection. Wired Wireless If you connect this unit to the Network using an Ethernet Cable, Select "Wired" to connect to the Internet. If you have a Wireless Networks, Select "Wireless" to connect to the Internet. 1 Press [ HOME ], then Select "Settings" "General Settings" "Network", then press [ OK ]. Network Connection 2 Select "Network Connection", then press [ OK ]. • Connecting method screen will appear. Manual 3 Select "Wired" using [ K/ L ], then press [ OK ]. 4 Select "Manual" using [ K/ L ], then press [ OK ]. IP Address Setting IP Address: Auto(DHCP) 1. Select "IP Address Setting" using [ K/ L ], then press [ OK ]. • You will be asked to Select "Auto(DHCP)" or "Manual". 2. Select "Auto(DHCP)" using [ K/ L ], then press [ OK ]. • Please move on to 'DNS Setting Mode'. IP Address: Manual "Manual" lets you manually configure the IP setting. 1. Select "IP Address Setting" using [ K/ L ], then press [ OK ]. 2. Select "Manual" using [ K/ L ], then press [ OK ]. Select "IP Address" using [ K/ L ], then press [ OK ]. • IP Address entry window will appear. 3. Enter an IP Address using [ the Number buttons ]. Press [ OK ] when at the cell to the far right. NETWORK ■ For Wired Connection For Wired Connection, a Network Connection will automatically be established. AUTO 3 Select "Wired" using [ K/ L ], then press [ OK ]. 4 Select "Auto" using [ K/ L ], then press [ OK ]. • Network Connection will automatically be established, then Connection test will Start and the test result will be Displayed. Refer to 'Connection to the Network' on page 18. 5 Press [ OK ] to complete the Network setup. • Press [ (EXIT) ] to Exit. • Enter an IP Address after checking the specifications of your Router. • If an IP Address is unknown, check the IP Address of other devices (e.g. PC connected with a LAN Cable). Then, in the cell to the far right, assign a different number from those other devices. • Please move on to 'Subnet Mask'. Subnet Mask:Manual 4. Select "Subnet Mask" using [ K/ L ], then press [ OK ]. • Subnet Mask entry window will appear. 5. Enter the Subnet Mask using [ the Number buttons ]. • Enter the Subnet Mask after checking the specifications of your Router, then enter the same Numbers in the cells. 6. Press [ OK ] when at the Cell to the far right. • Please move on to 'Default Gateway' EN - 43
-
 1
1 -
2
-
3
-
4
-
5
-
6
-
7
-
8
-
9
-
10
-
11
-
12
-
13
-
14
-
15
-
16
-
17
-
18
-
19
-
20
-
21
-
22
-
23
-
24
-
25
-
26
-
27
-
28
-
29
-
30
-
31
-
32
-
33
-
34
-
35
-
36
-
37
-
 38
38 -
 39
39 -
 40
40 -
 41
41 -
 42
42 -
 43
43 -
 44
44 -
 45
45 -
 46
46 -
 47
47 -
 48
48 -
49
-
50
-
51
-
52
-
53
-
54
-
55
-
56
-
57
-
58
-
59
-
60
-
61
-
62
-
63
-
64
-
65
-
66
-
67
-
68
-
69
-
70
-
71
-
72
-
73
-
74
-
75
-
76
-
77
-
78
-
79
-
80
-
81
-
82
-
83
 |
 |