Magnavox MDR868H Owners Manual - Page 66
OTHERS, Troubleshooting
 |
View all Magnavox MDR868H manuals
Add to My Manuals
Save this manual to your list of manuals |
Page 66 highlights
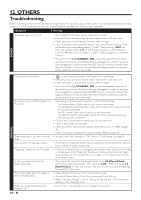
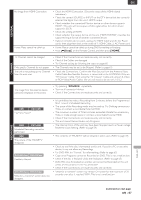
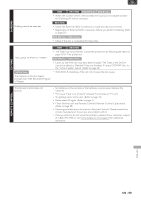
12. OTHERS Troubleshooting Before requesting service for this unit, check the table below for a possible cause of the problem you are experiencing. Some simple checks or a minor adjustment on your part may eliminate the problem and restore proper operation. Symptom Remedy POWER The Power does not turn On. • Check that the AC Power cord is connected securely. • Remote Control batteries may be weak, replace them with new ones. • Check operation of the Remote Control, refer to Page 4. • After "Initialize for Personal Information", this unit's Remote Control Code will be set back to the default setting "Code1". Keep pressing [ OK ] and press the number button [ 1 ] on the Remote Control to set the Remote Control's Remote Control Code to "Code1". (Refer to page 58 on 'Remote Control'.) • Press and hold the [ STANDBY / ON] on the front panel for more than 8 seconds to turn the unit off and leave the unit unplugged for a while (or, leave the unit unplugged for a while and press the RESET button on the rear cabinet) then, plug the unit back in. If the unit does not Power On please contact our customer service center for service on the model. The unit does not respond. • " " or error message appears if the operation is prohibited. • Remote Control batteries may be weak, replace them with new ones. • Check operation of the Remote Control, refer to Page 4. • Press and hold the [ STANDBY / ON] on the front panel for more than 8 seconds to turn the unit off and leave the unit unplugged for a while (or, leave the unit unplugged for a while and press the RESET button on the rear cabinet) then, plug the unit back in. If the unit does not Power On please contact our customer service center for service on the model. No picture, sound or Menu appears on the screen. • Depending on the Source/Connection, confirm the following: - For Antenna/basic Cable, redo an auto scan on the model. - For satellite Receiver/Cable Box, check the Connections to make sure they are securely connected. - For RF Coaxial Cable, redo an auto scan on the model. - For HDMI and RCA Video/Audio, check the Connections to make sure they are securely connected. • Check if the Connections are made securely and correctly. • Check if the Cables are damaged. • Check if a correct External Input Channel is Selected on your TV. (Refer to page 26) • Check if you have completed the Channel setting. (Refer to pages 60) GENERAL Time jumps/Auto Clock set's incorrect • Set the 'Auto Clock Setting' to "Off " and try 'Clock Setting' on page 59. Time. The unit does not operate properly. • Moisture has condensed inside the unit. Leave the unit turned On for about 2 hours until the moisture evaporates. "Repairing" appears on the TV screen. In case you intend to cancel the Repairing Process. • If there is a Power failure or unplugging during Recording, finalizing, formatting or editing (even after "Repairing" disappears), a Repairing Process will begin automatically just after turning the unit on again. It may take several minutes up to several hours. • If you intend to cancel the Repairing Process, press [ A (Open/Close) ] on the front panel, then Select "Yes" and press [ OK ]. After that, press [ A (Open/Close) ] to take out the disc. The disc canceled during the Repairing Process MAY NOT work. The Clock Display does not appear in the front Panel Display. • Check that the AC Power cord is connected securely. • (In case of Power failure) Check the breaker and Clock Setting. • When "Standby Settings" is set to "Energy Saving Standby", the front panel lighting is Off in Standby mode. When you forget the Password for Parental Lock. • Enter 4737 in "Change Password" to Reset the password. EN - 66
-
 1
1 -
2
-
3
-
4
-
5
-
6
-
7
-
8
-
9
-
10
-
11
-
12
-
13
-
14
-
15
-
16
-
17
-
18
-
19
-
20
-
21
-
22
-
23
-
24
-
25
-
26
-
27
-
28
-
29
-
30
-
31
-
32
-
33
-
34
-
35
-
36
-
37
-
38
-
39
-
40
-
41
-
42
-
43
-
44
-
45
-
46
-
47
-
48
-
49
-
50
-
51
-
52
-
53
-
54
-
55
-
56
-
57
-
58
-
59
-
60
-
 61
61 -
 62
62 -
 63
63 -
 64
64 -
 65
65 -
 66
66 -
 67
67 -
 68
68 -
 69
69 -
 70
70 -
 71
71 -
72
-
73
-
74
-
75
-
76
-
77
-
78
-
79
-
80
-
81
-
82
-
83
 |
 |
