Magnavox MDR868H Owners Manual - Page 44
EN - 44, DNS Setting : AutoDHCP
 |
View all Magnavox MDR868H manuals
Add to My Manuals
Save this manual to your list of manuals |
Page 44 highlights
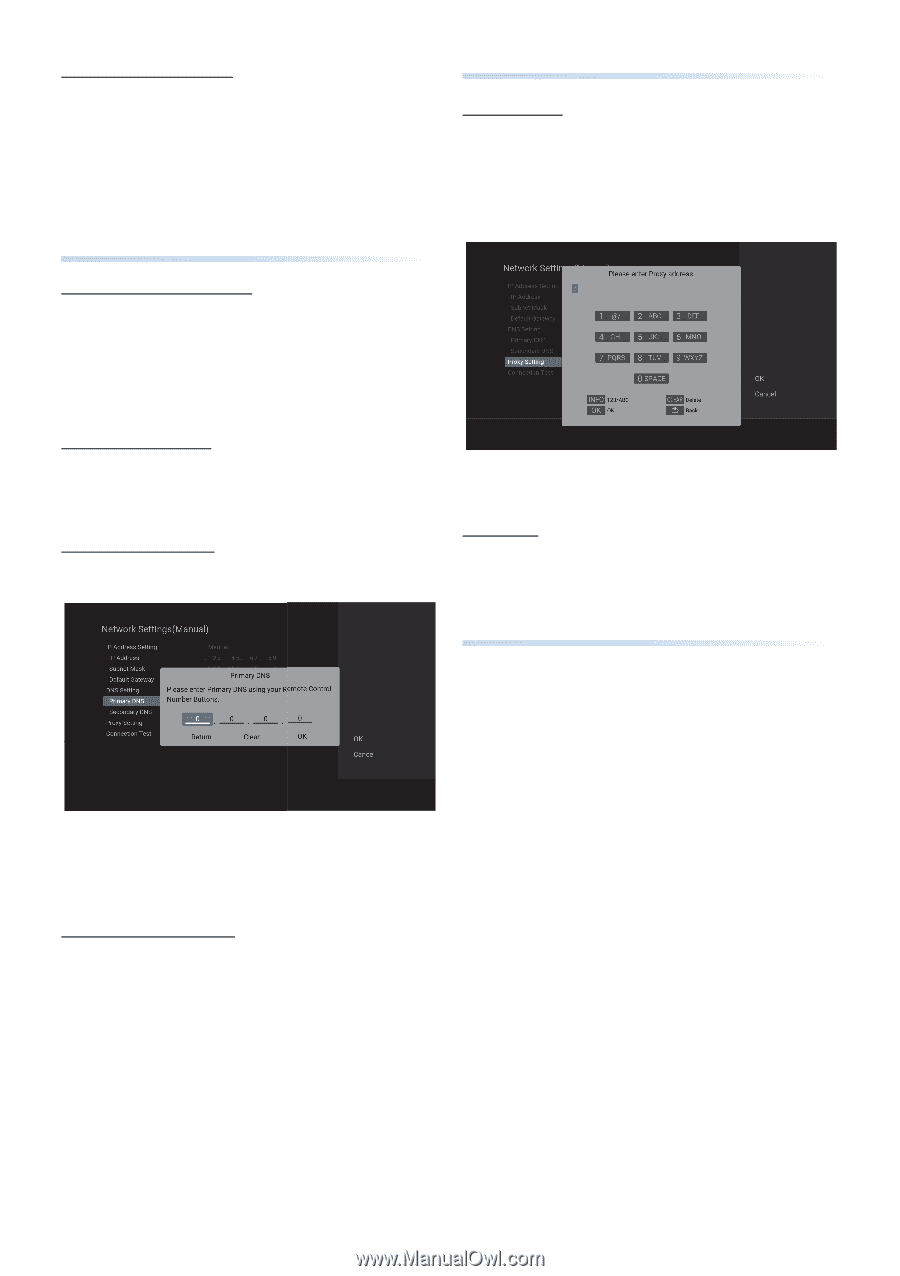
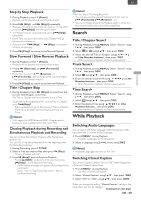
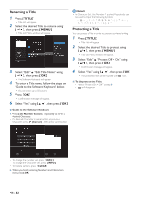
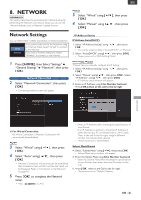
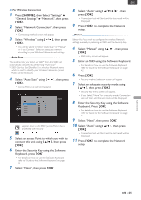
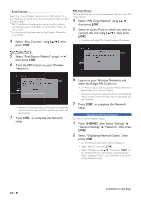
Default Gateway:Manual 7. Select "Default Gateway" using [ K/ L ], then press [ OK ]. • Default gateway Address entry window will appear. 8. Enter the default gateway Address using [ the Number buttons ]. 9. Press [ OK ] when at the Cell to the far right. • Please move on to 'DNS Setting'. DNS Setting DNS Setting : Auto(DHCP) 1. Select "DNS Setting" using [ K/ L ], then press [ OK ]. • You will be asked to Select "Auto(DHCP)" or "Manual". 2. Select "Auto(DHCP)" using [ K/ L ], then press [ OK ]. • Please move on to 'Proxy Setting' if your ISP (Internet Service Provider) requires Proxy Configuration. Otherwise, move on to 'Connection to the Network'. DNS Setting : Manual 1. Select "DNS Setting" using [ K/ L ], then press [ OK ]. 2. Select "Manual" using [ K/ L ], then press [ OK ]. • Please move on to ''. Primary DNS: Manual 3. Select "Primary DNS" using [ K/ L ], then press [ OK ]. • Primary DNS Address entry window will appear. Proxy Setting Proxy Address 1. Select "Proxy Setting" using [ K/ L ], then press [ OK ] 2. Select "Use" using [ K/ L ], then press [ OK ]. • Proxy Address entry Screen will appear. 3. Enter the Proxy Address using the Software Keyboard. • For details on how to use the Software Keyboard, refer to 'Guide to the Software Keyboard' on page 42. 4. Press [ OK ] • Proxy Port Number Input Window will appear. Proxy Port 5. Enter the Proxy Port Number using [ the Number buttons ]. 6. Select "OK" using [ K/ L ], then press [ OK ]. Connection Test 1. Select "Connection Test" using [ K/ L ], then press [ OK ]. • Connection test will Start and the test result will be Displayed. 2. Press [ OK ]. 4. Enter the primary DNS Address using [ the Number buttons ]. 5. Press [ OK ] when at the cell to the far right. • Please move on to 'Secondary DNS : Manual'. Secondary DNS : Manual 6. Select "Secondary DNS" using [ K/ L ], then press [ OK ]. • Secondary DNS Address entry window will appear. 7. Enter the Secondary DNS Address using [ K/ L ] or [ the Number buttons ]. • Enter the Secondary DNS Address after checking the specifications of your Router, then enter the same Numbers in the cells. 8. Press [ OK ] when at the cell to the far right. • Please move on to 'Proxy Setting' if your ISP (Internet Service Provider) requires Proxy Configuration. Otherwise, move on to 'Connection to the Network'. EN - 44 Continued on next page.
-
 1
1 -
2
-
3
-
4
-
5
-
6
-
7
-
8
-
9
-
10
-
11
-
12
-
13
-
14
-
15
-
16
-
17
-
18
-
19
-
20
-
21
-
22
-
23
-
24
-
25
-
26
-
27
-
28
-
29
-
30
-
31
-
32
-
33
-
34
-
35
-
36
-
37
-
38
-
 39
39 -
 40
40 -
 41
41 -
 42
42 -
 43
43 -
 44
44 -
 45
45 -
 46
46 -
 47
47 -
 48
48 -
 49
49 -
50
-
51
-
52
-
53
-
54
-
55
-
56
-
57
-
58
-
59
-
60
-
61
-
62
-
63
-
64
-
65
-
66
-
67
-
68
-
69
-
70
-
71
-
72
-
73
-
74
-
75
-
76
-
77
-
78
-
79
-
80
-
81
-
82
-
83
 |
 |