Netgear RBKE963 User Manual - Page 72
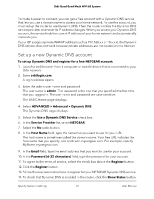
Set up a new Dynamic DNS account, ADVANCED > Advanced > Dynamic DNS
 |
View all Netgear RBKE963 manuals
Add to My Manuals
Save this manual to your list of manuals |
Page 72 highlights
Orbi Quad-Band Mesh WiFi 6E System To make it easier to connect, you can get a free account with a Dynamic DNS service that lets you use a domain name to access your home network. To use this account, you must set up the router to use Dynamic DNS. Then the router notifies the Dynamic DNS service provider whenever its IP address changes. When you access your Dynamic DNS account, the service finds the current IP address of your home network and automatically connects you. If your ISP assigns a private WAN IP address (such as 192.168.x.x or 10.x.x.x), the Dynamic DNS service does not work because private addresses are not routed on the Internet. Set up a new Dynamic DNS account To set up Dynamic DNS and register for a free NETGEAR account: 1. Launch a web browser from a computer or mobile device that is connected to your Orbi network. 2. Enter orbilogin.com. A login window opens. 3. Enter the admin user name and password. The user name is admin. The password is the one that you specified the first time that you logged in. The user name and password are case-sensitive. The BASIC Home page displays. 4. Select ADVANCED > Advanced > Dynamic DNS. The Dynamic DNS page displays. 5. Select the Use a Dynamic DNS Service check box. 6. In the Service Provider list, select NETGEAR. 7. Select the No radio button. 8. In the Host Name field, type the name that you want to use for your URL. The host name is sometimes called the domain name. Your free URL includes the host name that you specify, and ends with mynetgear.com. For example, specify MyName.mynetgear.com. 9. In the Email field, type the email address that you want to use for your account. 10. In the Password (6-32 characters) field, type the password for your account. 11. To agree to the terms of service, select the check box above the Register button. 12. Click the Register button. 13. Follow the onscreen instructions to register for your NETGEAR Dynamic DNS service. 14. To check that Dynamic DNS is enabled in the router, click the Show Status button. Specify Network Settings 72 User Manual
-
 1
1 -
2
-
3
-
4
-
5
-
6
-
7
-
8
-
9
-
10
-
11
-
12
-
13
-
14
-
15
-
16
-
17
-
18
-
19
-
20
-
21
-
22
-
23
-
24
-
25
-
26
-
27
-
28
-
29
-
30
-
31
-
32
-
33
-
34
-
35
-
36
-
37
-
38
-
39
-
40
-
41
-
42
-
43
-
44
-
45
-
46
-
47
-
48
-
49
-
50
-
51
-
52
-
53
-
54
-
55
-
56
-
57
-
58
-
59
-
60
-
61
-
62
-
63
-
64
-
65
-
66
-
 67
67 -
 68
68 -
 69
69 -
 70
70 -
 71
71 -
 72
72 -
 73
73 -
 74
74 -
 75
75 -
 76
76 -
 77
77 -
78
-
79
-
80
-
81
-
82
-
83
-
84
-
85
-
86
-
87
-
88
-
89
-
90
-
91
-
92
-
93
-
94
-
95
-
96
-
97
-
98
-
99
-
100
-
101
-
102
-
103
-
104
-
105
-
106
-
107
-
108
-
109
-
110
-
111
-
112
-
113
-
114
-
115
-
116
-
117
-
118
-
119
-
120
-
121
-
122
-
123
-
124
-
125
-
126
-
127
-
128
-
129
-
130
-
131
-
132
-
133
-
134
-
135
-
136
-
137
-
138
-
139
-
140
-
141
-
142
-
143
-
144
-
145
-
146
-
147
-
148
-
149
-
150
-
151
-
152
-
153
-
154
-
155
-
156
-
157
-
158
-
159
-
160
 |
 |
