Sharp AR M550N Installation Manual - Page 12
Cleaning - scanner
 |
View all Sharp AR M550N manuals
Add to My Manuals
Save this manual to your list of manuals |
Page 12 highlights
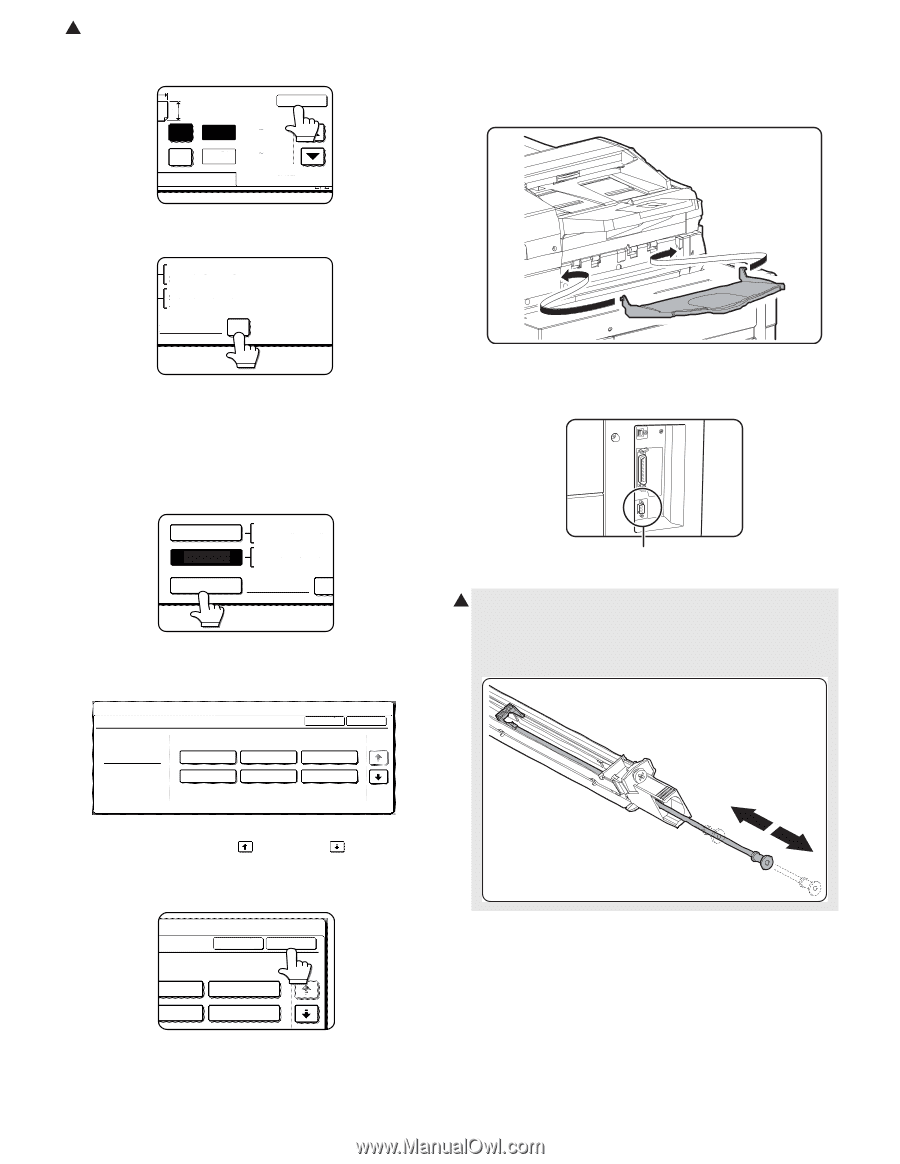
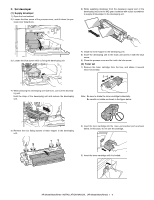
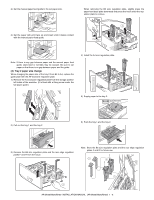
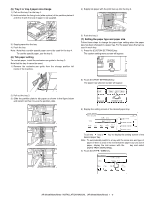
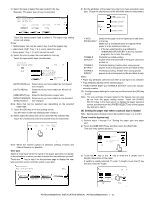
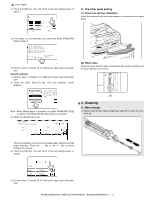
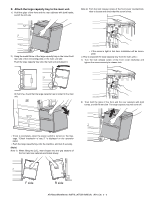
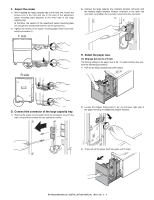
2 : Feb. 9 2004 4) Touch the [OK] key. (You will return to the size setting screen of step 2.) X Y X Y AB OK 17 (5 1/2 17) inch 11 (5 1/2 11 5/8) inch INCH H. The other parts setting (1) Document exit tray installation Install the document exit tray to the scanner unit as shown in the figure below. 5) If the paper is a non-standard size, select the [NON STANDARD SIZE] checkbox. 11X17,81/2X14,81/2X11 81/2X11R,71/4X101/2,51/2X81/2R A3,A4,A4R,A5R,B4,B5 B5R,216x330(81/2x13) X17 Y115/8 NON STANDARD SIZE 6) Perform steps 7 through 10 of "Setting the paper type and paper size". [Inserter (option)] 1) Perform steps 1 through 5 of "Setting the paper type and paper size". 2) Touch the [SIZE SELECT] key. (The size selection screen appears.) (2) Other notes Check to insure that the cable connected to the service terminal (A in the figure below) is 3m or less. AUTO-INCH AUTO-AB SIZE SELECT 11X17,81/2X14,81/2X 81/2X11R,71/4X101/2,5 A3,A4,A4R,A5R,B B5R Note: When tabbed paper is selected, the [NON STANDARD SIZE] checkbox of the [SIZE SELECT] key cannot be selected. 3) Select the desired paper size. CUSTOM SETTINGS INSERTER TYPE/SIZE SETTING TYPE PLAIN 11X17 81/2X11R SIZE 81/2X14 71/4X101/2 TYPE 81/2X11 51/2X81/2R OK 1/2 (A) 2 4. Cleaning A. Main charger 1) Reciprocate the MC cleaner shaft back and forth to clean the electrode tip. There are separate screens for inch-based paper selection and AB paper selection. Touch the key or the key to switch between the screens. 4) Touch the [OK] key. (You will return to the size setting screen of step 2.) SIZE 81/2X14 1/4X101/2 TYPE 81/2X11 51/2X81/2R OK 1/2 5) Perform steps 7 through 10 of "Setting the paper type and paper size". AR-M550/M620/M700 INSTALLATION MANUAL (AR-M550/M620/M700) 1 - 11
-
 1
1 -
2
-
3
-
4
-
5
-
6
-
 7
7 -
 8
8 -
 9
9 -
 10
10 -
 11
11 -
 12
12 -
 13
13 -
 14
14 -
 15
15 -
 16
16 -
 17
17 -
18
-
19
-
20
-
21
-
22
-
23
-
24
-
25
-
26
-
27
-
28
-
29
-
30
-
31
-
32
-
33
-
34
-
35
-
36
-
37
-
38
-
39
-
40
-
41
-
42
-
43
-
44
-
45
-
46
-
47
-
48
-
49
-
50
-
51
-
52
-
53
-
54
-
55
-
56
-
57
-
58
-
59
-
60
 |
 |