Sharp AR M550N Installation Manual - Page 34
AR-F15/F16
 |
View all Sharp AR M550N manuals
Add to My Manuals
Save this manual to your list of manuals |
Page 34 highlights
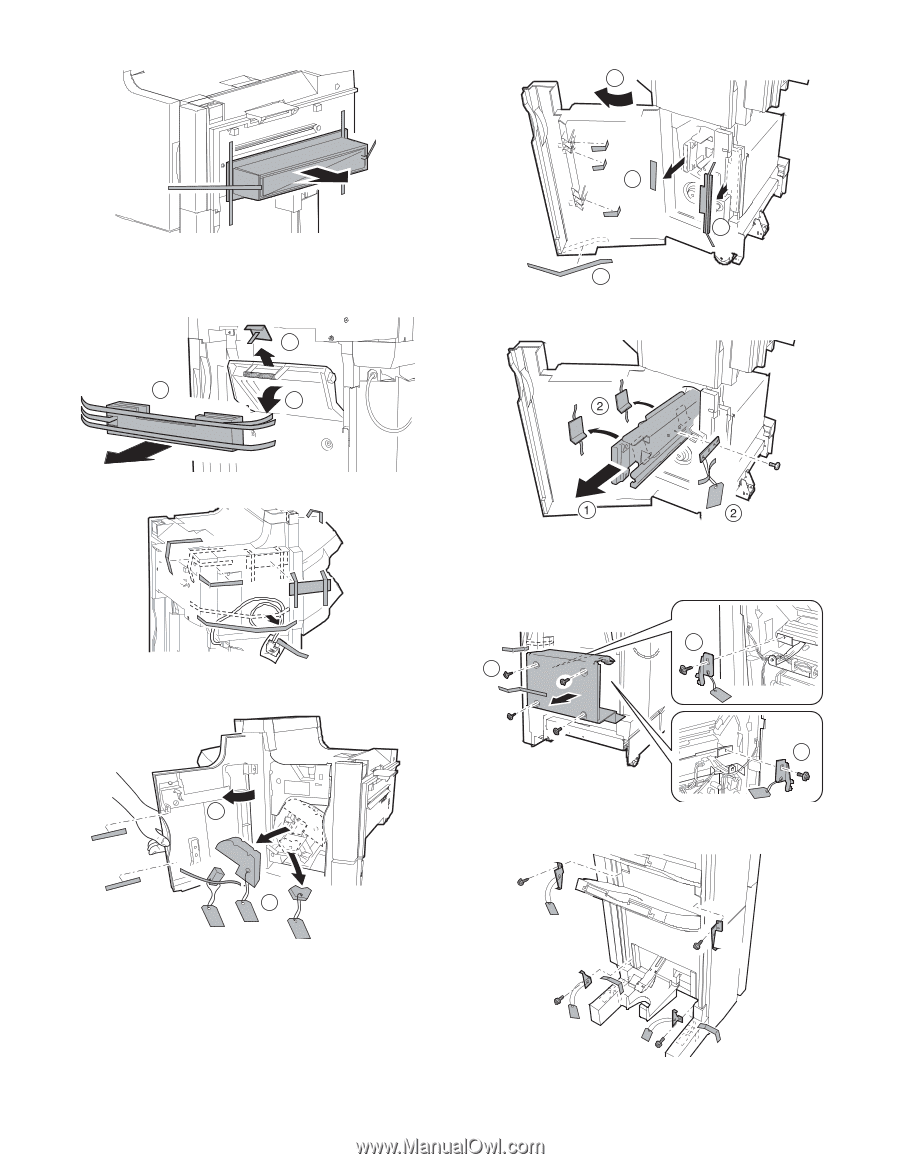
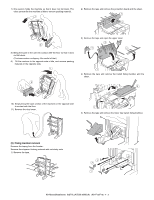
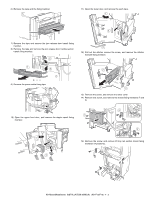
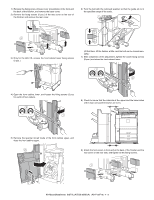
6) Remove the tape and the fixing member. 11) Open the lower door, and remove the each tape. 1 7) Remove the tape and remove the jam release door transit fixing member. 8) Remove the tape and remove the jam release door handle section transit fixing member. 3 1 2 2 2 2 12) Pull out the stitcher remove the screw, and remove the stitcher transmit fixing member. 9) Remove the power cable fixing tape. 13) Remove the screw, and remove the lower cover. 14) Remove the screw, and remove the transit fixing members F and R. 1 10) Open the upper front door, and remove the staple transit fixing member. 2 2 1 15) Remove the screw, and remove lift tray rail section transit fixing members (4 positions). 2 AR-M550/M620/M700 INSTALLATION MANUAL (AR-F15/F16) 4 - 3
-
 1
1 -
2
-
3
-
4
-
5
-
6
-
7
-
8
-
9
-
10
-
11
-
12
-
13
-
14
-
15
-
16
-
17
-
18
-
19
-
20
-
21
-
22
-
23
-
24
-
25
-
26
-
27
-
28
-
 29
29 -
 30
30 -
 31
31 -
 32
32 -
 33
33 -
 34
34 -
 35
35 -
 36
36 -
 37
37 -
 38
38 -
 39
39 -
40
-
41
-
42
-
43
-
44
-
45
-
46
-
47
-
48
-
49
-
50
-
51
-
52
-
53
-
54
-
55
-
56
-
57
-
58
-
59
-
60
 |
 |