Sharp AR M550N Installation Manual - Page 27
Install the connection plate. Use the packaged parts of, the finisher., Connect the connector,
 |
View all Sharp AR M550N manuals
Add to My Manuals
Save this manual to your list of manuals |
Page 27 highlights
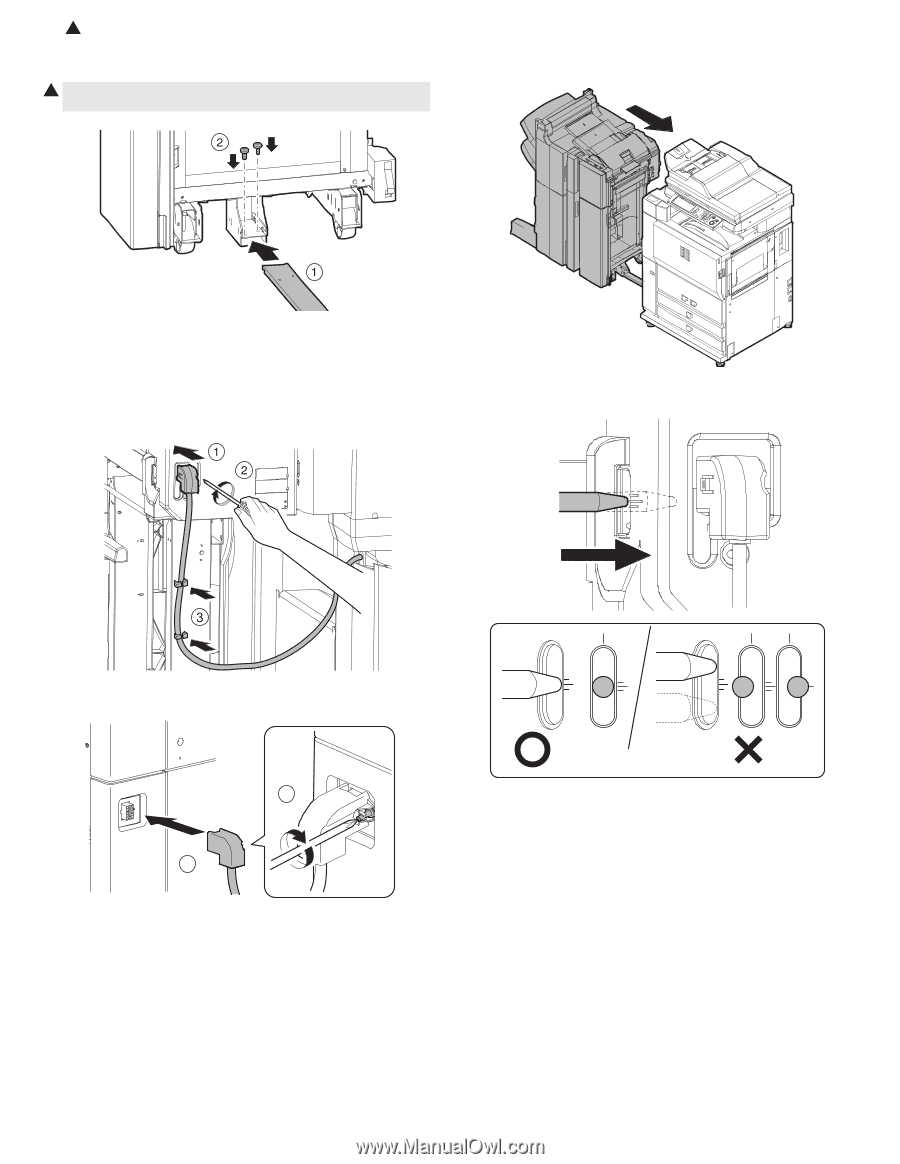
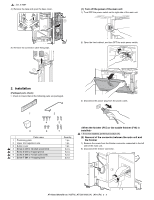
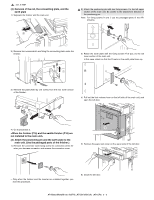
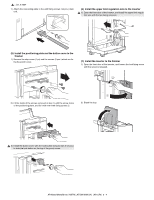
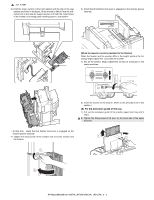
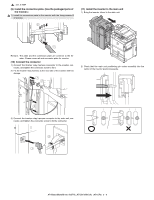
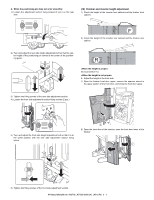
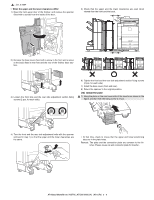
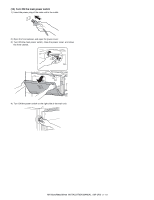
1 : Jan. 9 2004 (9) Install the connection plate. (Use the packaged parts of the finisher.) 1 1) Install the connection plate to the inserter with the fixing screws G (2 pieces.). (11) Install the inserter to the main unit 1) Bring the inserter closer to the main unit. Remark: The plate and the connection plate are common to the finisher. Please reuse rail and connector plate for inserter. (10) Connect the connector 1) Connect the finisher relay harness connector to the inserter connector, and tighten the connector screw to fix it. 2) Fix the finisher relay harness to the rear side of the inserter with two clamps. 2) Check that the main unit positioning pin enters smoothly into the center of the inserter positioning guide. 3) Connect the inserter relay harness connector to the main unit connector, and tighten the connector screw to fix the connector. 2 1 AR-M550/M620/M700 INSTALLATION MANUAL (AR-CF2) 3 - 6
-
 1
1 -
2
-
3
-
4
-
5
-
6
-
7
-
8
-
9
-
10
-
11
-
12
-
13
-
14
-
15
-
16
-
17
-
18
-
19
-
20
-
21
-
 22
22 -
 23
23 -
 24
24 -
 25
25 -
 26
26 -
 27
27 -
 28
28 -
 29
29 -
 30
30 -
 31
31 -
 32
32 -
33
-
34
-
35
-
36
-
37
-
38
-
39
-
40
-
41
-
42
-
43
-
44
-
45
-
46
-
47
-
48
-
49
-
50
-
51
-
52
-
53
-
54
-
55
-
56
-
57
-
58
-
59
-
60
 |
 |