Sharp AR M550N Installation Manual - Page 7
Set developer - toner cartridge
 |
View all Sharp AR M550N manuals
Add to My Manuals
Save this manual to your list of manuals |
Page 7 highlights
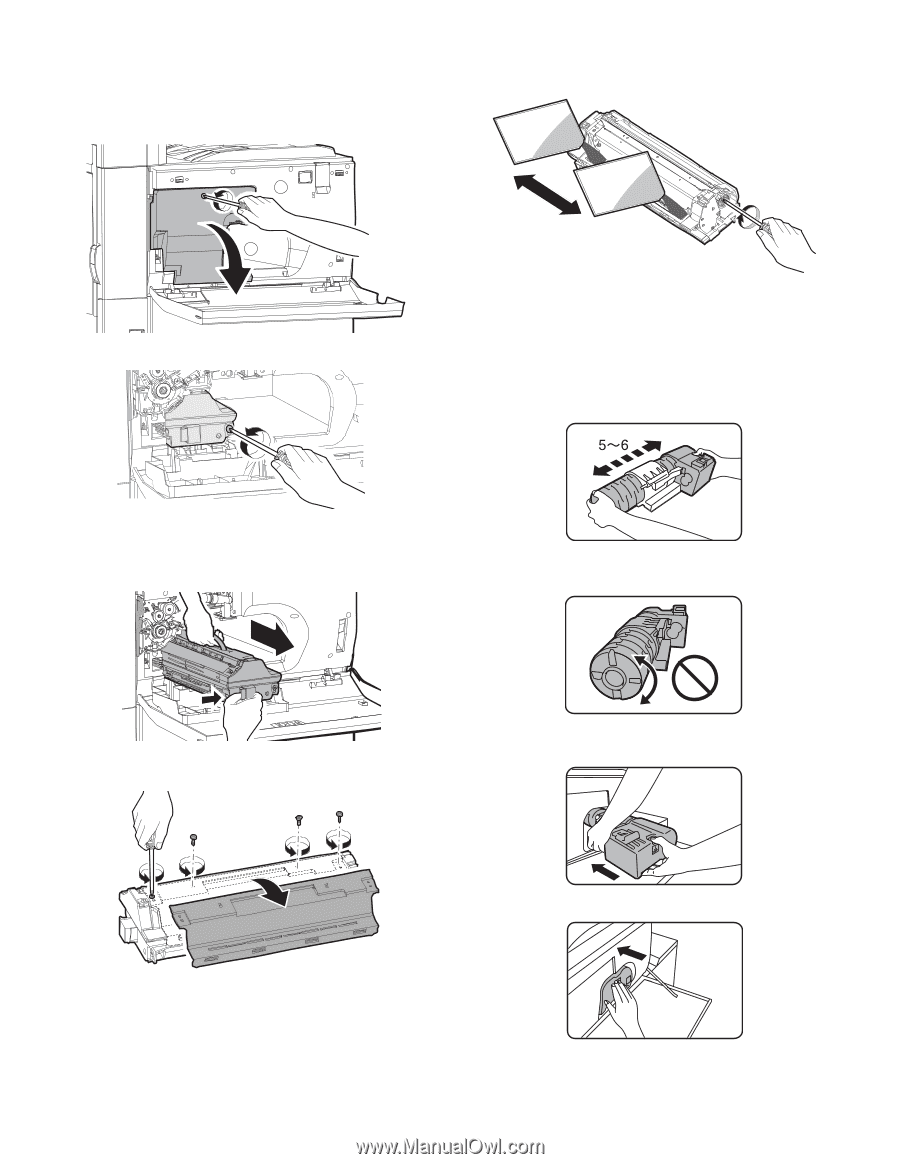
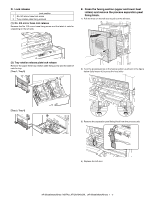
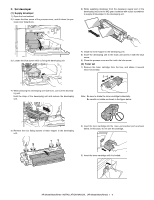
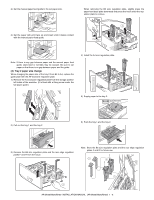
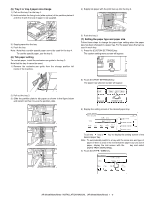
F. Set developer (1) Supply developer 1) Open the front cabinet. 2) Loosen the blue screw of the process cover, and tilt down the pro- cess cover toward you. 6) While supplying developer from the developer supply port of the developing unit, turn the MG gear clockwise with a plus screwdriver to supply all developer to the developing unit. 1 2 3) Loosen the blue screw which is fixing the developing unit. 7) Install the toner hopper to the developing unit. 8) Insert the developing unit to the main unit and fix it with the blue screw. 9) Close the process cover and fix it with the blue screw. (2) Toner set 1) Remove the toner cartridge from the box, and shake it several times horizontally. 4) While pressing the developing unit lock lever, pull out the developing unit. Hold the strap of the developing unit and remove the developing unit. Note: Be sure to shake the toner cartridge horizontally. Be careful not rotate as shown in the figure below. 5) Remove the four fixing screws of toner hopper in the developing unit. 2) Insert the toner cartridge into the main unit insertion port as shown below. In this case, do not turn the cartridge. 3) Insert the toner cartridge until it is locked. AR-M550/M620/M700 INSTALLATION MANUAL (AR-M550/M620/M700) 1 - 6
-
 1
1 -
 2
2 -
 3
3 -
 4
4 -
 5
5 -
 6
6 -
 7
7 -
 8
8 -
 9
9 -
 10
10 -
 11
11 -
 12
12 -
13
-
14
-
15
-
16
-
17
-
18
-
19
-
20
-
21
-
22
-
23
-
24
-
25
-
26
-
27
-
28
-
29
-
30
-
31
-
32
-
33
-
34
-
35
-
36
-
37
-
38
-
39
-
40
-
41
-
42
-
43
-
44
-
45
-
46
-
47
-
48
-
49
-
50
-
51
-
52
-
53
-
54
-
55
-
56
-
57
-
58
-
59
-
60
 |
 |