Sharp AR M550N Installation Manual - Page 44
Enable the printer expansion function. - driver
 |
View all Sharp AR M550N manuals
Add to My Manuals
Save this manual to your list of manuals |
Page 44 highlights
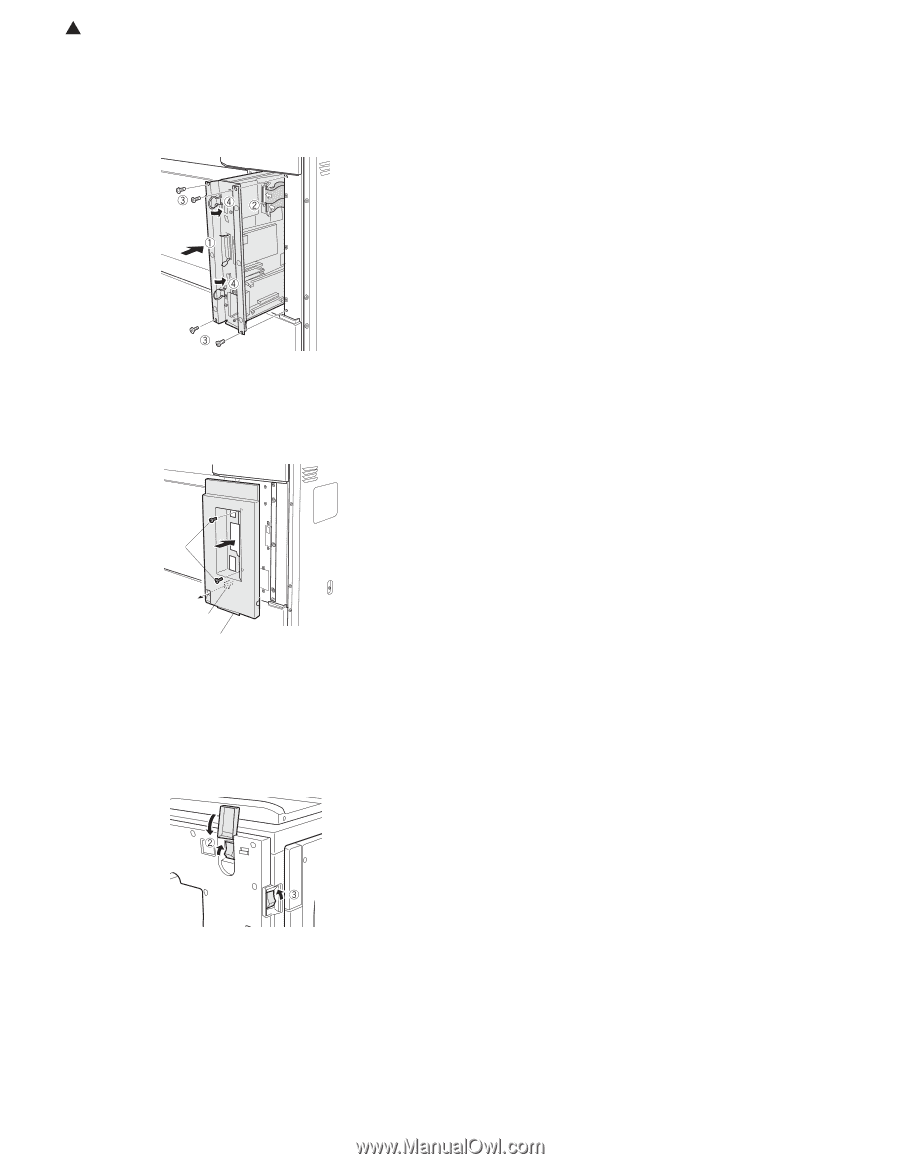
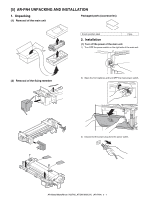
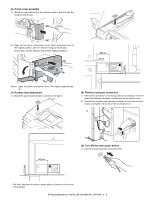
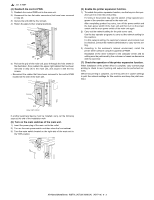
1 : Jan. 9 2004 (4) Reattach the control PWB. 1) Reattach the control PWB unit to the main unit. 2) Reconnect the two flat cable connectors that have been removed in step (2). 3) Secure the unit with the four screws. 4) Return the grips to their original positions. 5) Pull out the grip of the main unit, pass it through the hole shown in the illustration, then reattach the upper right cabinet that has been removed in step (2) to the main unit, and secure it with the two screws. ∗ Reconnect the cables that have been removed to the control PWB located on the side of the main unit. (6) Enable the printer expansion function. 1) To enable the printer expansion function, use the keys on the operation panel to enter the product key. For entry of the product key, see the section of key operator programs of the operation manual for the main unit. After completing product key entry, turn off the power switch and the main power switch of the main unit and then turn on the power switch and the main power switch of the main unit again. 2) Carry out the network setting for the print server card. Use the key operator programs to carry out the network setting for this machine. For this network setting, the customer's network environment must be checked. Consult the network administrator to carry out the setting. 3) According to the customer's network environment, install the printer driver software using the supplied CD-ROM. Installation of the driver software to the computer server and its setting must be performed by the customer or based on discussion with the customer. (7) Check the operation of the printer expansion function. When installation of the printer driver is complete, carry out test page printing to check to see if printing and output can be performed normally. (When test printing is complete, use the list print of in custom settings to print the network settings for this machine and keep the print carefully.) Screws Grip Upper right cabinet If another peripheral device must be installed, carry out the following steps at the end of the installation work. (5) Turn on the main switches of the main unit. 1) Insert the power plug of the main unit to the outlet. 2) Turn on the main power switch and then close the front cabinet. 3) Turn the main switch located on the right side of the main unit to the "ON" position. AR-M550/M620/M700 INSTALLATION MANUAL (AR-P19) 6 - 2
-
 1
1 -
2
-
3
-
4
-
5
-
6
-
7
-
8
-
9
-
10
-
11
-
12
-
13
-
14
-
15
-
16
-
17
-
18
-
19
-
20
-
21
-
22
-
23
-
24
-
25
-
26
-
27
-
28
-
29
-
30
-
31
-
32
-
33
-
34
-
35
-
36
-
37
-
38
-
 39
39 -
 40
40 -
 41
41 -
 42
42 -
 43
43 -
 44
44 -
 45
45 -
 46
46 -
 47
47 -
 48
48 -
 49
49 -
50
-
51
-
52
-
53
-
54
-
55
-
56
-
57
-
58
-
59
-
60
 |
 |