Sharp AR M550N Installation Manual - Page 28
Finisher and inserter height adjustment
 |
View all Sharp AR M550N manuals
Add to My Manuals
Save this manual to your list of manuals |
Page 28 highlights
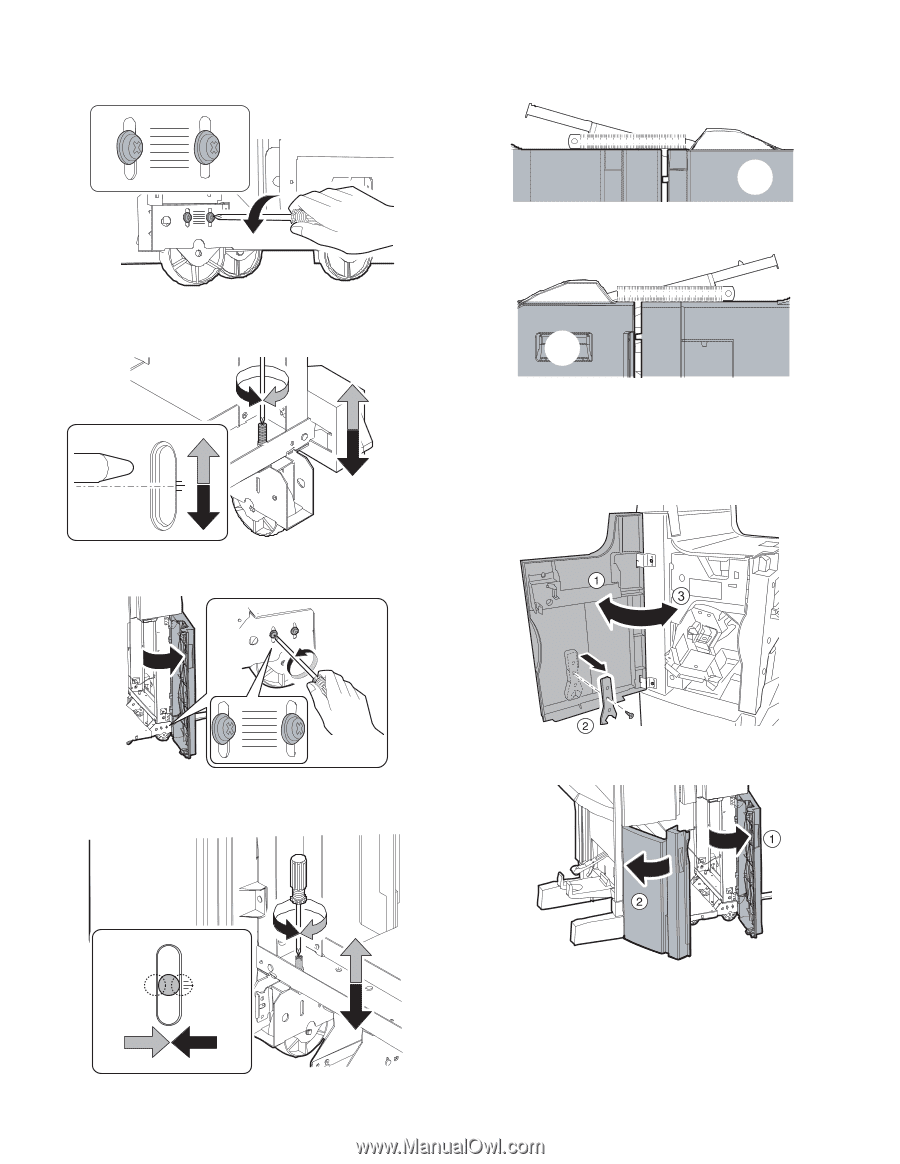
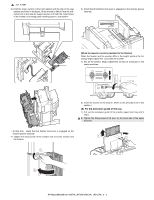
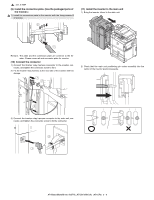
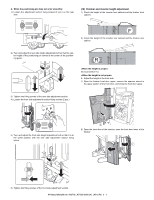
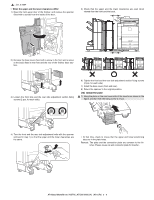
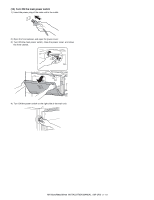
A. When the positioning pin does not enter smoothly: 1) Loosen the adjustment section fixing screws (2 pcs.) on the rear side. (12) Finisher and inserter height adjustment 1) Check the height of the inserter front cabinet and the finisher front cabinet. F 2) Check the height of the inserter rear cabinet and the finisher rear cabinet. 2) Turn and adjust the rear side height adjustment bolt so that the center height of the positioning pin comes at the center of the positioning guide. R Go to procedure 13. A. Adjust the height of the front side. 1) Open the finisher front door upper, remove the spanner stored in the upper section of the front door, and close the front door upper. 3) Tighten two fixing screws of the rear side adjustment section. 4) Loosen the front side adjustment section fixing screws (2 pcs.) 5) Turn and adjust the front side height adjustment bolt so that it is at the same position with the rear side adjustment section fixing screw. 2) Open the front door of the inserter, open the front door lower of the finisher 6) Tighten two fixing screws of the front side adjustment section. AR-M550/M620/M700 INSTALLATION MANUAL (AR-CF2) 3 - 7
-
 1
1 -
2
-
3
-
4
-
5
-
6
-
7
-
8
-
9
-
10
-
11
-
12
-
13
-
14
-
15
-
16
-
17
-
18
-
19
-
20
-
21
-
22
-
 23
23 -
 24
24 -
 25
25 -
 26
26 -
 27
27 -
 28
28 -
 29
29 -
 30
30 -
 31
31 -
 32
32 -
 33
33 -
34
-
35
-
36
-
37
-
38
-
39
-
40
-
41
-
42
-
43
-
44
-
45
-
46
-
47
-
48
-
49
-
50
-
51
-
52
-
53
-
54
-
55
-
56
-
57
-
58
-
59
-
60
 |
 |