Sharp AR M550N Installation Manual - Page 40
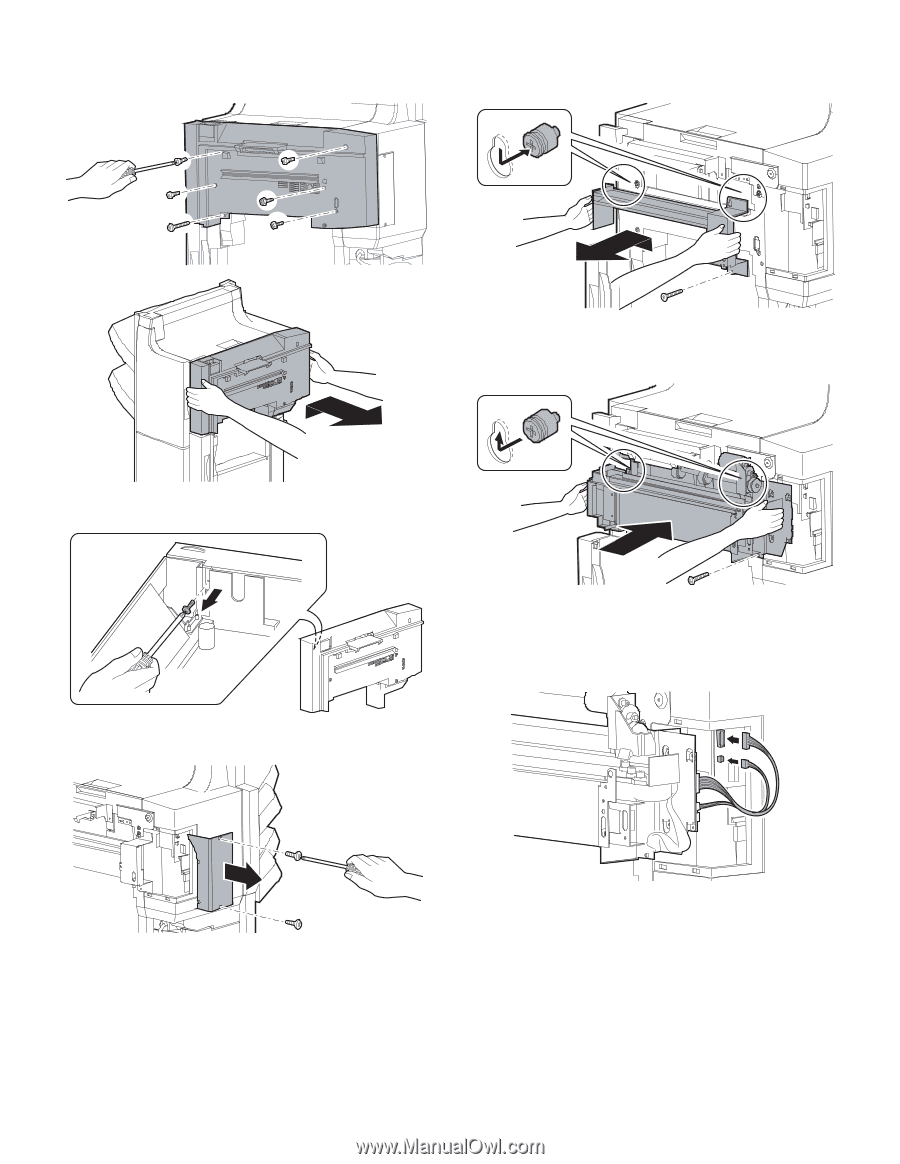
Punch cover disassembly, Paper guide disassembly, Punch unit assembly, Connector connection
 |
View all Sharp AR M550N manuals
Add to My Manuals
Save this manual to your list of manuals |
Page 40 highlights
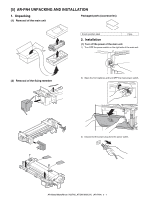
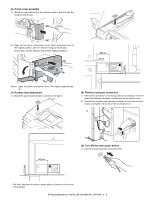
(2) Punch cover disassembly 1) Remove the punch cover fixing screws (6 pcs.), and lift the punch cover slightly to remove it from the finisher. (3) Paper guide disassembly 1) Remove the paper guide fixing screw (1 pc.) and remove the paper guide from the finisher. (4) Punch unit assembly 1) Hang the punch unit on the step screws (2 pcs.) of the finisher and assemble it. 2) Remove the fixing screw (1 pc.) of the punch cover front door from inside of the punch cover. 2) Fix the punch unit with the paper guide fixing screw (1 pc.) which was removed in step (3). (5) Connector connection 1) Connect the punch joint harness connectors (2 pcs.) of the punch unit to the connectors (2 positions) of the finisher PWB. 3) Remove the cabinet B fixing screws (2 pcs.) on the rear side of the finisher, and remove the rear cabinet B. AR-M550/M620/M700 INSTALLATION MANUAL (AR-PN4) 5 - 2
-
 1
1 -
2
-
3
-
4
-
5
-
6
-
7
-
8
-
9
-
10
-
11
-
12
-
13
-
14
-
15
-
16
-
17
-
18
-
19
-
20
-
21
-
22
-
23
-
24
-
25
-
26
-
27
-
28
-
29
-
30
-
31
-
32
-
33
-
34
-
 35
35 -
 36
36 -
 37
37 -
 38
38 -
 39
39 -
 40
40 -
 41
41 -
 42
42 -
 43
43 -
 44
44 -
 45
45 -
46
-
47
-
48
-
49
-
50
-
51
-
52
-
53
-
54
-
55
-
56
-
57
-
58
-
59
-
60
 |
 |