Sony HVR Z1U Operating Instructions - Page 21
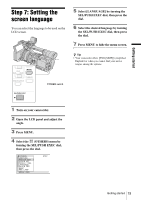
Recording, To turn the power off, To record from a low-angle, Indicators displayed during recording - hdv used
 |
UPC - 027242668799
View all Sony HVR Z1U manuals
Add to My Manuals
Save this manual to your list of manuals |
Page 21 highlights
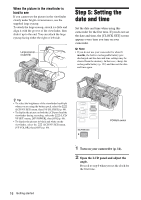
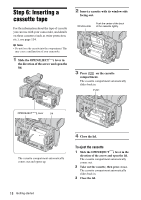
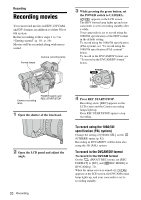
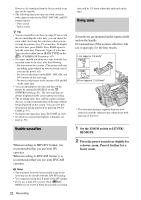
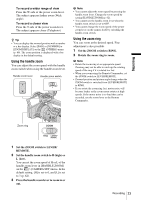
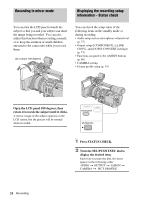
To record in the DV format On the (IN/OUT REC) menu, set [REC FORMAT] to [DV], and [ REC MODE] to [DV SP] (p. 71). When the menu screen is turned off, appears on the LCD screen, the DVCAM format lamp lights up, and your camcorder is set to recording standby. To turn the power off Set the POWER switch to OFF. To record from a low-angle Use the REC START/STOP button on the handle after releasing the HOLD lever. To view the picture during recording, face the LCD panel or the viewfinder upward, or face the LCD screen down, then close and restore the LCD panel to the original position with the LCD screen facing out. HOLD lever Indicators displayed during recording The indicators will not be recorded on the tape. The camera settings data (p. 51) will not be displayed during recording. 6 0min HDV1080i ND 1 REC 0 0 : 0 0 : 0 0 : 0 0 6 0min CH1 CH2 A Recording format (HDV1080i, DVCAM, or DV SP) B Remaining battery The indicated time may not be correct, depending on the environment where you are using your camcorder. When you open or close the LCD panel, it takes about 1 minute to display the correct remaining battery time. C 50i/60i system indicator (p. 82) D Recording status ([STBY] (standby) or [REC] (recording)) E Time code or user bits The time code of this camcorder can be preset. You can reset or preset the time code even during recording (p. 101). F Recording capacity of the tape (p. 80) G Microphone volume level (p. 37) H ND filter If [ND1] or [ND2] flashes on the screen, activate the ND filter (p. 30). b Note • Before changing the battery pack, set the POWER switch to OFF. • When the camcorder is left in recording standby for more than about 3 minutes, your camcorder exits the recording standby mode (the drum stops rotating) to prevent tape wear and battery loss. Since the power does not turn off, you can restart recording by pressing REC START/STOP again. It takes some time to restart recording, but this not a malfunction. When recording in the HDV format, you can shorten the time until recording starts by setting [QUICK REC] on the (OTHERS) menu to [ON] (p. 78). ,continued Recording 21 Recording
-
 1
1 -
2
-
3
-
4
-
5
-
6
-
7
-
8
-
9
-
10
-
11
-
12
-
13
-
14
-
15
-
 16
16 -
 17
17 -
 18
18 -
 19
19 -
 20
20 -
 21
21 -
 22
22 -
 23
23 -
 24
24 -
 25
25 -
 26
26 -
27
-
28
-
29
-
30
-
31
-
32
-
33
-
34
-
35
-
36
-
37
-
38
-
39
-
40
-
41
-
42
-
43
-
44
-
45
-
46
-
47
-
48
-
49
-
50
-
51
-
52
-
53
-
54
-
55
-
56
-
57
-
58
-
59
-
60
-
61
-
62
-
63
-
64
-
65
-
66
-
67
-
68
-
69
-
70
-
71
-
72
-
73
-
74
-
75
-
76
-
77
-
78
-
79
-
80
-
81
-
82
-
83
-
84
-
85
-
86
-
87
-
88
-
89
-
90
-
91
-
92
-
93
-
94
-
95
-
96
-
97
-
98
-
99
-
100
-
101
-
102
-
103
-
104
-
105
-
106
-
107
-
108
-
109
-
110
-
111
-
112
-
113
-
114
-
115
-
116
-
117
-
118
-
119
-
120
-
121
-
122
-
123
-
124
-
125
-
126
-
127
-
128
-
129
-
130
-
131
-
132
-
133
-
134
-
135
-
136
 |
 |
