Sony HVR Z1U Operating Instructions - Page 86
Assigning the functions
 |
UPC - 027242668799
View all Sony HVR Z1U manuals
Add to My Manuals
Save this manual to your list of manuals |
Page 86 highlights
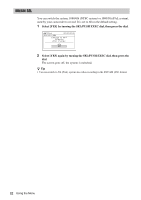
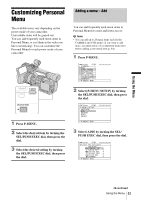
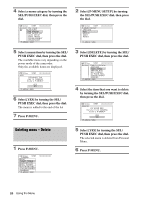
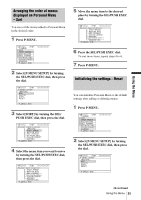
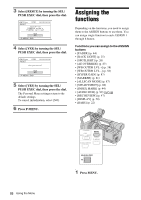
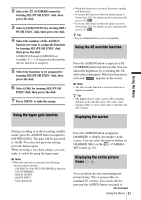
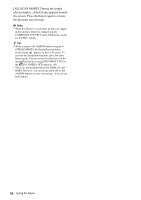
3 Select [RESET] by turning the SEL/ PUSH EXEC dial, then press the dial. 1 2 0min STBY 0 0 : 0 0 : 0 0 : 0 0 RESET I n i t i a l i ze CAMERA m o d e ' s P-MENU s e t t i n g ? YES NO [ P-MENU ] : END 4 Select [YES] by turning the SEL/ PUSH EXEC dial, then press the dial. 120min RESET STBY 0 0 : 0 0 : 0 0 : 0 0 Are you su r e? YES NO [ P-MENU ] : END 5 Select [YES] by turning the SEL/ PUSH EXEC dial, then press the dial. The Personal Menu settings return to the default settings. To cancel initialization, select [NO]. 6 Press P-MENU. Assigning the functions Depending on the functions, you need to assign them to the ASSIGN buttons to use them. You can assign single function to each ASSIGN 1 through 6 button. Functions you can assign to the ASSIGN buttons • [FADER] (p. 44) • [BACK LIGHT] (p. 25) • [SPOTLIGHT] (p. 26) • [AE OVERRIDE] (p. 87) • [WB OUTDR LVL +] (p. 58) • [WB OUTDR LVL -] (p. 58) • [HYPER GAIN] (p. 87) • [MARKER] (p. 61) • [ALLSCAN MODE] (p. 87) • [STEADYSHOT] (p. 60) • [INDEX MARK] (p. 44) • [AUDIO DUB] (p. 99) • [REC REVIEW] (p. 47) • [DISPLAY] (p. 50) • [BARS] (p. 22) 86 Using the Menu 1 Press MENU.
-
 1
1 -
2
-
3
-
4
-
5
-
6
-
7
-
8
-
9
-
10
-
11
-
12
-
13
-
14
-
15
-
16
-
17
-
18
-
19
-
20
-
21
-
22
-
23
-
24
-
25
-
26
-
27
-
28
-
29
-
30
-
31
-
32
-
33
-
34
-
35
-
36
-
37
-
38
-
39
-
40
-
41
-
42
-
43
-
44
-
45
-
46
-
47
-
48
-
49
-
50
-
51
-
52
-
53
-
54
-
55
-
56
-
57
-
58
-
59
-
60
-
61
-
62
-
63
-
64
-
65
-
66
-
67
-
68
-
69
-
70
-
71
-
72
-
73
-
74
-
75
-
76
-
77
-
78
-
79
-
80
-
 81
81 -
 82
82 -
 83
83 -
 84
84 -
 85
85 -
 86
86 -
 87
87 -
 88
88 -
 89
89 -
 90
90 -
 91
91 -
92
-
93
-
94
-
95
-
96
-
97
-
98
-
99
-
100
-
101
-
102
-
103
-
104
-
105
-
106
-
107
-
108
-
109
-
110
-
111
-
112
-
113
-
114
-
115
-
116
-
117
-
118
-
119
-
120
-
121
-
122
-
123
-
124
-
125
-
126
-
127
-
128
-
129
-
130
-
131
-
132
-
133
-
134
-
135
-
136
 |
 |
