Sony HVR Z1U Operating Instructions - Page 30
Adjusting the shutter speed, Adjusting the volume of light - ND FILTER, ND FILTER
 |
UPC - 027242668799
View all Sony HVR Z1U manuals
Add to My Manuals
Save this manual to your list of manuals |
Page 30 highlights
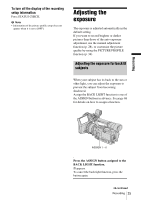
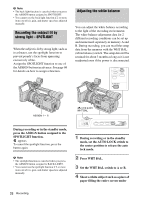
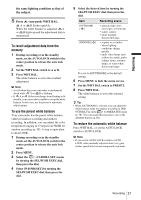
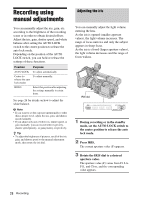
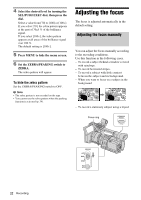
Adjusting the shutter speed You can manually adjust and fix the shutter speed for your convenience. Depending on the shutter speed, you can make the subject look still, or on the contrary, emphasize the fluidity of movement. number that appears on the screen, the slower the shutter speed. To restore automatic adjustment Press SHUTTER SPEED, or set the AUTO LOCK switch to AUTO LOCK. b Note • If you set the AUTO LOCK switch to AUTO LOCK, other manually adjusted items (iris, gain, white balance) also become temporarily automatic. z Tip • It is difficult to focus automatically at a lower shutter speed. Manual focusing with your camcorder attached to a tripod is recommended. • The picture may flicker or change colors under fluorescent lamps, sodium lamps, or mercury lamps. Adjusting the volume of light - ND FILTER 1 During recording or in the standby mode, set the AUTO LOCK switch to the center position to release the auto lock mode. 2 Press SHUTTER SPEED. 3 Adjust the shutter speed by turning the SEL/PUSH EXEC dial. When 60i is selected in [50i/60i SEL] on the (OTHERS) menu, you can select a shutter speed between 1/4 second and 1/ 10000 second. When 50i is selected in [50i/60i SEL], you can select a shutter speed between 1/3 second and 1/10000 second. The selected shutter speed appears on the screen. For example, if you select 1/100 second, [100] appears. The larger the number that appears on the screen, the faster the shutter speed. The smaller the You can record the subject clearly by using the ND filter when the recording environment is too bright. There are 2 levels of ND filter setting. ND filter 1 reduces the volume of light to about 1/6, and ND filter 2 to about 1/32. If [ND1] or [ND2] flashes in the standby mode, set the ND FILTER switch to the respective position. 30 Recording
-
 1
1 -
2
-
3
-
4
-
5
-
6
-
7
-
8
-
9
-
10
-
11
-
12
-
13
-
14
-
15
-
16
-
17
-
18
-
19
-
20
-
21
-
22
-
23
-
24
-
 25
25 -
 26
26 -
 27
27 -
 28
28 -
 29
29 -
 30
30 -
 31
31 -
 32
32 -
 33
33 -
 34
34 -
 35
35 -
36
-
37
-
38
-
39
-
40
-
41
-
42
-
43
-
44
-
45
-
46
-
47
-
48
-
49
-
50
-
51
-
52
-
53
-
54
-
55
-
56
-
57
-
58
-
59
-
60
-
61
-
62
-
63
-
64
-
65
-
66
-
67
-
68
-
69
-
70
-
71
-
72
-
73
-
74
-
75
-
76
-
77
-
78
-
79
-
80
-
81
-
82
-
83
-
84
-
85
-
86
-
87
-
88
-
89
-
90
-
91
-
92
-
93
-
94
-
95
-
96
-
97
-
98
-
99
-
100
-
101
-
102
-
103
-
104
-
105
-
106
-
107
-
108
-
109
-
110
-
111
-
112
-
113
-
114
-
115
-
116
-
117
-
118
-
119
-
120
-
121
-
122
-
123
-
124
-
125
-
126
-
127
-
128
-
129
-
130
-
131
-
132
-
133
-
134
-
135
-
136
 |
 |
