Sony HVR Z1U Operating Instructions - Page 71
REC FORMAT, REC MODE, format lamp of the selected format will light up during recording.
 |
UPC - 027242668799
View all Sony HVR Z1U manuals
Add to My Manuals
Save this manual to your list of manuals |
Page 71 highlights
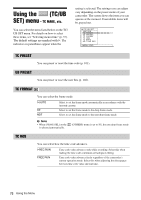
- at [HDV], an HDV signal is converted to an audio-unlocked DV signal; a DV signal is not output. - at [DV], a DV signal is output as it is; an HDV signal is not output. • An HDV signal cannot be converted to a DVCAM signal. REC FORMAT Selects a recording format when the POWER switch is set at CAMERA. The format lamp of the selected format will light up during recording. GHDV1080i ( ) DV ( Select to record using the HDV1080i specification. Select to record in the DVCAM/DV format. In addition, you need to ) set [ REC MODE] below. z Tip • When you output the picture during recording simultaneously to a connected device using an i.LINK cable, also set [i.LINK CONV] accordingly (p. 73). REC MODE This setting is valid only when [REC FORMAT] is set to [DV]. GDVCAM ( ) DV SP ( Select to record in the DVCAM format on the tape. ) Select to record in the SP mode of the DV format when you want to record for a long time on the tape. b Note • You cannot add sound on a tape recorded in the DV SP mode. • If you record in the DV SP mode, a mosaic-like disturbance of picture may appear or sound may be interrupted when you play back the tape on other camcorders or VCRs. • When you mix recordings in the DVCAM mode and in the DV SP mode on one tape, the playback picture may be distorted or the time code may not be continued properly between the scenes. Using the Menu ,continued Using the Menu 71
-
 1
1 -
2
-
3
-
4
-
5
-
6
-
7
-
8
-
9
-
10
-
11
-
12
-
13
-
14
-
15
-
16
-
17
-
18
-
19
-
20
-
21
-
22
-
23
-
24
-
25
-
26
-
27
-
28
-
29
-
30
-
31
-
32
-
33
-
34
-
35
-
36
-
37
-
38
-
39
-
40
-
41
-
42
-
43
-
44
-
45
-
46
-
47
-
48
-
49
-
50
-
51
-
52
-
53
-
54
-
55
-
56
-
57
-
58
-
59
-
60
-
61
-
62
-
63
-
64
-
65
-
 66
66 -
 67
67 -
 68
68 -
 69
69 -
 70
70 -
 71
71 -
 72
72 -
 73
73 -
 74
74 -
 75
75 -
 76
76 -
77
-
78
-
79
-
80
-
81
-
82
-
83
-
84
-
85
-
86
-
87
-
88
-
89
-
90
-
91
-
92
-
93
-
94
-
95
-
96
-
97
-
98
-
99
-
100
-
101
-
102
-
103
-
104
-
105
-
106
-
107
-
108
-
109
-
110
-
111
-
112
-
113
-
114
-
115
-
116
-
117
-
118
-
119
-
120
-
121
-
122
-
123
-
124
-
125
-
126
-
127
-
128
-
129
-
130
-
131
-
132
-
133
-
134
-
135
-
136
 |
 |
