TP-Link TL-WA7210N User Guide - Page 135
Reboot, 17.7 Password
 |
View all TP-Link TL-WA7210N manuals
Add to My Manuals
Save this manual to your list of manuals |
Page 135 highlights
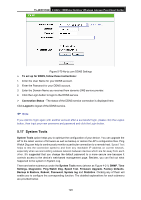
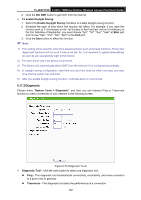
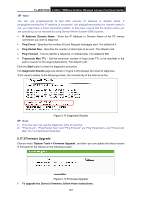
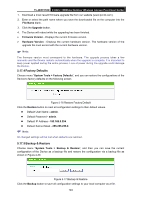
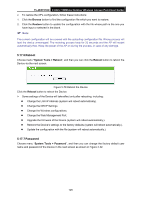
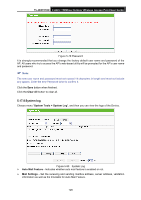
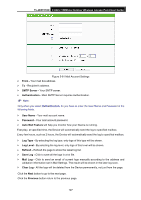
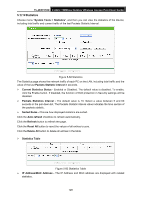
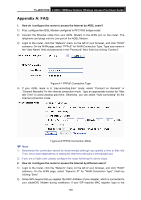
TL-WA7210N 2.4GHz 150Mbps Outdoor Wireless Access Point User Guide To restore the AP's configuration, follow these instructions: 1. Click the Browse button to find the configuration file which you want to restore. 2. Click the Restore button to update the configuration with the file whose path is the one you have input or selected in the blank. Note: The current configuration will be covered with the uploading configuration file. Wrong process will lead the device unmanaged. The restoring process lasts for 20 seconds and the AP will restart automatically then. Keep the power of the AP on during the process, in case of any damage. 5.17.6 Reboot Choose menu "System Tools > Reboot", and then you can click the Reboot button to reboot the Device via the next screen. Figure 5-78 Reboot the Device Click the Reboot button to reboot the Device. Some settings of the Device will take effect only after rebooting, including: Change the LAN IP Address (system will reboot automatically). Change the DHCP Settings. Change the Wireless configurations. Change the Web Management Port. Upgrade the firmware of the Device (system will reboot automatically.). Restore the Device's settings to the factory defaults (system will reboot automatically.). Update the configuration with the file (system will reboot automatically.). 5.17.7 Password Choose menu "System Tools > Password", and then you can change the factory default user name and password of the Device in the next screen as shown in Figure 4-32. 125
-
 1
1 -
2
-
3
-
4
-
5
-
6
-
7
-
8
-
9
-
10
-
11
-
12
-
13
-
14
-
15
-
16
-
17
-
18
-
19
-
20
-
21
-
22
-
23
-
24
-
25
-
26
-
27
-
28
-
29
-
30
-
31
-
32
-
33
-
34
-
35
-
36
-
37
-
38
-
39
-
40
-
41
-
42
-
43
-
44
-
45
-
46
-
47
-
48
-
49
-
50
-
51
-
52
-
53
-
54
-
55
-
56
-
57
-
58
-
59
-
60
-
61
-
62
-
63
-
64
-
65
-
66
-
67
-
68
-
69
-
70
-
71
-
72
-
73
-
74
-
75
-
76
-
77
-
78
-
79
-
80
-
81
-
82
-
83
-
84
-
85
-
86
-
87
-
88
-
89
-
90
-
91
-
92
-
93
-
94
-
95
-
96
-
97
-
98
-
99
-
100
-
101
-
102
-
103
-
104
-
105
-
106
-
107
-
108
-
109
-
110
-
111
-
112
-
113
-
114
-
115
-
116
-
117
-
118
-
119
-
120
-
121
-
122
-
123
-
124
-
125
-
126
-
127
-
128
-
129
-
 130
130 -
 131
131 -
 132
132 -
 133
133 -
 134
134 -
 135
135 -
 136
136 -
 137
137 -
 138
138 -
 139
139 -
 140
140 -
141
-
142
-
143
-
144
-
145
-
146
-
147
-
148
-
149
-
150
 |
 |