Apple M9032LL User Guide - Page 60
Replacing the Optical Drive, Contact your drive manufacturer or consult the manufacturer's website
 |
UPC - 718908487402
View all Apple M9032LL manuals
Add to My Manuals
Save this manual to your list of manuals |
Page 60 highlights
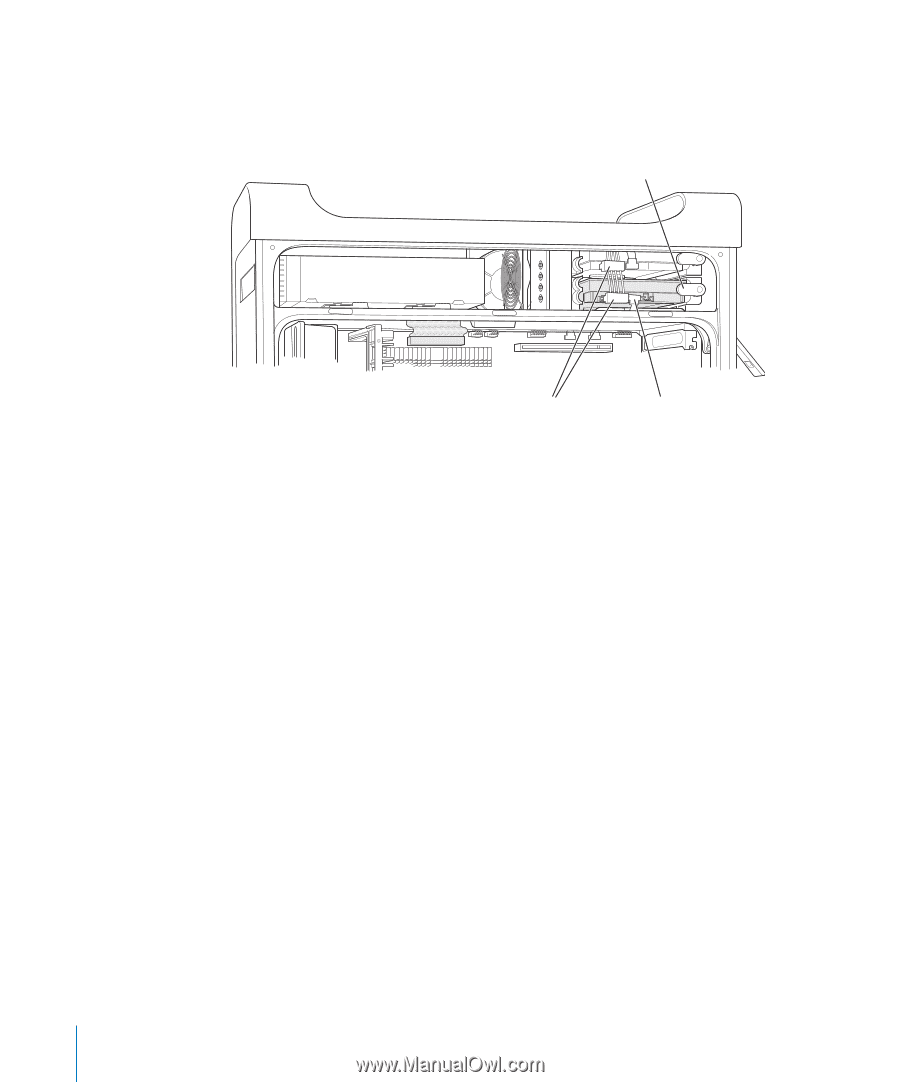
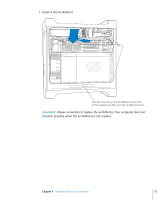
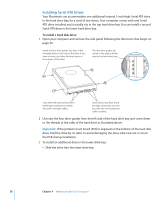
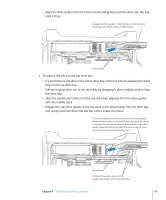
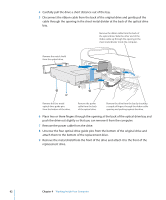
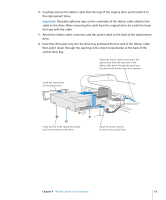
5 Pull the appropriate drive bay tab down to secure the drive. 6 Connect the power cable and the Serial ATA data cable to the drive, as shown in the illustration. Secure the drive in position by rotating the drive bay tab to its closed (horizontal) position. Disconnect the power cable from the top hard disk and pull the cable down to expose the middle power cable connector. Connect the middle power cable connector to the top drive, and the bottom cable connector to the bottom drive. Connect the data cable to the hard disk drive. 7 Replace the side panel, following the directions that begin on page 56. Replacing the Optical Drive Your computer comes with a SuperDrive. Follow these instructions to replace the SuperDrive drive in the optical drive bay. Important: Contact your drive manufacturer or consult the manufacturer's website to determine if your drive is set for cable select mode. Before installation, set the drive to cable select if the manufacturer hasn't already done so. 1 Open your computer and remove the side panel following the directions that begin on page 46. 60 Chapter 4 Working Inside Your Computer
-
 1
1 -
2
-
3
-
4
-
5
-
6
-
7
-
8
-
9
-
10
-
11
-
12
-
13
-
14
-
15
-
16
-
17
-
18
-
19
-
20
-
21
-
22
-
23
-
24
-
25
-
26
-
27
-
28
-
29
-
30
-
31
-
32
-
33
-
34
-
35
-
36
-
37
-
38
-
39
-
40
-
41
-
42
-
43
-
44
-
45
-
46
-
47
-
48
-
49
-
50
-
51
-
52
-
53
-
54
-
 55
55 -
 56
56 -
 57
57 -
 58
58 -
 59
59 -
 60
60 -
 61
61 -
 62
62 -
 63
63 -
 64
64 -
 65
65 -
66
-
67
-
68
-
69
-
70
-
71
-
72
-
73
-
74
-
75
-
76
-
77
-
78
-
79
-
80
-
81
-
82
-
83
-
84
-
85
-
86
-
87
-
88
-
89
-
90
-
91
-
92
-
93
-
94
-
95
-
96
-
97
-
98
-
99
-
100
-
101
-
102
-
103
-
104
-
105
-
106
-
107
-
108
-
109
-
110
-
111
-
112
 |
 |