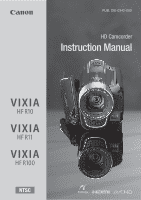
Canon VIXIA HF R11 VIXIA HF R10/HF R11/HF R100 Instruction Manual
Canon VIXIA HF R11 Manual
 |
View all Canon VIXIA HF R11 manuals
Add to My Manuals
Save this manual to your list of manuals |
Canon VIXIA HF R11 manual content summary:
- Canon VIXIA HF R11 | VIXIA HF R10/HF R11/HF R100 Instruction Manual - Page 1
PUB. DIE-0342-000 HD Camcorder Instruction Manual - Canon VIXIA HF R11 | VIXIA HF R10/HF R11/HF R100 Instruction Manual - Page 2
ACCESSORIES ONLY. COPYRIGHT WARNING: Unauthorized recording of copyrighted materials may infringe on the rights of copyright owners and be contrary to copyright laws. HD Camcorder, VIXIA HF R11 A / VIXIA HF R10 A / VIXIA HF for class B digital device, pursuant to with the instructions, may cause - Canon VIXIA HF R11 | VIXIA HF R10/HF R11/HF R100 Instruction Manual - Page 3
wrong type of batteries are attached. Use only the same type of batteries. • Do not expose batteries or product to NO USER-SERVICEABLE PARTS INSIDE. REFER SERVICING TO QUALIFIED SERVICE PERSONNEL. The lightning flash with arrowhead servicing) instructions in the literature accompanying the product. 3 - Canon VIXIA HF R11 | VIXIA HF R10/HF R11/HF R100 Instruction Manual - Page 4
Canon HD Camcorder VIXIA HF R11 A / VIXIA HF R10 A / VIXIA HF R100 A and all its accessories. 1 Read these instructions. 2 Keep these instructions. 3 Heed all warnings. 4 Follow all instructions other power sources such as battery power, refer to instructions in this manual. 19 Overloading - Do not - Canon VIXIA HF R11 | VIXIA HF R10/HF R11/HF R100 Instruction Manual - Page 5
power company. Regarding other power sources such as battery power, refer to instructions in this manual. 23 Lightning - For added protection of this to the responsible nearest Canon Service Center and please replace it with the same type number CA-590. This Class B digital apparatus complies with - Canon VIXIA HF R11 | VIXIA HF R10/HF R11/HF R100 Instruction Manual - Page 6
can be found on the battery compartment cover of the camcorder. Write down the number and other information here and retain this book as a permanent record of your purchase to aid identification in case of theft. Model Name: VIXIA HF R11 A / VIXIA HF R10 A / VIXIA HF R100 A Date of Purchase - Canon VIXIA HF R11 | VIXIA HF R10/HF R11/HF R100 Instruction Manual - Page 7
specifications3. With your new HD camcorder, capturing the special moments in your life with amazing image quality and in lifelike vibrant colors is easy and fun! / Dual Flash Memory You can record in the built-in memory or on commercially available memory cards ( 37). Pre-recording ( 59) When - Canon VIXIA HF R11 | VIXIA HF R10/HF R11/HF R100 Instruction Manual - Page 8
them into a video clip set to your favorite background music. Just point the camcorder and it will automatically select the best settings for your subject Face Detection ( 62) The camcorder automatically detects people's faces and adjusts the focus and other settings accordingly for beautiful - Canon VIXIA HF R11 | VIXIA HF R10/HF R11/HF R100 Instruction Manual - Page 9
sharing Web site Use the supplied software High Definition ImageMixer 3 SE ( 111, 124) MPEG-2 Standard Definition AVCHD SD-Video Convert your HD movies, in the camcorder itself, to standard definition files ( 117, 125) Standard DVDs * Refer to the instruction manual of the device. Depending on - Canon VIXIA HF R11 | VIXIA HF R10/HF R11/HF R100 Instruction Manual - Page 10
Joystick Guide 31 Using the Menus 33 First Time Settings 33 Setting the Date and Time 34 Changing the Language 34 Changing the Time Zone 35 Using a Memory Card 35 Memory Cards Compatible for Use with the Camcorder 36 Inserting and Removing a Memory Card 37 / Selecting the Memory for - Canon VIXIA HF R11 | VIXIA HF R10/HF R11/HF R100 Instruction Manual - Page 11
recording Function 59 Self Timer 60 Manual Exposure Adjustment 61 Manual Focus Adjustment 62 Face Detection 63 White Balance 65 Image Effects 65 Digital Effects 67 On-Screen Displays Video Snapshot Scenes from a Movie 83 / Copying Scenes to a Memory Card Table of contents Š 11 - Canon VIXIA HF R11 | VIXIA HF R10/HF R11/HF R100 Instruction Manual - Page 12
Capturing Photos from a Movie 96 Protecting Photos 97 / Copying Photos to a Memory Card 100 Printing Photos 100 Printing Photos (Direct Print) 103 Print Orders „ External Connections 106 Terminals on the Camcorder 107 Connection Diagrams 110 Playback on a TV Screen 111 Saving and Sharing - Canon VIXIA HF R11 | VIXIA HF R10/HF R11/HF R100 Instruction Manual - Page 13
Menus 143 Onscreen Icons and Displays 147 Trouble? 147 Troubleshooting 153 List of Messages 163 Do's and Don'ts 163 Handling Precautions 167 Maintenance/Others 168 Using the Camcorder Abroad 169 General Information 169 Accessories 170 Optional Accessories 173 Product Codes 174 Specifications 178 - Canon VIXIA HF R11 | VIXIA HF R10/HF R11/HF R100 Instruction Manual - Page 14
About this Manual Thank you for purchasing the Canon VIXIA HF R11 / VIXIA HF R10 / VIXIA HF R100. Please read this manual carefully before you use the camcorder and retain it for future reference. Should your camcorder fail to operate correctly, refer to Troubleshooting ( 147). Conventions Used in - Canon VIXIA HF R11 | VIXIA HF R10/HF R11/HF R100 Instruction Manual - Page 15
on the memory. Select FXP or XP+ mode for better movie quality; select LP mode for longer recording times. The following table gives approximate recording times. Operating modes: FUNC. [ Standard Play 7 Mbps] mode FUNC. Desired recording NOTES • The camcorder uses a variable bit rate (VBR) to - Canon VIXIA HF R11 | VIXIA HF R10/HF R11/HF R100 Instruction Manual - Page 16
Getting to Know the Camcorder Supplied Accessories and CD-ROMs The following accessories are supplied with the camcorder: XCA-590 Compact Power Adapter* BP-2L5 Battery PackW XIFC-300PCU USB Cable STV-250N Stereo Video CableW Yellow • Red • White plugs XCTC-100/S Component Cable Red • Green • Blue - Canon VIXIA HF R11 | VIXIA HF R10/HF R11/HF R100 Instruction Manual - Page 17
Applications Ver.34.0*/Music Data CD-ROM (referred to in this manual as "Camcorder Supplemental Disc") - Instruction Manual - The full-version instruction manual of the camcorder (this PDF file). - Photo Application - Software for saving, managing, and printing photos. - Music data - Music files - Canon VIXIA HF R11 | VIXIA HF R10/HF R11/HF R100 Instruction Manual - Page 18
Names of Parts Left side view Right side view Front view 1 (camera/play) button ( 29) 2 VIDEO SNAP (video snapshot) button ( 58) 3 / WEB button ( 124) 4 button ( 27)/ / INDEX SEL. (index selection) button ( 47)/ PLAYLIST button ( 47) 5 DISP. (on-screen display) button ( 67) 6 ACCESS - Canon VIXIA HF R11 | VIXIA HF R10/HF R11/HF R100 Instruction Manual - Page 19
FUNC. button ( 31, 130) Al USB terminal ( 106, 109) Sq HDMI OUT terminal ( 106, 107) Sa COMPONENT OUT terminal ( 106, 108) Ss MIC terminal ( 70) Sd AV OUT terminal ( 106, 108)/ (headphones) terminal ( 69) Sf DC IN terminal ( 21) Sg START/STOP button ( 40) Introduction Š 19 - Canon VIXIA HF R11 | VIXIA HF R10/HF R11/HF R100 Instruction Manual - Page 20
Bottom view Sh Tripod socket ( 163) Sj Memory card slot ( 36) Sk Battery compartment Sl Battery release latch Dq Battery compartment cover/Memory card slot cover Da Serial number The serial number label is located on the battery compartment cover. 20 Š Introduction - Canon VIXIA HF R11 | VIXIA HF R10/HF R11/HF R100 Instruction Manual - Page 21
, and first time settings to help you learn more about your camcorder. Getting Started Charging the Battery Pack The camcorder can be powered with a battery pack or directly using the compact power adapter. Charge the battery pack before use. For approximate charging times and recording/playback - Canon VIXIA HF R11 | VIXIA HF R10/HF R11/HF R100 Instruction Manual - Page 22
turn off the camcorder. After a moment, the ON/OFF (CHG) indicator will start flashing in red (battery pack charging). The red ON/ OFF (CHG) indicator will go out when the battery pack is fully charged. • If the indicator flashes quickly, refer to Troubleshooting ( 147). 6 22 Š Preparations - Canon VIXIA HF R11 | VIXIA HF R10/HF R11/HF R100 Instruction Manual - Page 23
slide it toward the lens until you hear a click. Battery release latch IMPORTANT • Turn off the camcorder before connecting or disconnecting the compact power adapter. After pressing POWER to turn off the camcorder, important data is updated in the memory. Be sure to wait until the green ON/OFF - Canon VIXIA HF R11 | VIXIA HF R10/HF R11/HF R100 Instruction Manual - Page 24
The Lithium ion/polymer battery that powers the product is recyclable. Please call 1-800-8-BATTERY for information on how to recycle this battery. Preparing the Accessories Fasten the grip from the front bracket on the camcorder, then to unthread it from the handgrip and finally to remove it from the - Canon VIXIA HF R11 | VIXIA HF R10/HF R11/HF R100 Instruction Manual - Page 25
To attach an optional wrist strap Pass the attaching end of the wrist strap through the rear bracket on the camcorder, thread the wrist strap through the loop and fasten. You can also attach the wrist strap to the strap mount on the grip belt to - Canon VIXIA HF R11 | VIXIA HF R10/HF R11/HF R100 Instruction Manual - Page 26
When recording in bright places it may be difficult to use the LCD screen. Turn on the LCD backlight to make it brighter. With the camcorder on, hold DISP. pressed down for more than 2 seconds. • Repeat this action to switch the LCD backlight between off (normal) and on (bright). • If [LCD - Canon VIXIA HF R11 | VIXIA HF R10/HF R11/HF R100 Instruction Manual - Page 27
mode for beginners or if you just prefer not to bother with detailed camcorder settings, and flexible recording ( ) mode, which lets you change the camcorder's settings to your prefer- ence. Press the button to switch the camcorder to mode and press the button again to switch back to mode. In - Canon VIXIA HF R11 | VIXIA HF R10/HF R11/HF R100 Instruction Manual - Page 28
• When shooting in mode, the camcorder will automatically detect certain characteristics of the subject, background, lighting conditions, etc. It will then adjust various settings (focus, exposure, color, image stabilization, image quality, - Canon VIXIA HF R11 | VIXIA HF R10/HF R11/HF R100 Instruction Manual - Page 29
media for movies/photos - Video snapshot length - Auto slow shutter - All settings under the setup menu's , and tabs. • Even in flexible recording mode, the camcorder can help you with the settings. For example, you can use the Special Scene recording pro- grams ( 55) to set at once all the - Canon VIXIA HF R11 | VIXIA HF R10/HF R11/HF R100 Instruction Manual - Page 30
NOTES • / When switching to a playback mode, the memory selected for playback will be the same currently used for recording. Joystick and Joystick Guide Use the joystick to operate the camcorder's menus. Push the joystick up, down, left or right ( , ) to select an item or change settings. - Canon VIXIA HF R11 | VIXIA HF R10/HF R11/HF R100 Instruction Manual - Page 31
Using the Menus Many of the camcorder's functions can be adjusted from the menus that open after With some settings you will need to make further selections and/or press . Follow the additional operation guides that will appear on the screen (such as the icon, small arrows, etc.). 4 Press FUNC - Canon VIXIA HF R11 | VIXIA HF R10/HF R11/HF R100 Instruction Manual - Page 32
menu (step 3). 5 Select ( , setting. ) the desired option and press to save the 6 Press FUNC. . You can press FUNC. to close the menu at any time. 32 Š Preparations - Canon VIXIA HF R11 | VIXIA HF R10/HF R11/HF R100 Instruction Manual - Page 33
way. 3 Select ( ) [OK] and press setup screen. to start the clock and close the NOTES • When you do not use the camcorder for about 3 months, the built-in rechargeable lithium battery may discharge completely and the date and time setting may be lost. In such case, recharge the built-in lithium - Canon VIXIA HF R11 | VIXIA HF R10/HF R11/HF R100 Instruction Manual - Page 34
[ Menu] Desired language [Language ] FUNC. NOTES • The displays and that appear in some menu screens refer to the name of buttons on the camcorder and will not change, regardless of the language selected. Changing the Time Zone Change the time zone to match your location. The default setting - Canon VIXIA HF R11 | VIXIA HF R10/HF R11/HF R100 Instruction Manual - Page 35
data transfer speed of SD/SDHC memory cards. When you buy a new memory card, look for the Speed Class logo on the package. We recommend using memory cards rated Speed Class 4, 6 or 10. Eye-Fi cards This product is not guaranteed to support Eye-Fi card functions (including wireless transfer - Canon VIXIA HF R11 | VIXIA HF R10/HF R11/HF R100 Instruction Manual - Page 36
remove the memory card Push the memory card once to release it. When the memory card springs out, pull it all the way out. IMPORTANT • Memory cards have front and back sides that are not interchangeable. Inserting a memory card facing the wrong direction can cause a malfunction of the camcorder. Be - Canon VIXIA HF R11 | VIXIA HF R10/HF R11/HF R100 Instruction Manual - Page 37
) or creating standard DVDs ( 116). Relay Recording If the memory becomes full while you are recording a movie, relay recording allows the camcorder to automatically continue recording on to the memory card. Operating modes: 1 Insert a memory card that does not contain any movies. 2 Activate relay - Canon VIXIA HF R11 | VIXIA HF R10/HF R11/HF R100 Instruction Manual - Page 38
relay recording function. - Turning off the camcorder - Opening the memory card slot cover - Changing the camcorder's operating mode - Setting [Rec Media for Movies] to [Mem. Card] Initializing the Built-in Memory ( / only) or Memory Card Initialize memory cards when you use them with this - Canon VIXIA HF R11 | VIXIA HF R10/HF R11/HF R100 Instruction Manual - Page 39
will be erased and the memory can be used without any problem. Options [Quick Initialization] Clears software ImageMixer 3 SE to trans- fer music files from the supplied Camcorder Supplemental Disc to the memory card again. For details, refer to the 'ImageMixer 3 SE Software Guide'. • Mac - Canon VIXIA HF R11 | VIXIA HF R10/HF R11/HF R100 Instruction Manual - Page 40
precautions while the ACCESS indicator is on or flashing. Failing to do so may result in permanent data loss or damage to the memory. - Do not open the memory card slot cover. - Do not disconnect the power source or turn off the camcorder. - Do not change the camcorder's operating mode. 40 Š Video - Canon VIXIA HF R11 | VIXIA HF R10/HF R11/HF R100 Instruction Manual - Page 41
especially after making important recordings. Canon shall not be liable for any loss or corruption of data. NOTES • About the Power Save mode: If [Power Saving Mode] is set to [ On], the camcorder will shut off automatically to save power when it is powered by a battery pack and is left without - Canon VIXIA HF R11 | VIXIA HF R10/HF R11/HF R100 Instruction Manual - Page 42
times Default value Recording mode → Memory ↓ FXP1 XP+ SP LP 4 GB memory card Built-in memory2/ 8 GB memory card 30 min. 1 hr. 40 min. 1 hr. 25 min. 1 hr. 10 min. 2 hr. 20 min. 1 hr. 30 min. 3 hr. 16 GB memory card Built-in memory2/ 32 GB memory card 2 hr. 5 min. 4 hr. 10 min - Canon VIXIA HF R11 | VIXIA HF R10/HF R11/HF R100 Instruction Manual - Page 43
while the ACCESS indicator is on or flashing, while a menu is being displayed, or while the PHOTO button is pressed down halfway. The camcorder may also not enter standby mode if the LCD panel is closed while the memory card slot cover is open or when the battery charge is too low. Check that the - Canon VIXIA HF R11 | VIXIA HF R10/HF R11/HF R100 Instruction Manual - Page 44
of the [Power Saving Mode] setting. Press POWER to turn on the camcorder. • You can select the length of time until shut-off or turn off the Quick Start function altogether with the [Quick Start] setting. • When the camcorder exits standby mode, it will return to the operating mode previously - Canon VIXIA HF R11 | VIXIA HF R10/HF R11/HF R100 Instruction Manual - Page 45
start from the scene selected and continue until the end of the last scene recorded. To pause/stop the playback 1 During playback, open ( ) the joystick guide. 2 Select ( ) to pause the playback or to stop the playback. To adjust the volume 1 During playback, open ( ) the joystick - Canon VIXIA HF R11 | VIXIA HF R10/HF R11/HF R100 Instruction Manual - Page 46
flashing. Failing to do so may result in permanent data loss. - Do not open the memory card slot cover. - Do not disconnect the power source or turn off the camcorder. - Do not change the camcorder → 60x the normal speed. Open ( ) the joystick guide Select ( ) the bottom row the joystick ( ) toward - Canon VIXIA HF R11 | VIXIA HF R10/HF R11/HF R100 Instruction Manual - Page 47
Skipping scenes Open ( ) the joystick guide Select ( ) the middle row Push the joystick ( ) toward used by other functions in this camcorder, such as video snapshot and the playlist. Operating modes: / Movies Photos Recordings in the built-in memory Recordings on the memory card Video Š 47 - Canon VIXIA HF R11 | VIXIA HF R10/HF R11/HF R100 Instruction Manual - Page 48
Movies Photos 1 In the index screen, move ( ) the orange selection frame to the tabs on the top of the screen. 2 Select ( ) the tab corresponding to the recordings you want to play back. 3 Return ( ) to the index screen to select a scene or photo. By default, the index screen will show up to 6 items - Canon VIXIA HF R11 | VIXIA HF R10/HF R11/HF R100 Instruction Manual - Page 49
standard definition for Web upload ( 125) or DVD authoring ( 117). Open the original movies index screen on the memory card. Press INDEX SEL. and then select [For Web (MPEG-2)] or [For DVD (SDVIDEO)]. [For DVD (SD-VIDEO)] index screen NOTES • When you open the original movies index screen on the - Canon VIXIA HF R11 | VIXIA HF R10/HF R11/HF R100 Instruction Manual - Page 50
time. Selecting from the List of Recordings 1 Open the original movies index screen. • / You can select the original movies in the built-in memory or on the memory card. • You can press VIDEO SNAP to open the index screen for video snapshot scenes. 2 Open the list of recordings. 50 Š Video - Canon VIXIA HF R11 | VIXIA HF R10/HF R11/HF R100 Instruction Manual - Page 51
recorded movies with the Face Detection function ( 62) activated, the camcorder can narrow down the scenes shown in the index screen, leaving only . / You can select the original movies in the built-in memory or on the memory card. 2 Narrow down the scenes displayed in the index screen. FUNC - Canon VIXIA HF R11 | VIXIA HF R10/HF R11/HF R100 Instruction Manual - Page 52
: Move the zoom lever toward W to display the index screen. • / You can select the original movies or photos in the built- in memory or on the memory card. • You can press VIDEO SNAP to open the index screen for video snapshot scenes. 2 Open the selection screen. FUNC. [ Select] [Individual - Canon VIXIA HF R11 | VIXIA HF R10/HF R11/HF R100 Instruction Manual - Page 53
The pre-selection of scenes/photos will be canceled if you turn off the camcorder or change the operating mode. • Scenes in the playlist cannot be included in • / You can select the original movies in the built-in memory or on the memory card. • You can press VIDEO SNAP to open the index screen - Canon VIXIA HF R11 | VIXIA HF R10/HF R11/HF R100 Instruction Manual - Page 54
following precautions while the ACCESS indicator is on or flashing (while scenes are being deleted). - Do not open the memory card slot cover. - Do not disconnect the power source or turn off the camcorder. - Do not change the camcorder's operating mode. NOTES • Deleting a scene from the original - Canon VIXIA HF R11 | VIXIA HF R10/HF R11/HF R100 Instruction Manual - Page 55
Programmed AE] recording program to give you full control over functions like the white balance or image effects. Alternatively, give the camcorder more control by selecting a Special Scene recording program. Operating modes: Using [ Programmed AE] When you use the [ Programmed AE] recording program - Canon VIXIA HF R11 | VIXIA HF R10/HF R11/HF R100 Instruction Manual - Page 56
[ Sports] To record sports scenes such as tennis or golf. [ Snow] To record in bright ski resorts without the subject being underexposed. [ Beach] To record on a sunny beach without the subject being underexposed. [ Sunset] To record sunsets in vibrant colors. [ Night Scene] To record nightscapes - Canon VIXIA HF R11 | VIXIA HF R10/HF R11/HF R100 Instruction Manual - Page 57
In such case, adjust the focus manually (for movies only). • [ Fireworks]: - To avoid camcorder blur (blur due to the camcorder moving) we recommend using a tripod program. Combine this recording program with the 24 fps progressive frame rate [ PF24] to get the enhanced effect of the 24p Cinema - Canon VIXIA HF R11 | VIXIA HF R10/HF R11/HF R100 Instruction Manual - Page 58
To change the frame rate FUNC. [ Menu] FUNC. [Frame Rate] [ PF24] Video Snapshot Record a series of short the length of video snapshot scenes with the [Video Snapshot Length] setting. • When the camcorder stops recording, the screen will momentarily turn black as if a camera shutter had released. - Canon VIXIA HF R11 | VIXIA HF R10/HF R11/HF R100 Instruction Manual - Page 59
( ) the joystick guide. 2 Select ( ) [ Pre REC] and press . • appears. • Press again to turn pre-recording off. Pre REC 3 Press START/STOP . The scene recorded in the memory will start 3 seconds before START/STOP was pressed. NOTES • While pre-recording is activated, the camcorder will not emit - Canon VIXIA HF R11 | VIXIA HF R10/HF R11/HF R100 Instruction Manual - Page 60
- Setting the camcorder to standby mode. - Changing the camcorder's operating mode. - Turning off the camcorder. Manual Exposure Adjustment At times • Select a recording program other than [ Fireworks]. Manual Exposure Adjustment 1 Open ( ) the joystick guide. 2 Select ( ) [ Exposure] and press - Canon VIXIA HF R11 | VIXIA HF R10/HF R11/HF R100 Instruction Manual - Page 61
brightness of the image as required, then hide ( ) the joystick guide. • The exposure adjustment indicator will change to white and the selected camcorder to automatic exposure. NOTES • If the recording program is changed during exposure lock, the camcorder will return to automatic exposure. Manual - Canon VIXIA HF R11 | VIXIA HF R10/HF R11/HF R100 Instruction Manual - Page 62
guide. • The selected focus will be locked. • During focus lock, press twice to return the camcorder to autofocus. Face Detection The camcorder the main subject. You can also select the main subject manually, so the camcorder optimizes the settings for the person selected. Operating modes: POINTS - Canon VIXIA HF R11 | VIXIA HF R10/HF R11/HF R100 Instruction Manual - Page 63
set to [ PF24]) or when the digital zoom is activated at more than 80x zoom (dark blue area on the zoom bar). • When face detection is activated, the slowest shutter speed used by the camcorder is 1/30 (1/24 if the frame rate is set to [ PF24]). White Balance The white balance function helps - Canon VIXIA HF R11 | VIXIA HF R10/HF R11/HF R100 Instruction Manual - Page 64
. When the adjustment is completed, stops flashing and stays on. The camcorder retains the custom setting even if you turn off the camcorder. 2 Press FUNC. to save the . NOTES • When you select the custom white balance: - Set [Digital Zoom] to [ Off]. - Reset the white balance when you change - Canon VIXIA HF R11 | VIXIA HF R10/HF R11/HF R100 Instruction Manual - Page 65
obtain the best effect, use this setting when recording a person in close-up. Note that areas similar to the skin color may lack in detail. Digital Effects Operating modes: FUNC. [ Digital Effect Off] Desired fader/effect* FUNC. The icon of the selected - Canon VIXIA HF R11 | VIXIA HF R10/HF R11/HF R100 Instruction Manual - Page 66
and photos in sepia tones for an "old" look. * Only these digital effects are available for photos. Applying the Selected Digital Effect 1 Open ( ) the joystick guide. 2 Select ( ) [ Digital Effects] and press . • The icon of the selected digital effect turns green. • Press again to deactivate the - Canon VIXIA HF R11 | VIXIA HF R10/HF R11/HF R100 Instruction Manual - Page 67
automatically but will not remove onscreen displays that were turned on manually (for example, onscreen markers, the audio level meter or the joystick guide). About the Data Code With every scene or photo recorded, the camcorder keeps a data code (date/time of recording, information about the - Canon VIXIA HF R11 | VIXIA HF R10/HF R11/HF R100 Instruction Manual - Page 68
Recording Level 1 Open ( ) the joystick guide. 2 Select ( ) [ Mic. Level] and press . • The manual adjustment icon will appear to the left of the audio level indicator and the manual adjustment bar (orange) will appear below it. • Press to return the camcorder to automatic audio recording levels - Canon VIXIA HF R11 | VIXIA HF R10/HF R11/HF R100 Instruction Manual - Page 69
NOTES • When the audio level meter reaches the red point (0 dB mark), the sound may be distorted. • If the audio level is too high and the sound gets distorted, activate the microphone attenuator with the [Microphone Attenuator] setting. • We recommend using headphones to check the sound level - Canon VIXIA HF R11 | VIXIA HF R10/HF R11/HF R100 Instruction Manual - Page 70
to mode. Using an External Microphone When recording in very quiet surroundings, the built-in microphone may pick up the sound of the camcorder's internal machinery. In such case, we recommend using an external microphone. Operating modes: Connect the external microphone to the MIC terminal. Use - Canon VIXIA HF R11 | VIXIA HF R10/HF R11/HF R100 Instruction Manual - Page 71
camcorder, [Wind Screen] will automatically be set to [ Off ]. • If the audio level is too high and the sound gets distorted, turn on the microphone attenuator with the [Microphone Attenuator] setting or adjust the audio recording level manually the built-in memory or on the memory card. • To - Canon VIXIA HF R11 | VIXIA HF R10/HF R11/HF R100 Instruction Manual - Page 72
on the memory card. 2 Select ( , ) the scene you want to view and press DISP. . • The [Timeline by Faces] screen appears. The large thumbnail shows the point at which a face was first detected. Below it, frames are taken from the scene every time the main subject detected by the camcorder changed - Canon VIXIA HF R11 | VIXIA HF R10/HF R11/HF R100 Instruction Manual - Page 73
Segment ruler Page slidebar Current scene / Total number of scenes Scene length Recording date and time Frame selected for start of playback 3 Select ( ) the playback starting point from the segment ruler. 4 Press to begin the playback. You can select another scene and move between segment ruler - Canon VIXIA HF R11 | VIXIA HF R10/HF R11/HF R100 Instruction Manual - Page 74
Using a Supplied Music Track as Background Music The supplied Camcorder Supplemental Disc contains three music tracks you can use as on the memory card, you will need to transfer the music tracks to the memory card in advance. For details, refer to the 'ImageMixer 3 SE Software Guide'. 1 Open - Canon VIXIA HF R11 | VIXIA HF R10/HF R11/HF R100 Instruction Manual - Page 75
to the background music selected. • Use the joystick guide to stop the playback. • Select FUNC. [ Slideshow (to connect to the MIC terminal on the camcorder); the other end will depend on the terminal select the recordings in the built-in memory or on the memory card. • To open the playlist index - Canon VIXIA HF R11 | VIXIA HF R10/HF R11/HF R100 Instruction Manual - Page 76
to the onscreen indications. When the audio input is in the correct range, stop the music playback. Select [ On ] and then press FUNC. on the camcorder. • Select ( ) [External Player Link] to link the video playback to the start/end of the music from the external player. Playback with the video - Canon VIXIA HF R11 | VIXIA HF R10/HF R11/HF R100 Instruction Manual - Page 77
it is initialized (/ only). • Windows users: Use the supplied software ImageMixer 3 SE to trans- fer music files from the supplied Camcorder Supplemental Disc to the memory card again. For details, refer to the 'ImageMixer 3 SE Software Guide'. • Mac OS users: Use the Finder to transfer music - Canon VIXIA HF R11 | VIXIA HF R10/HF R11/HF R100 Instruction Manual - Page 78
cut out the rest. Operating modes: 1 Open the original movies index screen. / You can select the original movies in the built-in memory or on the memory card ( 47). 2 Select ( , ) the scene you want to divide. 3 Press FUNC. , select [ Divide] and press . • The scene selected will start playing - Canon VIXIA HF R11 | VIXIA HF R10/HF R11/HF R100 Instruction Manual - Page 79
Scenes that were edited using the supplied software ImageMixer 3 SE and were then written back to the memory. • Scenes cannot be divided within 1 screen. • / You can select the original movies in the built-in memory or on the memory card. • You can press VIDEO SNAP to open the index screen for - Canon VIXIA HF R11 | VIXIA HF R10/HF R11/HF R100 Instruction Manual - Page 80
playlist scenes that were edited using the software on the supplied software ImageMixer 3 SE and were then written back to the memory. • / You can copy scenes from the built-in memory to the memory card ( 83) to include in the memory card's playlist also scenes that were originally recorded - Canon VIXIA HF R11 | VIXIA HF R10/HF R11/HF R100 Instruction Manual - Page 81
the playlist index screen. • / Before opening the playlist, you can select the original movies in the built-in memory or on the memory card to open the playlist of the respective memory. • To open the playlist index screen from the original movies index screen: - / For scenes in the built - Canon VIXIA HF R11 | VIXIA HF R10/HF R11/HF R100 Instruction Manual - Page 82
2 Press START/STOP at the point you want to capture. • The camcorder captures a video snapshot scene (the blue frame serves as a visual progress Scenes that were edited using the software on the supplied software ImageMixer 3 SE and were then written back to the memory. • When the source scene is - Canon VIXIA HF R11 | VIXIA HF R10/HF R11/HF R100 Instruction Manual - Page 83
the icon. • You can press VIDEO SNAP to open the index screen for video snapshot scenes. 2 Select ( , ) the scene you want to copy to the memory card, or a scene recorded on the date you want to copy. This step is not necessary to copy all scenes or previously selected scenes. 3 Copy the - Canon VIXIA HF R11 | VIXIA HF R10/HF R11/HF R100 Instruction Manual - Page 84
• Observe the following precautions while the ACCESS indicator is on or flashing. Failing to do so may result in permanent data loss. - Do not open the memory card slot cover. - Do not disconnect the power source or turn off the camcorder. - Do not change the camcorder's operating mode. 84 Š Video - Canon VIXIA HF R11 | VIXIA HF R10/HF R11/HF R100 Instruction Manual - Page 85
NOTES • If the memory card slot cover is open, or the LOCK switch on the mem- ory card is set to prevent writing, you will not be able to copy movies to the memory card. • Scenes that were edited using the supplied software ImageMixer 3 SE and were then written back to the camcorder cannot be copied - Canon VIXIA HF R11 | VIXIA HF R10/HF R11/HF R100 Instruction Manual - Page 86
on the camcorder. • / By default, photos are recorded in the built-in memory. You can set the memory card as the card. 2 Press PHOTO halfway. Once the focus is automatically adjusted, will turn green and one or more AF frames will appear. 3 Press PHOTO fully. The ACCESS indicator will flash - Canon VIXIA HF R11 | VIXIA HF R10/HF R11/HF R100 Instruction Manual - Page 87
precautions while the ACCESS indicator is on or flashing. Failing to do so may result in permanent data loss. - Do not open the memory card slot cover. - Do not disconnect the power source or turn off the camcorder. - Do not change the camcorder's operating mode. • When recording photos on an Eye - Canon VIXIA HF R11 | VIXIA HF R10/HF R11/HF R100 Instruction Manual - Page 88
will vary depending on the subject and shooting conditions. • The camcorder retains the last setting used even if you set the cam- on the Web. Approximate number of photos available on a memory card Default value Memory card 128 MB 512 MB 1 GB Photo quality1 → Photo size ↓ LW - Canon VIXIA HF R11 | VIXIA HF R10/HF R11/HF R100 Instruction Manual - Page 89
the photo index screen. • / You can select the photos in the built-in memory or on the memory card. • Move the zoom lever toward W to show 15 photos per page; move the index screen from single photo view 1 Open ( ) the joystick guide. 2 Select ( ) the icon and press . You can also move the - Canon VIXIA HF R11 | VIXIA HF R10/HF R11/HF R100 Instruction Manual - Page 90
or 100 photos at a time. 1 Open ( ) the joystick guide. 2 Select ( ) the icon and press . 3 Select ( flashing. Failing to do so may result in permanent data loss. - Do not open the memory card slot cover. - Do not disconnect the power source or turn off the camcorder. - Do not change the camcorder - Canon VIXIA HF R11 | VIXIA HF R10/HF R11/HF R100 Instruction Manual - Page 91
the menu. Deleting Photos from the Index Screen 1 Open the photo index screen. / You can select the photos in the built-in memory or on the memory card. 2 Select ( , ) the photo you want to delete. This step is not necessary to delete all photos or previously selected photos. 3 Delete the - Canon VIXIA HF R11 | VIXIA HF R10/HF R11/HF R100 Instruction Manual - Page 92
Magnifying Photos during Playback In single photo view, photos can be magnified up to 5 times. will appear for photos that cannot be enlarged. Operating modes: 1 Move the zoom lever toward T. • The photo is magnified by 2 times and a frame appears indicating the position of the magnified area. • To - Canon VIXIA HF R11 | VIXIA HF R10/HF R11/HF R100 Instruction Manual - Page 93
Additional Functions Slideshow You can play a slideshow of all the photos and even set it to music ( 74). Operating modes: 1 Open the photo index screen. 2 Select the background music to use when playing back the photo slideshow ( 74). 3 Back in the index screen, select first photo of the slideshow - Canon VIXIA HF R11 | VIXIA HF R10/HF R11/HF R100 Instruction Manual - Page 94
left when they advance. NOTES • The background music may not be played back correctly when playing back a slideshow from a memory card with slow transfer rates. • When playing back a slideshow with music from an external audio player, the slideshow will repeat until the music finishes. Rotating - Canon VIXIA HF R11 | VIXIA HF R10/HF R11/HF R100 Instruction Manual - Page 95
will be [LW 1920x1080] and it cannot be changed, but you can select the photo quality. POINTS TO CHECK • Please read the IMPORTANT section ( card. Operating modes: 96) before using an Eye-Fi To select the photo capture settings FUNC. [ Menu] [Photo Capture Quality] Desired photo quality* FUNC - Canon VIXIA HF R11 | VIXIA HF R10/HF R11/HF R100 Instruction Manual - Page 96
Using an Eye-Fi card ( 128). NOTES • The data code of the photos will reflect the date and time of recording of the original scene. • Photos captured from a scene with a lot of fast movement may be blurred. • / Photos will be recorded on the memory selected for recording photos. Protecting - Canon VIXIA HF R11 | VIXIA HF R10/HF R11/HF R100 Instruction Manual - Page 97
Protecting Photos from the Index Screen 1 Open the photo index screen. / You can select the photos in the built-in memory or on the memory card. 2 Select ( , ) the photo you want to protect. FUNC. [ Protect] Desired option [Yes] [OK] FUNC. Options [Individual Photos] Opens the same screen - Canon VIXIA HF R11 | VIXIA HF R10/HF R11/HF R100 Instruction Manual - Page 98
press FUNC. twice to close the menu. Copying Photos from the Index Screen 1 Open the index screen of the photos recorded in the built-in memory. Move the zoom lever toward W and then select the tab under the icon. 2 Select ( , ) the photo you want to copy. This step is not necessary - Canon VIXIA HF R11 | VIXIA HF R10/HF R11/HF R100 Instruction Manual - Page 99
precautions while the ACCESS indicator is on or flashing. Failing to do so may result in permanent data loss. - Do not open the memory card slot cover. - Do not disconnect the power source or turn off the camcorder. - Do not change the camcorder's operating mode. • When copying photos onto an Eye - Canon VIXIA HF R11 | VIXIA HF R10/HF R11/HF R100 Instruction Manual - Page 100
). Canon printers: SELPHY printers of the CP, DS and ES series and PIXMA printers marked with the PictBridge logo. Operating modes: Connecting the Camcorder to the Printer 1 Set the camcorder to mode, single photo view. / You can select the photos in the built-in memory or on the memory card - Canon VIXIA HF R11 | VIXIA HF R10/HF R11/HF R100 Instruction Manual - Page 101
be printed. • We recommend powering the camcorder using the compact power adapter. • Refer also to the printer's instruction manual. • If you have no intention to ( ) the photo you wish to print. 2 Open ( ) the joystick guide. 3 Select ( ) the icon and press . The print settings menu appears. - Canon VIXIA HF R11 | VIXIA HF R10/HF R11/HF R100 Instruction Manual - Page 102
photos/sheet]: Printing multiple photos on the same sheet When using Canon printers you can print the same photo multiple times on the on the [ Paper Size] setting. [ Paper Size]→ [Credit Card] [9 x 13 cm] [10 x 14.8 cm] [A4] Canon printer ↓ PIXMA printers SELPHY DS SELPHY CP/ES - - 2, - Canon VIXIA HF R11 | VIXIA HF R10/HF R11/HF R100 Instruction Manual - Page 103
the camcorder's screen. Solve the problem referring to the error message list ( 161) and to the printer's instruction manual. • Canon's out the print orders by inserting the memory card into the SD memory card slot of DPOF-compatible printers or self-serviced digital photo kiosks. You can set print - Canon VIXIA HF R11 | VIXIA HF R10/HF R11/HF R100 Instruction Manual - Page 104
POINTS TO CHECK • Only photos on the memory card can be set for print orders. Marking Single Photos with Print Orders 1 In single photo view, open the photo selection screen. FUNC. [ Print Orders] appears - Canon VIXIA HF R11 | VIXIA HF R10/HF R11/HF R100 Instruction Manual - Page 105
from the Index Screen ( 52). [Remove All] Removes all the print orders. NOTES • / To set print orders set for photos recorded in the built-in memory, copy the photos to the memory card in advance. Photos Š 105 - Canon VIXIA HF R11 | VIXIA HF R10/HF R11/HF R100 Instruction Manual - Page 106
such as a TV, VCR, or computer. Terminals on the Camcorder USB Terminal Access: Open the left rear terminal cover. HDMI OUT Terminal* Access: Open the left rear terminal cover. The HDMI OUT terminal offers a high-quality digital connection that combines audio and video in a single convenient cable - Canon VIXIA HF R11 | VIXIA HF R10/HF R11/HF R100 Instruction Manual - Page 107
About the HDMITM connection The HDMI (High-Definition Multimedia Interface) connection ( 1 ) is a convenient all-digital connection using a single cable for both video and audio. When you connect the camcorder to an HDTV equipped with an HDMI terminal, you can enjoy video and audio playback at the - Canon VIXIA HF R11 | VIXIA HF R10/HF R11/HF R100 Instruction Manual - Page 108
3 Type: Analog Quality: Standard definition Output only Connect to a standard TV or a VCR with audio/video input terminals. Change the following on the camcorder: - [TV Type] according to the TV set (widescreen or 4:3), if the TV cannot automatically detect and change the aspect ratio - [AV - Canon VIXIA HF R11 | VIXIA HF R10/HF R11/HF R100 Instruction Manual - Page 109
Connection 4 Type: Digital data connection Connect to a computer to save your recordings, be able to write back scenes and to transfer music files from the computer to the camcorder, power the camcorder using the compact power adapter and only then connect it to the computer using the supplied - Canon VIXIA HF R11 | VIXIA HF R10/HF R11/HF R100 Instruction Manual - Page 110
TV. 3 Turn on the connected TV. On the TV, select as the video input the same terminal to which you connected the camcorder. Refer to the instruction manual of the connected TV. 4 Turn on the camcorder and set it to or mode. Play back the movies or photos. NOTES • We recommend powering the - Canon VIXIA HF R11 | VIXIA HF R10/HF R11/HF R100 Instruction Manual - Page 111
to your computer, and easily organize and edit them. Installation Install the software before you connect the camcorder to the computer for the first time. See also the relevant sections in the 'Photo Application' Instruction Manual ( PHOTO PDF file). Install the Photo Application module on the - Canon VIXIA HF R11 | VIXIA HF R10/HF R11/HF R100 Instruction Manual - Page 112
while the ACCESS indicator is on or flashing. Failing to do so may result in permanent data loss. - Do not open the memory card slot cover. - Do not disconnect the USB cable. - Do not turn off the camcorder or the computer. - Do not change the camcorder's operating mode. • When restoring to the - Canon VIXIA HF R11 | VIXIA HF R10/HF R11/HF R100 Instruction Manual - Page 113
• Refer also to the computer's instruction manual. • Users of Windows 7, Windows Vista, Windows XP and Mac OS X: Your camcorder is equipped with the standard Picture Transfer Protocol (PTP) allowing you to transfer photos (JPEG only) simply by connecting the camcorder to a computer using the - Canon VIXIA HF R11 | VIXIA HF R10/HF R11/HF R100 Instruction Manual - Page 114
scenes in the playlist will be added to the disc. 1 Power the camcorder with the compact power adapter. 2 Open the index screen that contains the Turn on the DVD burner. DW-100 Refer to Creating DVDs. 2 Connect the camcorder to the DVD burner using the supplied USB cable. • Connection 4 . Refer to - Canon VIXIA HF R11 | VIXIA HF R10/HF R11/HF R100 Instruction Manual - Page 115
tray and repeat the operation. IMPORTANT • While the camcorder is connected to the DVD burner, do not open the memory card slot cover and do not remove the memory card. • Observe the following precautions while the ACCESS indicator on the camcorder is on or flashing. Failing to do so may result in - Canon VIXIA HF R11 | VIXIA HF R10/HF R11/HF R100 Instruction Manual - Page 116
You can complete the conversion to standard definition in the camcorder and then use the supplied software ImageMixer 3 SE to save the converted scenes and burn 'PIXELA Applications' Installation Guide. Using the software See 'ImageMixer 3 SE Software Guide' (PDF file). 116 Š External - Canon VIXIA HF R11 | VIXIA HF R10/HF R11/HF R100 Instruction Manual - Page 117
the instruction manual of the DW-100. Operating modes: Converting Scenes into Standard Definition in the Camcorder Convert high-definition scenes in the built-in memory to standard definition before creating a DVD disc. Converted scenes will be saved to the memory card. 1 Power the camcorder using - Canon VIXIA HF R11 | VIXIA HF R10/HF R11/HF R100 Instruction Manual - Page 118
Index Screen ( 52). To select the bit rate Using a higher bit rate will result in better video quality for the converted scenes. FUNC. [Bit Rate (Quality)] Desired option [Return] To embed the takes longer on a computer, we recommend using the camcorder to convert scenes. 118 Š External Connections - Canon VIXIA HF R11 | VIXIA HF R10/HF R11/HF R100 Instruction Manual - Page 119
. See also 'ImageMixer 3 SE Software Guide'. IMPORTANT • While the camcorder is connected to a computer, do not open the memory card slot cover and do not remove the memory card. • Observe the following precautions while the ACCESS indicator on the camcorder is on or flashing. Failing to do so may - Canon VIXIA HF R11 | VIXIA HF R10/HF R11/HF R100 Instruction Manual - Page 120
DVD burner, do not open the memory card slot cover and do not remove the memory card. • Observe the following precautions while the ACCESS indicator on the camcorder is on or flashing. Failing to do so may result in permanent data loss. - Do not open the memory card slot cover. - Do not disconnect - Canon VIXIA HF R11 | VIXIA HF R10/HF R11/HF R100 Instruction Manual - Page 121
for burning AVCHD discs ( 114). IMPORTANT • While the camcorder is connected to the DVD burner, do not open the memory card slot cover and do not remove the memory card. • Observe the following precautions while the ACCESS indicator on the camcorder is on or flashing. Failing to do so may result in - Canon VIXIA HF R11 | VIXIA HF R10/HF R11/HF R100 Instruction Manual - Page 122
( , ) the scene you want to play back and press to begin the playback. IMPORTANT • While the camcorder is connected to the DVD burner, do not open the memory card slot cover and do not remove the memory card. NOTES • Only AVCHD discs created with the DW-100 DVD burner can be played back using the - Canon VIXIA HF R11 | VIXIA HF R10/HF R11/HF R100 Instruction Manual - Page 123
in high definition. If the external digital video recorder has an SD memory card slot, you can use the memory card to copy your movies without connecting the camcorder. Details will vary depending on the device used so be sure to refer to the instruction manual of the digital video recorder used. In - Canon VIXIA HF R11 | VIXIA HF R10/HF R11/HF R100 Instruction Manual - Page 124
just before the desired scene. 4 Camcorder: Resume playback. • Push the joystick ( ) to hide the joystick guide. • By default, on-screen displays -Fi card, after converting your video recordings into standard definition scenes you can upload your movies wirelessly, directly from the camcorder. Refer - Canon VIXIA HF R11 | VIXIA HF R10/HF R11/HF R100 Instruction Manual - Page 125
'PIXELA Applications' Installation Guide. Using the software See 'ImageMixer 3 SE Software Guide' (PDF file). Operating modes: / Converting Scenes into Standard Definition in the Camcorder 1 Power the camcorder using the compact power adapter. 2 Insert a memory card with sufficient available space - Canon VIXIA HF R11 | VIXIA HF R10/HF R11/HF R100 Instruction Manual - Page 126
When the conversion is completed, a confirmation screen will appear. Connect the camcorder to the computer at this point ( 107) to continue uploading the connect to the computer later. To select the bit rate Using a higher bit rate will result in better video quality for the converted scenes but they - Canon VIXIA HF R11 | VIXIA HF R10/HF R11/HF R100 Instruction Manual - Page 127
's indications. • See also 'ImageMixer 3 SE Software Guide'. IMPORTANT • While the camcorder is connected to the computer, do not open the memory card slot cover and do not remove the memory card. • Observe the following precautions while the ACCESS indicator is on or flashing. Failing to do so may - Canon VIXIA HF R11 | VIXIA HF R10/HF R11/HF R100 Instruction Manual - Page 128
have installed the software supplied with your Eye-Fi card and completed all the required configuration setup in advance. Refer to the instruction manual of the Eye-Fi card. Please read the IMPORTANT section ( 128) before using an Eye-Fi card. 1 Insert your Eye-Fi card in the camcorder and make sure - Canon VIXIA HF R11 | VIXIA HF R10/HF R11/HF R100 Instruction Manual - Page 129
battery pack. You can power the camcorder using the compact power adapter so the battery pack will not be consumed. • While files are being uploaded, the camcorder . • The ACCESS indicator may flash periodically while the Eye-Fi card is in use. * This menu option will appear only when using an - Canon VIXIA HF R11 | VIXIA HF R10/HF R11/HF R100 Instruction Manual - Page 130
Additional Information This chapter contains troubleshooting advice, screen messages, handling and maintenance ], [ Soft Skin Detail] z z 65 Digital effects [ Digital Effect Off], [ Fade Trigger], [ Wipe], [ Black & White], [ Sepia] z - 65 [ Digital Effect Off], [ Black & White], [ Sepia - Canon VIXIA HF R11 | VIXIA HF R10/HF R11/HF R100 Instruction Manual - Page 131
Menu item Recording mode Photo size/quality Setting options [ High Quality 17 Mbps], [ High Quality 12 Mbps], [ Standard Play 7 Mbps], [ Long Play 5 Mbps] [ 1920x1080], [ 1600x1200], [ 640x480] [ Super Fine], [ Fine], [ Normal] z - 41 - z 87 Setup Menus FUNC. Menu (Playback Modes) (movie playback - Canon VIXIA HF R11 | VIXIA HF R10/HF R11/HF R100 Instruction Manual - Page 132
Selection] - 49 [Scenes with Faces] -- / [Convert HD SD (DVD)]2 [Slideshow] [This Scene], [Selected Scene] [Cancel], [OK] - - 116 - - - z 93 1 / Available only for photos on the memory card. 2 Available only for scenes in the built in memory. Setup Menus Camera Setup 1 ( Mode) Menu item - Canon VIXIA HF R11 | VIXIA HF R10/HF R11/HF R100 Instruction Manual - Page 133
Web. [ PF24]: 24 frames per second, progressive. Using this frame rate will give your recordings a cinematic look. When combined with the [ Cine life. • Use this function to record video only when you intend to play back your recordings on an HDTV compatible with x.v.Color, connected to the camcorder - Canon VIXIA HF R11 | VIXIA HF R10/HF R11/HF R100 Instruction Manual - Page 134
switch automatically to digital zoom when you zoom in beyond the optical zoom range. • With the digital zoom the image is digitally processed, so The image stabilizer may not be able to successfully eliminate all blur if the camcorder or the subject is moving too much. • The image stabilizer may not - Canon VIXIA HF R11 | VIXIA HF R10/HF R11/HF R100 Instruction Manual - Page 135
Programmed AE.] [Auto Slow Shutter]: The camcorder automatically uses slow shutter speeds to obtain shutter speed used: 1/30; 1/12 when the frame rate is set to [ PF24]; 1/15 when it center of the screen is magnified to help you focus manually ( 61). • Using the focus assistance will not affect - Canon VIXIA HF R11 | VIXIA HF R10/HF R11/HF R100 Instruction Manual - Page 136
not affect the recordings. [Wind Screen]: The camcorder automatically reduces the background sound of wind when ] [USB Connection Type] [Add Recordings to Disc] [Slideshow Transition] Setting options [Built-in Mem.], [Mem. Card] z - 37 [ Super Fine], [ Fine], [ Normal] z - 95 [ 2 sec], [ 4 - Canon VIXIA HF R11 | VIXIA HF R10/HF R11/HF R100 Instruction Manual - Page 137
the aperture (f-stop) and shutter speed used when recording the scene. [USB Connection Type]: Select the connection protocol to use when connecting the camcorder to an external device using the supplied USB cable. [ DVD Burner]: To connect exclusively to the optional DW-100 DVD Burner. [ Computer - Canon VIXIA HF R11 | VIXIA HF R10/HF R11/HF R100 Instruction Manual - Page 138
also adjust the volume using the joystick guide ( 45). [Demo Mode]: The demonstration mode displays the camcorder's main features. It starts automatically when the camcorder is powered with the compact power adapter if you leave it turned on without a memory card for more than 5 minutes. • To cancel - Canon VIXIA HF R11 | VIXIA HF R10/HF R11/HF R100 Instruction Manual - Page 139
screen. [Notification Sounds]: A beep will accompany some operations like turning on the camcorder, the self-timer countdown, etc. [Power Saving Mode]: In order to save power when the camcorder is powered by a battery pack, it will automatically shut off if left without any operation for 5 minutes - Canon VIXIA HF R11 | VIXIA HF R10/HF R11/HF R100 Instruction Manual - Page 140
to the TV's instruction manual. • Correct operation of the HDMI-CEC function cannot be guaranteed even when connecting the camcorder to compatible TV sets Select the photo numbering method to be used on a new memory card. Photos are automatically assigned consecutive numbers from 0101 to 9900 - Canon VIXIA HF R11 | VIXIA HF R10/HF R11/HF R100 Instruction Manual - Page 141
the date printed on photos. [Calendar Start Day]: Select the day on which the week starts for the calendar display ( 49). Information Screens Menu item / [Memory Info] [Memory Card Info] [HDMI Status] Setting options - - - zzz - zzz - zzz - Additional Information Š 141 - Canon VIXIA HF R11 | VIXIA HF R10/HF R11/HF R100 Instruction Manual - Page 142
settings currently in use. • / The total space for the built-in memory may be less than the capacity listed in Specifications ( 174). • In the [Memory Card Info] screen you can verify also the Speed Class of the memory card. [HDMI Status]: Displays a screen where you can verify the standard - Canon VIXIA HF R11 | VIXIA HF R10/HF R11/HF R100 Instruction Manual - Page 143
( 63) 4 Image effect ( 65) 5 Digital effect ( 65) 6 Recording mode ( 41) 7 Flicker reduction ( 133) 8 Pre-recording ( 59) 9 Memory operation ( 146) A q Instant AF ( 133), MF Manual focus ( 61) A a Eye-Fi wireless communication ( 128) A s Remaining battery time ( 146) A d While recording - Canon VIXIA HF R11 | VIXIA HF R10/HF R11/HF R100 Instruction Manual - Page 144
Photos S g Zoom ( 42), Exposure ( 60) S h Photo quality/size ( 87) S j Self timer ( 59) S k Number of available photos On the memory card / In the built-in memory Sl Camcorder shake warning ( Dq Face detection ( 62) Da AF frame ( 86) Ds Focus and exposure lock ( 133) 86) Playing Movies - Canon VIXIA HF R11 | VIXIA HF R10/HF R11/HF R100 Instruction Manual - Page 145
) D j Current photo / Total number of photos D k Photo number ( 139) D l Protected photo mark ( 96) F q Date and time of recording Fa File size Fs Manual exposure ( 60) Fd Photo size ( 87) Ff Aperture value Fg Evaluative light metering* Fh Shutter speed * The light metering mode cannot be changed - Canon VIXIA HF R11 | VIXIA HF R10/HF R11/HF R100 Instruction Manual - Page 146
( 57) to give your recordings a cinematic look. You can combine this frame rate with the [ Cine Mode] recording program to enhance the effect. Number of available photos in red: There is no memory card in the camcorder. in green: 6 or more photos in yellow: 1 to 5 photos in red: No more photos can - Canon VIXIA HF R11 | VIXIA HF R10/HF R11/HF R100 Instruction Manual - Page 147
a Canon Service Center if the problem persists. CHECK THIS FIRST Power supply • Is the battery charged? Is the compact power adapter correctly con- nected to the camcorder? ( 21) Recording • Did you turn the camcorder on and correctly set it to recording mode? ( 27) If you are recording on a memory - Canon VIXIA HF R11 | VIXIA HF R10/HF R11/HF R100 Instruction Manual - Page 148
camcorder is writing previous recordings onto the memory (while the ACCESS indicator is on or flashing). Wait until the camcorder has finished. - The memory camcorder will not focus. - Autofocus does not work on the subject. Focus manually a problem with the camcorder. Consult a Canon Service Center - Canon VIXIA HF R11 | VIXIA HF R10/HF R11/HF R100 Instruction Manual - Page 149
while transferring the music files. Delete the music tracks and transfer the music files again. - The transfer rate of the memory card used is too slow. Use a recommended memory card ( 35). Playback is not linked with music from a connected external audio player. - If the player's volume is - Canon VIXIA HF R11 | VIXIA HF R10/HF R11/HF R100 Instruction Manual - Page 150
scene is being recorded in the memory. This is not a malfunction. The red ON/OFF (CHG) indicator flashes rapidly ( one flash at 0.5-second intervals). - Charging has stopped because the compact power adapter or the battery pack is faulty. Con- sult a Canon Service Center. The red ON/OFF (CHG - Canon VIXIA HF R11 | VIXIA HF R10/HF R11/HF R100 Instruction Manual - Page 151
Cable is connected to the camcorder, disconnect it. - The AV OUT/ terminal is set to headphone output. Set [AV/Headphones] to [AV]. Memory Card and Accessories Cannot insert the memory card. - The memory card was not facing the correct direction. Turn the memory card over and insert it. Cannot - Canon VIXIA HF R11 | VIXIA HF R10/HF R11/HF R100 Instruction Manual - Page 152
ing] to [Reset] and insert a new memory card. [Photo Number- Cannot upload files using an Eye-Fi card. - Files cannot be uploaded when [Eye-Fi . Refer to the instruction manual of the connected TV. The computer does not recognize the camcorder even though the camcorder is connected correctly. - Canon VIXIA HF R11 | VIXIA HF R10/HF R11/HF R100 Instruction Manual - Page 153
( 160). Accessing the memory card. Do not remove the memory card. - You opened the memory card slot cover while the camcorder was accessing the memory card or the camcorder started accessing the memory card as you opened the memory card slot cover. Do not remove the memory card until this message - Canon VIXIA HF R11 | VIXIA HF R10/HF R11/HF R100 Instruction Manual - Page 154
in memory - There is a problem with the built-in memory. Contact a Canon Service Center. Cannot convert - Cannot access the memory card. Check the memory card and make sure it is inserted cor- rectly. - You inserted a MultiMedia Card (MMC) into the camcorder. Use a recommended memory card ( 35 - Canon VIXIA HF R11 | VIXIA HF R10/HF R11/HF R100 Instruction Manual - Page 155
Initialize the memory card with this camcorder ( 38). Cannot record - You cannot capture video snapshot scenes from scenes recorded or edited using another device. - There is a problem with the memory. If this message appears often without apparent reason, contact a Canon Service Center. / Cannot - Canon VIXIA HF R11 | VIXIA HF R10/HF R11/HF R100 Instruction Manual - Page 156
camcorder - The memory card in the camcorder was initialized using a computer. Initialize the memory card with this camcorder ( 38). Change the battery pack - Battery pack is exhausted. Replace or charge the battery pack. Check the memory card - Cannot access the memory card. Check the memory card - Canon VIXIA HF R11 | VIXIA HF R10/HF R11/HF R100 Instruction Manual - Page 157
] to [Reset] and delete all the photos on the memory card ( 90) or initialize it ( 38). Initialize only using the camcorder - There is a problem with the file system that prevents accessing the selected memory. Initialize the memory with this camcorder ( 38). LCD Screen has been dimmed - Hold DISP - Canon VIXIA HF R11 | VIXIA HF R10/HF R11/HF R100 Instruction Manual - Page 158
erasure. Change the position of the LOCK switch. No memory card - Insert a compatible memory card into the camcorder ( 35). No photos - There are no photos - Delete some recordings on the memory card ( the conversion to SD. 53, 90) or select the [3 Mbps] bit rate for Number of scenes already at - Canon VIXIA HF R11 | VIXIA HF R10/HF R11/HF R100 Instruction Manual - Page 159
were not recorded with this camcorder cannot be copied to the memory card. Task in progress. Do not disconnect the power source. - The camcorder is updating the memory. Wait until the operation ends and do not disconnect the compact power adapter or remove the battery pack. This photo could not - Canon VIXIA HF R11 | VIXIA HF R10/HF R11/HF R100 Instruction Manual - Page 160
AVCHD disc created with the DVD burner. Close the memory card slot cover - The memory card slot cover is open. Close the cover after correctly inserting the memory card. Connect the compact power adapter - The camcorder is being powered by the battery pack. Connect the compact power adapter to the - Canon VIXIA HF R11 | VIXIA HF R10/HF R11/HF R100 Instruction Manual - Page 161
back on and reconnect the USB cable. - You attempted to print from a memory card that contains a large number of photos. Reduce the number of photos. File of the camcorder conflict with the printer's settings. Ink absorber full - Select [Continue] to resume printing. Consult a Canon Service Center ( - Canon VIXIA HF R11 | VIXIA HF R10/HF R11/HF R100 Instruction Manual - Page 162
printer's error indicator flashes or an error message appears on the printer's operation panel, refer to the printer's instruction manual. • If you cannot solve the problem even after consulting this list and the printer's instruction manual, contact the closest Canon Service Center (refer to the - Canon VIXIA HF R11 | VIXIA HF R10/HF R11/HF R100 Instruction Manual - Page 163
device such as a computer or digital video recorder ( 111) and save them on a regular basis. This will protect your impor- tant recordings in case of damage and create more free space on the memory. Canon shall not be liable for any data loss. • Do not carry the camcorder by the LCD panel. Be - Canon VIXIA HF R11 | VIXIA HF R10/HF R11/HF R100 Instruction Manual - Page 164
may cause a poor contact between the battery pack and the camcorder. Wipe the terminals with a soft cloth. Long-term storage • Store battery packs in a dry place at temperatures no higher than 30 °C (86 °F). • To extend the battery life of the battery pack, discharge it completely before storing it - Canon VIXIA HF R11 | VIXIA HF R10/HF R11/HF R100 Instruction Manual - Page 165
• Check the direction before inserting the memory card. Forcing a mem- ory card into the slot if it is not correctly oriented may damage the memory card or the camcorder. • Do not attach any labels or stickers on the memory card. • Secure Digital (SD) memory cards have a physical switch to prevent - Canon VIXIA HF R11 | VIXIA HF R10/HF R11/HF R100 Instruction Manual - Page 166
, for example by physically damaging it to prevent the leakage of private data. If giving the camcorder or memory card to another person, initialize the built-in memory ( / only) or memory card using the [Complete Initialization] option ( 38). Fill it up with unimportant recordings, and then - Canon VIXIA HF R11 | VIXIA HF R10/HF R11/HF R100 Instruction Manual - Page 167
cloth. • Condensation may form on the surface of the screen when the temper- ature changes suddenly. Wipe it with a soft dry cloth. Condensation Moving the camcorder rapidly between hot and cold temperatures may cause condensation (water droplets) to form on its internal surfaces. Stop using the - Canon VIXIA HF R11 | VIXIA HF R10/HF R11/HF R100 Instruction Manual - Page 168
• Remove the memory card and battery pack. Then, place the camcorder in an airtight plastic bag and let it adjust gradually to temperature changes before removing it from the bag. When condensation is detected The camcorder automatically shuts off. The precise time required for water droplets to - Canon VIXIA HF R11 | VIXIA HF R10/HF R11/HF R100 Instruction Manual - Page 169
VCR/DVD recorder Optional accessories not listed below are described in more detail in the following pages. SS-600/SS-650 Shoulder Strap Memory card WS-20 Wrist Strap power cord, in Asia. ** Supplied with the camcorder; not available as an optional accessory. Additional Information Š 169 - Canon VIXIA HF R11 | VIXIA HF R10/HF R11/HF R100 Instruction Manual - Page 170
of non-genuine Canon accessories, although you may request such repairs on a chargeable basis. Battery Packs When you need extra battery packs, select the NB-2LH. The supplied BP-2L5 is not available as a separate optional accessory. CB-2LW Battery Charger Use the battery charger to charge the - Canon VIXIA HF R11 | VIXIA HF R10/HF R11/HF R100 Instruction Manual - Page 171
min. 105 min. 60 min. 60 min. 145 min. 145 min. LP 80 min. 50 min. 110 min. 105 min. 65 min. 145 min. Using a memory card Battery pack Usage time BP-2L5 NB-2LH Recording (maximum) Recording (typical)* Playback Recording (maximum) Recording (typical)* Playback FXP 75 min. 45 min. 110 min. 100 - Canon VIXIA HF R11 | VIXIA HF R10/HF R11/HF R100 Instruction Manual - Page 172
the car battery charger to charge battery packs on the go. The car battery charger's cable plugs into your car's cigarette lighter and runs off a 12-24 V DC negative ground battery. SC-2000 Soft Carrying Case A handy camcorder bag with padded compartments and plenty of space for accessories. HTC-100 - Canon VIXIA HF R11 | VIXIA HF R10/HF R11/HF R100 Instruction Manual - Page 173
Pack STV-250N Stereo Video Cable IFC-300PCU USB Cable Optional Accessories NB-2LH Battery Pack CB-2LW Battery Charger CBC-NB2 Car Battery Charger HTC-100 HDMI Cable CTC-100 Component Cable SS-650 Shoulder Strap SS-600 Shoulder Strap WS-20 Wrist Strap SC-2000 Soft Carrying Case - Canon VIXIA HF R11 | VIXIA HF R10/HF R11/HF R100 Instruction Manual - Page 174
] frame rate are converted and recorded on the memory as 60i. • Recording Media Built-in flash memory, 32 GB; SD or SDHC (SD High Capacity) memory card (not included) Built-in flash memory, 8 GB; SD or SDHC (SD High Capacity) memory card (not included) SD or SDHC (SD High Capacity) memory card (not - Canon VIXIA HF R11 | VIXIA HF R10/HF R11/HF R100 Instruction Manual - Page 175
System Autofocus (TTL + external distance sensor when set to [Instant AF]) or Manual focus (for movies only) • Minimum Focusing Distance 1 m (3.3 ft.); 1 movies) Terminals • AV OUT/ Terminal ∅ 3.5 mm minijack; output only (dual purpose terminal also for headphones stereo output) Video: 1 Vp-p / 75 Ω - Canon VIXIA HF R11 | VIXIA HF R10/HF R11/HF R100 Instruction Manual - Page 176
(camcorder body only): 270 g (9.5 oz.) CA-590 Compact Power Adapter • Power input • Rated output • Operating temperature • Dimensions • Weight 100 - 240 V AC, 50/60 Hz, 0.14 - 0.08 A 8.4 V DC, 0.6 A 0 - 40 °C (32 - 104 °F) 46 x 26 x 70 mm (1.8 x 1.0 x 2.8 in.) 95 g (3.4 oz.) BP-2L5 Battery Pack - Canon VIXIA HF R11 | VIXIA HF R10/HF R11/HF R100 Instruction Manual - Page 177
Minimum length: 1 second File extension: WAV The music data is saved in the memory under the following folder structure. / In the built-in memory: CANON MY_MUSIC MUSIC_01.WAV to MUSIC_99.WAV On the memory card: CANON PRIVATE MY_MUSIC MUSIC_01.WAV to MUSIC_99.WAV Additional Information Š 177 - Canon VIXIA HF R11 | VIXIA HF R10/HF R11/HF R100 Instruction Manual - Page 178
56 Built-in backup battery 166 C Calendar display 49 Camcorder Supplemental Disc . . card 128 F Face detection Playback 51, 72 Recording 62 Fireworks (recording program) . . . . 56 Flexible recording 27 Focus Focus assistance 135 Manual 61 Frame rate 57, 133 FUNC. menu 31, 130 H HD to SD - Canon VIXIA HF R11 | VIXIA HF R10/HF R11/HF R100 Instruction Manual - Page 179
133 Index screen 45, 47 Initialization (built-in memory*/memory card) . . . 38 J Joystick 30 Joystick guide 30 L Language 34 LCD screen 25 LCD screen by date 49 Selecting the memory* for playback 47 for recording 37 Self timer 59 Serial number 20 Setup menus 32, 132 Slideshow 93 Smart - Canon VIXIA HF R11 | VIXIA HF R10/HF R11/HF R100 Instruction Manual - Page 180
71 Transferring recordings to a computer 111 Tripod 163 Troubleshooting 147 U Uploading movies to video sharing sites 124 USB terminal 106, 109 V Video snapshot 58 Volume 45, 69, 137 W White balance 63 Wide angle 42 Wind screen 135 Z Zoom 42 Digital zoom 133 Zoom speed 42, 133 180 - Canon VIXIA HF R11 | VIXIA HF R10/HF R11/HF R100 Instruction Manual - Page 181
follow operating instructions; B) If the Equipment is defective as a result of leaking batteries, sand, dirt or water damage; C) If defects or damages are caused by the use of unauthorized parts or by service other than by Canon USA's factory service centers or authorized service facilities; D) If - Canon VIXIA HF R11 | VIXIA HF R10/HF R11/HF R100 Instruction Manual - Page 182
USA HAS BEEN ADVISED OF THE POSSIBILITY OF SUCH DAMAGES. NOR SHALL RECOVERY OF ANY KIND AGAINST CANON USA BE GREATER THAN THE PURCHASE PRICE OF THE EQUIPMENT SOLD BY CANON USA AND CAUSING THE ALLEGED DAMAGE. WITHOUT LIMITING THE FOREGOING, YOU ASSUME ALL RISK AND LIABILITY FOR LOSS, DAMAGE OR INJURY - Canon VIXIA HF R11 | VIXIA HF R10/HF R11/HF R100 Instruction Manual - Page 183
the instruction manual; ii) the use of accessories, attachments, products, supplies, parts or devices with the Equipment that do not conform to Canon specifications or that cause abnormally frequent service problems; iii) repairs or services performed by any party other than a Canon Service Facility - Canon VIXIA HF R11 | VIXIA HF R10/HF R11/HF R100 Instruction Manual - Page 184
, Kowloon, Hong Kong Tel: +852 3191 2333, Fax: +852 2428 3963 For support concerning the supplied PIXELA applications, please call PIXELA customer support (details in the 'PIXELA Applications' Installation Guide). © 2010 CANON INC. PUB. DIE-0342-000 30-2, Shimomaruko 3-chome, Ohta-ku, Tokyo 146
-
 1
1 -
 2
2 -
 3
3 -
 4
4 -
 5
5 -
 6
6 -
 7
7 -
8
-
9
-
10
-
11
-
12
-
13
-
14
-
15
-
16
-
17
-
18
-
19
-
20
-
21
-
22
-
23
-
24
-
25
-
26
-
27
-
28
-
29
-
30
-
31
-
32
-
33
-
34
-
35
-
36
-
37
-
38
-
39
-
40
-
41
-
42
-
43
-
44
-
45
-
46
-
47
-
48
-
49
-
50
-
51
-
52
-
53
-
54
-
55
-
56
-
57
-
58
-
59
-
60
-
61
-
62
-
63
-
64
-
65
-
66
-
67
-
68
-
69
-
70
-
71
-
72
-
73
-
74
-
75
-
76
-
77
-
78
-
79
-
80
-
81
-
82
-
83
-
84
-
85
-
86
-
87
-
88
-
89
-
90
-
91
-
92
-
93
-
94
-
95
-
96
-
97
-
98
-
99
-
100
-
101
-
102
-
103
-
104
-
105
-
106
-
107
-
108
-
109
-
110
-
111
-
112
-
113
-
114
-
115
-
116
-
117
-
118
-
119
-
120
-
121
-
122
-
123
-
124
-
125
-
126
-
127
-
128
-
129
-
130
-
131
-
132
-
133
-
134
-
135
-
136
-
137
-
138
-
139
-
140
-
141
-
142
-
143
-
144
-
145
-
146
-
147
-
148
-
149
-
150
-
151
-
152
-
153
-
154
-
155
-
156
-
157
-
158
-
159
-
160
-
161
-
162
-
163
-
164
-
165
-
166
-
167
-
168
-
169
-
170
-
171
-
172
-
173
-
174
-
175
-
176
-
177
-
178
-
179
-
180
-
181
-
182
-
183
-
184
 |
 |
PUB. DIE-0342-000
HD Camcorder
Instruction Manual