Canon VIXIA HF R11 VIXIA HF R10/HF R11/HF R100 Instruction Manual - Page 125
onverting Scenes into Standard Definition in the, amcorder
 |
View all Canon VIXIA HF R11 manuals
Add to My Manuals
Save this manual to your list of manuals |
Page 125 highlights
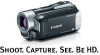
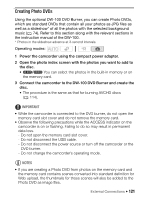
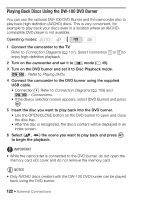
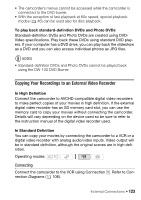
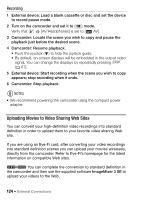
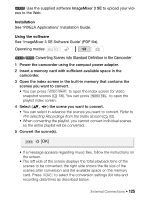
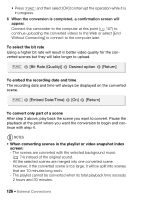
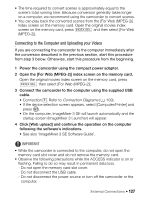
Use the supplied software ImageMixer 3 SE to upload your videos to the Web. Installation See 'PIXELA Applications' Installation Guide. Using the software See 'ImageMixer 3 SE Software Guide' (PDF file). Operating modes: / Converting Scenes into Standard Definition in the Camcorder 1 Power the camcorder using the compact power adapter. 2 Insert a memory card with sufficient available space in the camcorder. 3 Open the index screen in the built-in memory that contains the scenes you want to convert. • You can press VIDEO SNAP to open the index screen for video snapshot scenes ( 58). You can press INDEX SEL. to open the playlist index screen. 4 Select ( , ) the scene you want to convert. • You can select in advance the scenes you want to convert. Refer to Pre-selecting Recordings from the Index Screen ( 52). • When converting the playlist, you cannot convert individual scenes so the entire playlist will be converted. 5 Convert the scene(s). WEB [OK] • If a message appears regarding music files, follow the instructions on the screen. • The left side of the screen displays the total playback time of the scenes to be converted; the right side shows the file size of the scenes after conversion and the available space on the memory card. Press FUNC. to select the conversion settings (bit rate and recording date/time) as described below. External Connections Š 125
-
 1
1 -
2
-
3
-
4
-
5
-
6
-
7
-
8
-
9
-
10
-
11
-
12
-
13
-
14
-
15
-
16
-
17
-
18
-
19
-
20
-
21
-
22
-
23
-
24
-
25
-
26
-
27
-
28
-
29
-
30
-
31
-
32
-
33
-
34
-
35
-
36
-
37
-
38
-
39
-
40
-
41
-
42
-
43
-
44
-
45
-
46
-
47
-
48
-
49
-
50
-
51
-
52
-
53
-
54
-
55
-
56
-
57
-
58
-
59
-
60
-
61
-
62
-
63
-
64
-
65
-
66
-
67
-
68
-
69
-
70
-
71
-
72
-
73
-
74
-
75
-
76
-
77
-
78
-
79
-
80
-
81
-
82
-
83
-
84
-
85
-
86
-
87
-
88
-
89
-
90
-
91
-
92
-
93
-
94
-
95
-
96
-
97
-
98
-
99
-
100
-
101
-
102
-
103
-
104
-
105
-
106
-
107
-
108
-
109
-
110
-
111
-
112
-
113
-
114
-
115
-
116
-
117
-
118
-
119
-
 120
120 -
 121
121 -
 122
122 -
 123
123 -
 124
124 -
 125
125 -
 126
126 -
 127
127 -
 128
128 -
 129
129 -
 130
130 -
131
-
132
-
133
-
134
-
135
-
136
-
137
-
138
-
139
-
140
-
141
-
142
-
143
-
144
-
145
-
146
-
147
-
148
-
149
-
150
-
151
-
152
-
153
-
154
-
155
-
156
-
157
-
158
-
159
-
160
-
161
-
162
-
163
-
164
-
165
-
166
-
167
-
168
-
169
-
170
-
171
-
172
-
173
-
174
-
175
-
176
-
177
-
178
-
179
-
180
-
181
-
182
-
183
-
184
 |
 |