Compaq AP500 Reference Guide - Page 92
Upgrading the Processor
 |
UPC - 743172574732
View all Compaq AP500 manuals
Add to My Manuals
Save this manual to your list of manuals |
Page 92 highlights
10-3 Figure 10-3. Installing a heatsink bridge 4. Reassemble the workstation and connect the power cord to the grounded AC outlet and to the workstation. IMPORTANT: When replacing the side access panel, be sure to tighten all four thumbscrews. Upgrading the Processor To upgrade the processor, follow the installation procedures included with the processor upgrade kit. Compaq Professional Workstation AP500 Reference Guide
-
 1
1 -
2
-
3
-
4
-
5
-
6
-
7
-
8
-
9
-
10
-
11
-
12
-
13
-
14
-
15
-
16
-
17
-
18
-
19
-
20
-
21
-
22
-
23
-
24
-
25
-
26
-
27
-
28
-
29
-
30
-
31
-
32
-
33
-
34
-
35
-
36
-
37
-
38
-
39
-
40
-
41
-
42
-
43
-
44
-
45
-
46
-
47
-
48
-
49
-
50
-
51
-
52
-
53
-
54
-
55
-
56
-
57
-
58
-
59
-
60
-
61
-
62
-
63
-
64
-
65
-
66
-
67
-
68
-
69
-
70
-
71
-
72
-
73
-
74
-
75
-
76
-
77
-
78
-
79
-
80
-
81
-
82
-
83
-
84
-
85
-
86
-
 87
87 -
 88
88 -
 89
89 -
 90
90 -
 91
91 -
 92
92 -
 93
93 -
 94
94 -
 95
95 -
 96
96 -
 97
97 -
98
-
99
-
100
-
101
-
102
-
103
-
104
-
105
-
106
-
107
-
108
-
109
-
110
-
111
-
112
-
113
-
114
-
115
-
116
-
117
-
118
-
119
-
120
-
121
-
122
-
123
-
124
-
125
-
126
-
127
-
128
-
129
-
130
-
131
-
132
-
133
-
134
-
135
-
136
-
137
-
138
-
139
-
140
 |
 |
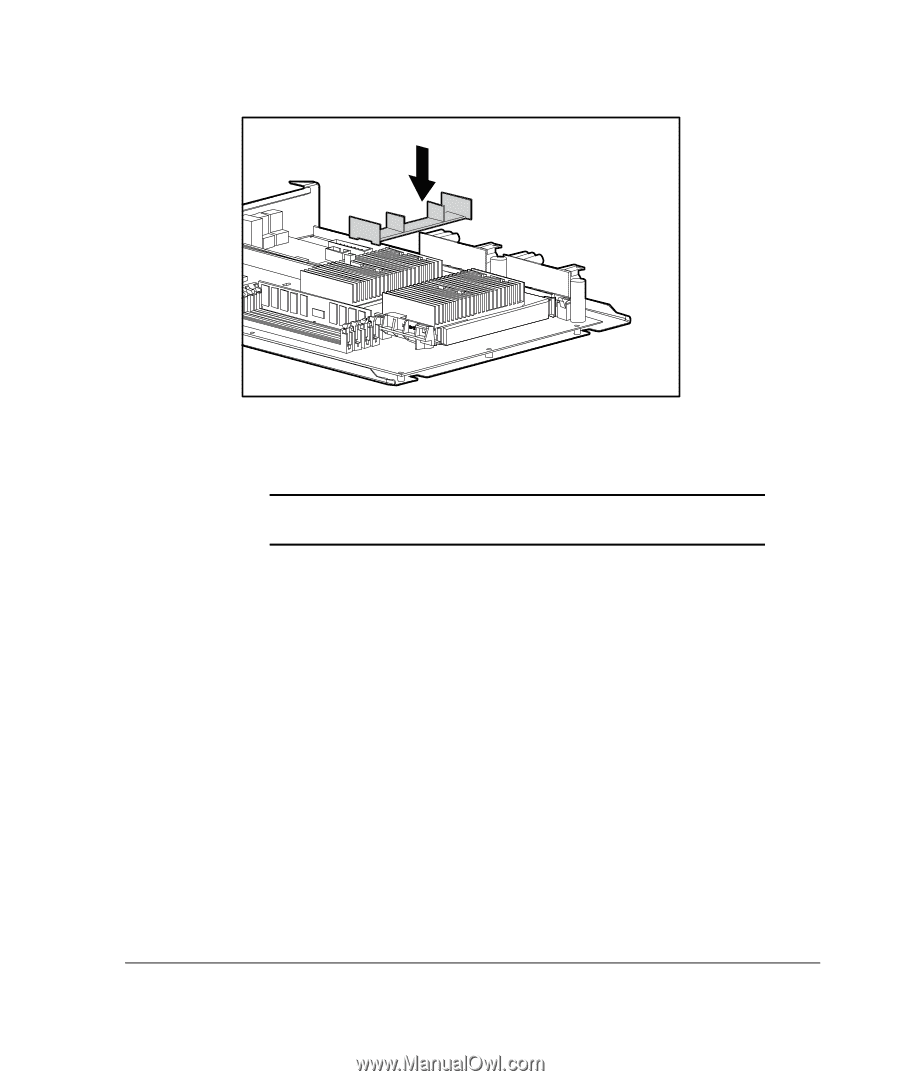
10-3
Compaq Professional Workstation AP500 Reference Guide
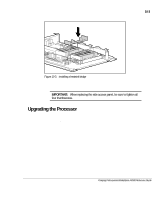
Figure 10-3.
Installing a heatsink bridge
4.
Reassemble the workstation and connect the power cord to the
grounded AC outlet and to the workstation.
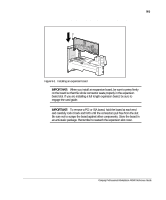
IMPORTANT:
When replacing the side access panel, be sure to tighten all
four thumbscrews.
Upgrading the Processor
To upgrade the processor, follow the installation procedures included with the
processor upgrade kit.