Dell 2355DN User Guide - Page 145
SmarThru Office, Select Scanner, Select Profile, Scan Settings, Scan
 |
View all Dell 2355DN manuals
Add to My Manuals
Save this manual to your list of manuals |
Page 145 highlights
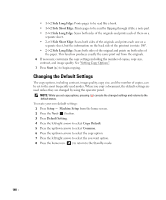
3 Scan Setting window opens. ➊ ➋ ➌ ➍ Property Description ➊ Select Scanner Allows you to select the scanner. ➋ Select Profile Allows you to save settings frequently used for future use. Click New Profile to save the setting. ➌ Scan Settings Allows you to customize settings for Scan Size and Paper Source. ❹ Scan To Allows you to customize settings for File Name and location to send scanned data. NOTE: Click Advanced button to set more scan options. 4 Set scan settings and click Scan. Printing 1 Click the SmarThru icon in the tray area of the Windows taskbar to active the SmarThru Office launcher. 2 Click the printing icon to open the faxing window. 144
-
 1
1 -
2
-
3
-
4
-
5
-
6
-
7
-
8
-
9
-
10
-
11
-
12
-
13
-
14
-
15
-
16
-
17
-
18
-
19
-
20
-
21
-
22
-
23
-
24
-
25
-
26
-
27
-
28
-
29
-
30
-
31
-
32
-
33
-
34
-
35
-
36
-
37
-
38
-
39
-
40
-
41
-
42
-
43
-
44
-
45
-
46
-
47
-
48
-
49
-
50
-
51
-
52
-
53
-
54
-
55
-
56
-
57
-
58
-
59
-
60
-
61
-
62
-
63
-
64
-
65
-
66
-
67
-
68
-
69
-
70
-
71
-
72
-
73
-
74
-
75
-
76
-
77
-
78
-
79
-
80
-
81
-
82
-
83
-
84
-
85
-
86
-
87
-
88
-
89
-
90
-
91
-
92
-
93
-
94
-
95
-
96
-
97
-
98
-
99
-
100
-
101
-
102
-
103
-
104
-
105
-
106
-
107
-
108
-
109
-
110
-
111
-
112
-
113
-
114
-
115
-
116
-
117
-
118
-
119
-
120
-
121
-
122
-
123
-
124
-
125
-
126
-
127
-
128
-
129
-
130
-
131
-
132
-
133
-
134
-
135
-
136
-
137
-
138
-
139
-
 140
140 -
 141
141 -
 142
142 -
 143
143 -
 144
144 -
 145
145 -
 146
146 -
 147
147 -
 148
148 -
 149
149 -
 150
150 -
151
-
152
-
153
-
154
-
155
-
156
-
157
-
158
-
159
-
160
-
161
-
162
-
163
-
164
-
165
-
166
-
167
-
168
-
169
-
170
-
171
-
172
-
173
-
174
-
175
-
176
-
177
-
178
-
179
-
180
-
181
-
182
-
183
-
184
-
185
-
186
-
187
-
188
-
189
-
190
-
191
-
192
-
193
-
194
-
195
-
196
-
197
-
198
-
199
-
200
-
201
-
202
-
203
-
204
-
205
-
206
-
207
-
208
-
209
-
210
-
211
-
212
-
213
-
214
-
215
-
216
-
217
-
218
-
219
-
220
-
221
-
222
-
223
-
224
-
225
-
226
-
227
-
228
-
229
-
230
-
231
-
232
-
233
-
234
-
235
-
236
-
237
-
238
-
239
-
240
-
241
-
242
-
243
-
244
-
245
-
246
-
247
-
248
-
249
-
250
-
251
-
252
-
253
-
254
-
255
-
256
-
257
-
258
-
259
-
260
-
261
-
262
-
263
-
264
-
265
-
266
-
267
-
268
-
269
-
270
-
271
-
272
-
273
-
274
-
275
-
276
-
277
-
278
-
279
-
280
-
281
-
282
-
283
-
284
-
285
-
286
-
287
-
288
-
289
-
290
-
291
-
292
-
293
-
294
-
295
-
296
-
297
-
298
-
299
-
300
-
301
-
302
-
303
-
304
-
305
-
306
-
307
-
308
-
309
-
310
-
311
-
312
-
313
-
314
-
315
-
316
-
317
-
318
-
319
-
320
 |
 |

144
3
Scan Setting window opens.
NOTE:
Click
Advanced
button to set more scan options.
4
Set scan settings and click Scan.
Printing
1
Click the SmarThru icon
in the tray area of the Windows taskbar to active the
SmarThru Office
launcher.
2
Click the printing icon
to open the faxing window.
Property
Description
Select Scanner
Allows you to select the scanner.
Select Profile
Allows you to save settings frequently used for future use. Click New
Profile to save the setting.
Scan Settings
Allows you to customize settings for Scan Size and Paper Source.
Scan To
Allows you to customize settings for File Name and location to send
scanned data.
➍
➋
➌
➊
➊
➋
➌
❹