Epson Perfection 1640SU Office Scanner Basics - Page 23
If You’re Using a Macintosh . . ., double-click
 |
View all Epson Perfection 1640SU Office manuals
Add to My Manuals
Save this manual to your list of manuals |
Page 23 highlights
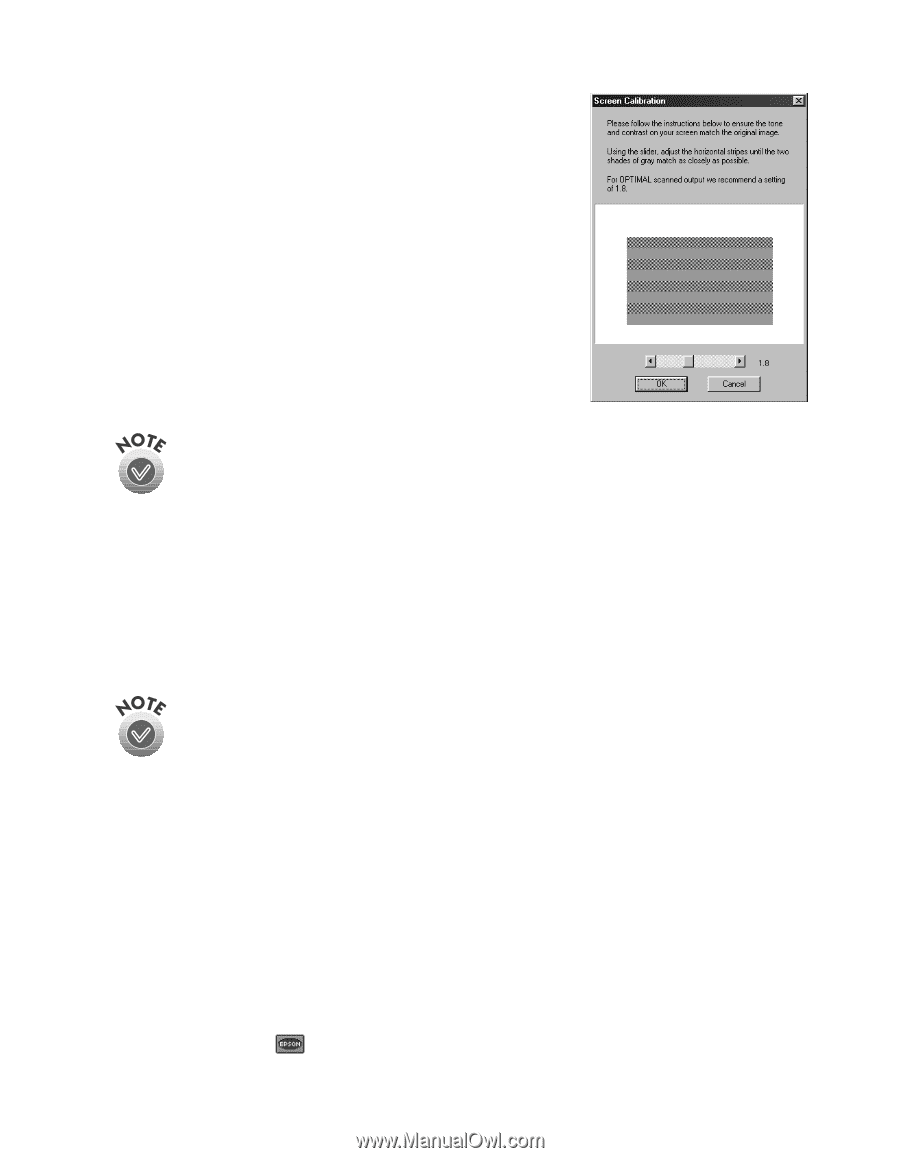
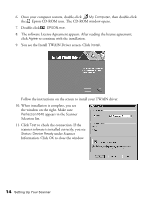
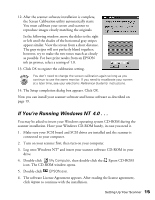
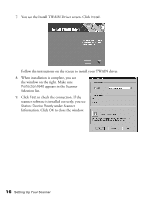
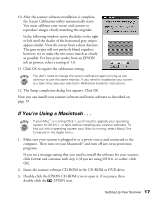
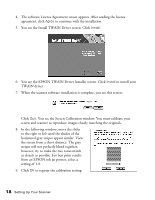
10. After the scanner software installation is complete, the Screen Calibration utility automatically starts. You must calibrate your screen and scanner to reproduce images closely matching the originals. In the following window, move the slider to the right or left until the shades of the horizontal gray stripes appear similar. View the screen from a short distance. The gray stripes will not perfectly blend together; however, try to make the two tones match as closely as possible. For best print results from an EPSON ink jet printer, select a setting of 1.8. 11. Click OK to register the calibration setting. You don't need to change the screen calibration again so long as you continue to use the same monitor. If you need to recalibrate your screen at a later time, see your electronic Reference Guide for instructions. 12. The Setup completion dialog box appears. Click OK. Now you can install your scanner software and bonus software as described on page 19. If You're Using a Macintosh . . . If your iMac™ is running OS 8.1, you'll need to upgrade your operating system to OS 8.5.1, or later, before installing your scanner software. To find out which operating system your iMac is running, select About This Computer in the Apple menu. 1. Make sure your scanner is plugged in to a power source and connected to the computer. Then turn on your Macintosh® and turn off any virus protection programs. If you see a message stating that you need to install the software for your scanner, click Cancel and continue with step 2 (if you are using OS 8.6, or earlier, click OK). 2. Insert the scanner software CD-ROM in the CD-ROM or DVD drive. 3. Double-click the EPSON CD-ROM icon to open it, if necessary, then double-click the EPSON icon. Setting Up Your Scanner 17
-
 1
1 -
2
-
3
-
4
-
5
-
6
-
7
-
8
-
9
-
10
-
11
-
12
-
13
-
14
-
15
-
16
-
17
-
 18
18 -
 19
19 -
 20
20 -
 21
21 -
 22
22 -
 23
23 -
 24
24 -
 25
25 -
 26
26 -
 27
27 -
 28
28 -
29
-
30
-
31
-
32
-
33
-
34
-
35
-
36
-
37
-
38
-
39
-
40
-
41
-
42
-
43
-
44
-
45
-
46
-
47
-
48
-
49
-
50
-
51
-
52
-
53
-
54
-
55
-
56
-
57
-
58
-
59
-
60
-
61
-
62
-
63
-
64
-
65
-
66
-
67
-
68
-
69
-
70
-
71
-
72
-
73
-
74
-
75
-
76
-
77
-
78
-
79
-
80
-
81
-
82
-
83
-
84
-
85
-
86
-
87
-
88
-
89
-
90
-
91
-
92
 |
 |