Epson Perfection 1640SU Office Scanner Basics - Page 25
Install the Scanner and Bonus Software
 |
View all Epson Perfection 1640SU Office manuals
Add to My Manuals
Save this manual to your list of manuals |
Page 25 highlights
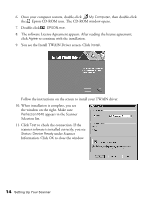
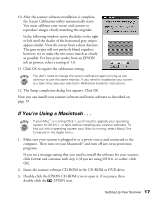
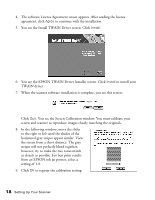
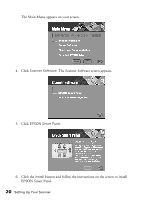
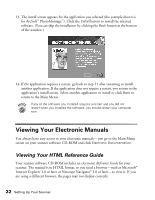
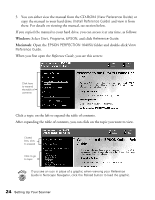
You will not need to change the screen calibration again as long as you continue to use the same monitor. If you need to recalibrate your screen at a later time, select Screen Calibration in the EPSON Scanner folder. 10. Restart your Macintosh. 11. After your computer restarts, install your scanner software and bonus software as described below. Install the Scanner and Bonus Software Before you begin, be sure any virus protection programs are turned off. Be sure to install EPSON Smart Panel,™ ScanSoft™ TextBridge® Pro, and Adobe PhotoDeluxe to take advantage of your scanner's ] Start button. Adobe PhotoDeluxe is included on a separate CD-ROM. Follow these steps to install PhotoDeluxe: In Windows, insert the PhotoDeluxe CD-ROM in your drive, double-click My Computer, then double-click the CD-ROM icon. Open the English\Install folder and double-click Setup.exe. Follow the instructions on the screen and then restart your computer. On a Macintosh, insert the CD-ROM in your drive and double-click the CD-ROM icon, if necessary. Double-click the English icon, then double-click the Adobe PhotoDeluxe Installer icon. Follow the steps on the screen and then restart your computer. Follow these steps: 1. Insert the scanner software CD-ROM in your CD-ROM or DVD drive. 2. Windows: Double-click My Computer, then double-click the CD-ROM icon. The CD-ROM window opens. Double-click EPSON.exe. Macintosh: Double-click the EPSON CD-ROM icon to open it, if necessary, then double-click the EPSON icon. 3. The EPSON screen appears. If the software License Agreement screen appears, read the license agreement and click Agree to continue with the installation. Setting Up Your Scanner 19
-
 1
1 -
2
-
3
-
4
-
5
-
6
-
7
-
8
-
9
-
10
-
11
-
12
-
13
-
14
-
15
-
16
-
17
-
18
-
19
-
 20
20 -
 21
21 -
 22
22 -
 23
23 -
 24
24 -
 25
25 -
 26
26 -
 27
27 -
 28
28 -
 29
29 -
 30
30 -
31
-
32
-
33
-
34
-
35
-
36
-
37
-
38
-
39
-
40
-
41
-
42
-
43
-
44
-
45
-
46
-
47
-
48
-
49
-
50
-
51
-
52
-
53
-
54
-
55
-
56
-
57
-
58
-
59
-
60
-
61
-
62
-
63
-
64
-
65
-
66
-
67
-
68
-
69
-
70
-
71
-
72
-
73
-
74
-
75
-
76
-
77
-
78
-
79
-
80
-
81
-
82
-
83
-
84
-
85
-
86
-
87
-
88
-
89
-
90
-
91
-
92
 |
 |