Epson Perfection 1640SU Office Scanner Basics - Page 40
Scanning and Printing Photos
 |
View all Epson Perfection 1640SU Office manuals
Add to My Manuals
Save this manual to your list of manuals |
Page 40 highlights
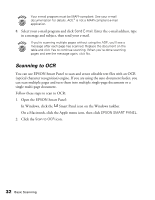
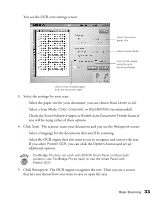
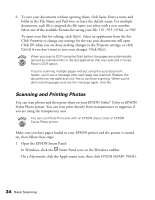
6. To save your documents without opening them, click Save. Enter a name and folder in the File Name and Path box, or leave the default name. For multiple documents, each file is assigned the file name you select with a new number. Select one of the available formats for saving your file: TXT, RTF, HTML, or PDF. To open your files for editing, click Open. Select an application from the list. Click Property to change any settings for the way your documents will open. Click OK when you are done making changes to the Property settings, or click Cancel if you don't want to save your changes. Click Open. When you scan to OCR using the Start button, the pages are automatically opened as individual files in the last application that was selected in Smart Panel's OCR option. If you're scanning multiple pages without using the auto document feeder, you'll see a message after each page has scanned. Replace the document on the table and click Yes to continue scanning. When you're done scanning pages and see the message again, click No. Scanning and Printing Photos You can scan photos and then print them on your EPSON Stylus® Color or EPSON Stylus Photo printer. You can even print directly from transparencies or negatives if you are using the transparency unit. You can use Photo Print only with an EPSON Stylus Color or EPSON Stylus Photo printer. Make sure you have paper loaded in your EPSON printer and the printer is turned on, then follow these steps: 1. Open the EPSON Smart Panel: In Windows, click the Smart Panel icon on the Windows taskbar. On a Macintosh, click the Apple menu icon, then click EPSON SMART PANEL. 34 Basic Scanning
-
 1
1 -
2
-
3
-
4
-
5
-
6
-
7
-
8
-
9
-
10
-
11
-
12
-
13
-
14
-
15
-
16
-
17
-
18
-
19
-
20
-
21
-
22
-
23
-
24
-
25
-
26
-
27
-
28
-
29
-
30
-
31
-
32
-
33
-
34
-
 35
35 -
 36
36 -
 37
37 -
 38
38 -
 39
39 -
 40
40 -
 41
41 -
 42
42 -
 43
43 -
 44
44 -
 45
45 -
46
-
47
-
48
-
49
-
50
-
51
-
52
-
53
-
54
-
55
-
56
-
57
-
58
-
59
-
60
-
61
-
62
-
63
-
64
-
65
-
66
-
67
-
68
-
69
-
70
-
71
-
72
-
73
-
74
-
75
-
76
-
77
-
78
-
79
-
80
-
81
-
82
-
83
-
84
-
85
-
86
-
87
-
88
-
89
-
90
-
91
-
92
 |
 |