Epson Perfection 1640SU Office Scanner Basics - Page 41
From the Print Sizes list, select a size for the image to print. You can select
 |
View all Epson Perfection 1640SU Office manuals
Add to My Manuals
Save this manual to your list of manuals |
Page 41 highlights
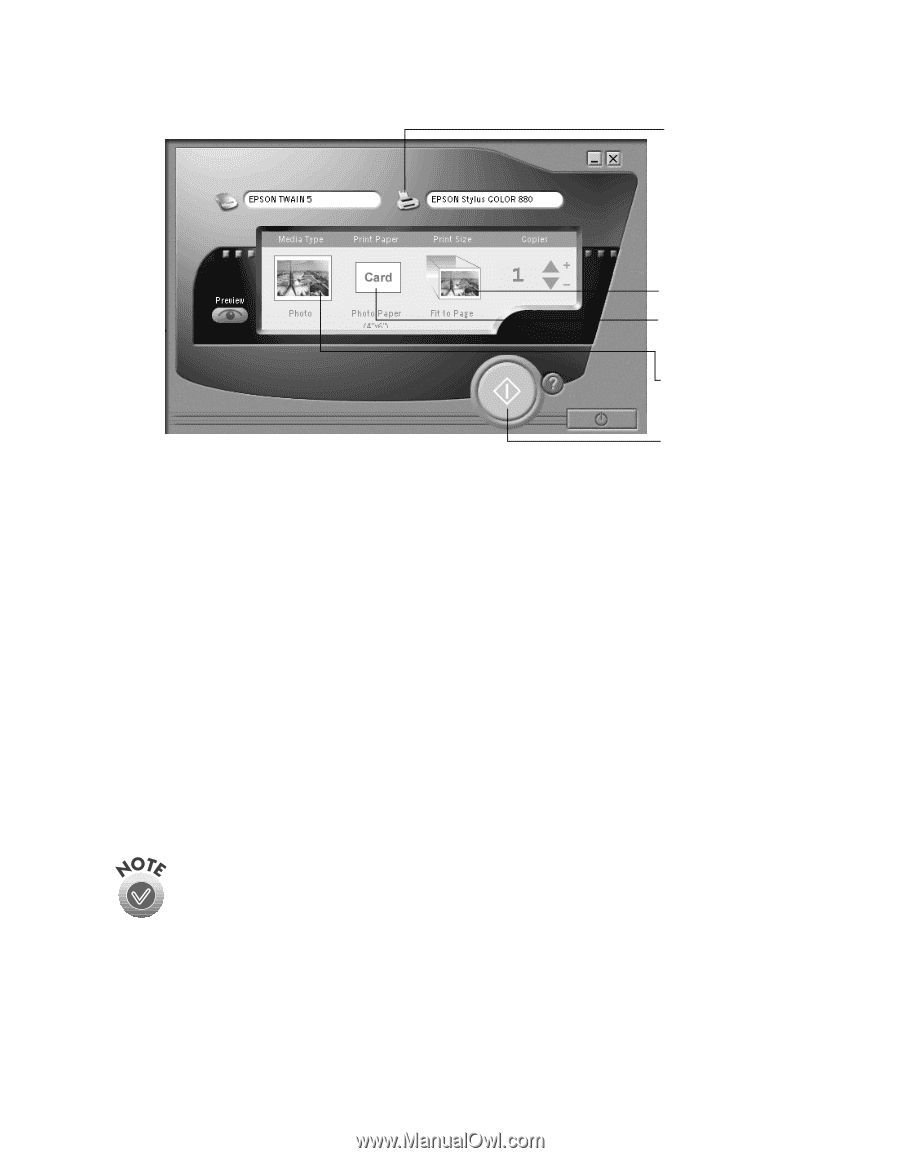
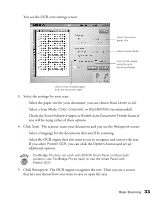
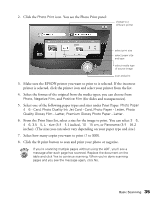
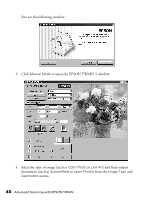
2. Click the Photo Print icon. You see the Photo Print panel: change to a different printer select print size select paper size and type select media type of source image scan and print 3. Make sure the EPSON printer you want to print to is selected. If the incorrect printer is selected, click the printer icon and select your printer from the list. 4. Select the format of the original from the media types; you can choose from Photo, Negative Film, and Positive Film (for slides and transparencies). 5. Select one of the following paper types and sizes under Print Paper: Photo Paper 4 × 6 - Card, Photo Quality Ink Jet Card - Card, Photo Paper - Letter, Photo Quality Glossy Film - Letter, Premium Glossy Photo Paper - Letter. 6. From the Print Sizes list, select a size for the image to print. You can select 3 × 5, 4 × 6, 3.5 × 5, L - size (3.5 × 5.1 inches), 10 × 15 cm, or Panorama (3.5 × 10.2 inches). (The sizes you can select vary depending on your paper type and size.) 7. Select how many copies you want to print (1 to 999). 8. Click the x print button to scan and print your photo or negative. If you're scanning multiple pages without using the ADF, you'll see a message after each page has scanned. Replace the document on the table and click Yes to continue scanning. When you're done scanning pages and you see the message again, click No. Basic Scanning 35
-
 1
1 -
2
-
3
-
4
-
5
-
6
-
7
-
8
-
9
-
10
-
11
-
12
-
13
-
14
-
15
-
16
-
17
-
18
-
19
-
20
-
21
-
22
-
23
-
24
-
25
-
26
-
27
-
28
-
29
-
30
-
31
-
32
-
33
-
34
-
35
-
 36
36 -
 37
37 -
 38
38 -
 39
39 -
 40
40 -
 41
41 -
 42
42 -
 43
43 -
 44
44 -
 45
45 -
 46
46 -
47
-
48
-
49
-
50
-
51
-
52
-
53
-
54
-
55
-
56
-
57
-
58
-
59
-
60
-
61
-
62
-
63
-
64
-
65
-
66
-
67
-
68
-
69
-
70
-
71
-
72
-
73
-
74
-
75
-
76
-
77
-
78
-
79
-
80
-
81
-
82
-
83
-
84
-
85
-
86
-
87
-
88
-
89
-
90
-
91
-
92
 |
 |