HP J4550 User Guide - Page 64
Use reports, Print fax confirmation reports - review
 |
UPC - 883585774142
View all HP J4550 manuals
Add to My Manuals
Save this manual to your list of manuals |
Page 64 highlights
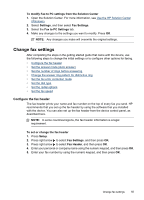
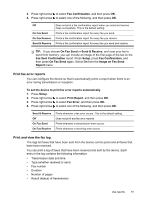
Chapter 6 5. Press right arrow to select Run Fax Test, and then press OK. The device displays the status of the test on the display and prints a report. 6. Review the report. • If the test passes and you are still having problems faxing, check the fax settings listed in the report to verify the settings are correct. A blank or incorrect fax setting can cause problems faxing. • If the test fails, review the report for more information on how to fix any problems found. Use reports You can set up the device to print error reports and confirmation reports automatically for each fax you send and receive. You can also manually print system reports as required; these reports provide useful system information about the device. By default, the device is set to print a report only if there is a problem sending or receiving a fax. A confirmation message that indicates whether a fax was successfully sent appears briefly on the control-panel display after each transaction. • Print fax confirmation reports • Print fax error reports • Print and view the fax log Print fax confirmation reports If you require printed confirmation that your faxes were successfully sent, follow these instructions to enable fax confirmation before sending any faxes. Select either On Fax Send or Send & Receive. The default fax confirmation setting is Off. This means that a confirmation report is not printed for each fax sent or received. A confirmation message indicating whether a fax was successfully sent appears briefly on the control-panel display after each transaction. To enable fax confirmation 1. Press Setup. 2. Press right arrow to select Print Report, and then press OK. 60 Fax
-
 1
1 -
2
-
3
-
4
-
5
-
6
-
7
-
8
-
9
-
10
-
11
-
12
-
13
-
14
-
15
-
16
-
17
-
18
-
19
-
20
-
21
-
22
-
23
-
24
-
25
-
26
-
27
-
28
-
29
-
30
-
31
-
32
-
33
-
34
-
35
-
36
-
37
-
38
-
39
-
40
-
41
-
42
-
43
-
44
-
45
-
46
-
47
-
48
-
49
-
50
-
51
-
52
-
53
-
54
-
55
-
56
-
57
-
58
-
 59
59 -
 60
60 -
 61
61 -
 62
62 -
 63
63 -
 64
64 -
 65
65 -
 66
66 -
 67
67 -
 68
68 -
 69
69 -
70
-
71
-
72
-
73
-
74
-
75
-
76
-
77
-
78
-
79
-
80
-
81
-
82
-
83
-
84
-
85
-
86
-
87
-
88
-
89
-
90
-
91
-
92
-
93
-
94
-
95
-
96
-
97
-
98
-
99
-
100
-
101
-
102
-
103
-
104
-
105
-
106
-
107
-
108
-
109
-
110
-
111
-
112
-
113
-
114
-
115
-
116
-
117
-
118
-
119
-
120
-
121
-
122
-
123
-
124
-
125
-
126
-
127
-
128
-
129
-
130
-
131
-
132
-
133
-
134
-
135
-
136
-
137
-
138
-
139
-
140
-
141
-
142
-
143
-
144
-
145
-
146
-
147
-
148
-
149
-
150
-
151
-
152
-
153
-
154
-
155
-
156
-
157
-
158
-
159
-
160
-
161
-
162
-
163
-
164
-
165
-
166
-
167
-
168
-
169
-
170
-
171
-
172
-
173
-
174
-
175
-
176
-
177
-
178
-
179
-
180
-
181
-
182
 |
 |