HP StorageWorks 4000s NAS 4000s and 9000s Administration Guide - Page 147
Publishing an Existing Share in DFS, Removing a Published Share from DFS, Shares, Publish in DFS
 |
View all HP StorageWorks 4000s manuals
Add to My Manuals
Save this manual to your list of manuals |
Page 147 highlights
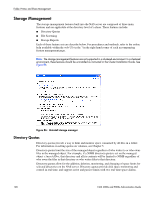
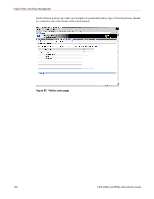
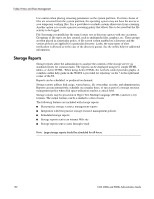
Folder, Printer, and Share Management Figure 85: DFS share example, mapped drive In this case, Documentation exists on G:\documentation, Technical Specs exists on G:\technical specs and Project Info exists on C:\project info on the local machine but they are all accessible via \\DOCNASBOX\engineering. Publishing an Existing Share in DFS To enable an existing shares for DFS, perform the following steps: 1. Select Shares from the WebUI. 2. Select the target share from the table and select Publish in DFS. 3. Enter the name of the DFS root to publish the share too. 4. Click OK. The share will appear in the DFS underneath the DFS root. Removing a Published Share from DFS Once a share is published in DFS, it may be removed from the virtual namespace via the Shares Property page. To remove a share from DFS perform the following steps: 1. Select Shares from the WebUI. 2. Select the target share from the table and select properties. 3. Uncheck the box entitled Publish to DFS root. 4. Click OK. The share will no longer appear in the DFS. NAS 4000s and 9000s Administration Guide 147
-
 1
1 -
2
-
3
-
4
-
5
-
6
-
7
-
8
-
9
-
10
-
11
-
12
-
13
-
14
-
15
-
16
-
17
-
18
-
19
-
20
-
21
-
22
-
23
-
24
-
25
-
26
-
27
-
28
-
29
-
30
-
31
-
32
-
33
-
34
-
35
-
36
-
37
-
38
-
39
-
40
-
41
-
42
-
43
-
44
-
45
-
46
-
47
-
48
-
49
-
50
-
51
-
52
-
53
-
54
-
55
-
56
-
57
-
58
-
59
-
60
-
61
-
62
-
63
-
64
-
65
-
66
-
67
-
68
-
69
-
70
-
71
-
72
-
73
-
74
-
75
-
76
-
77
-
78
-
79
-
80
-
81
-
82
-
83
-
84
-
85
-
86
-
87
-
88
-
89
-
90
-
91
-
92
-
93
-
94
-
95
-
96
-
97
-
98
-
99
-
100
-
101
-
102
-
103
-
104
-
105
-
106
-
107
-
108
-
109
-
110
-
111
-
112
-
113
-
114
-
115
-
116
-
117
-
118
-
119
-
120
-
121
-
122
-
123
-
124
-
125
-
126
-
127
-
128
-
129
-
130
-
131
-
132
-
133
-
134
-
135
-
136
-
137
-
138
-
139
-
140
-
141
-
 142
142 -
 143
143 -
 144
144 -
 145
145 -
 146
146 -
 147
147 -
 148
148 -
 149
149 -
 150
150 -
 151
151 -
 152
152 -
153
-
154
-
155
-
156
-
157
-
158
-
159
-
160
-
161
-
162
-
163
-
164
-
165
-
166
-
167
-
168
-
169
-
170
-
171
-
172
-
173
-
174
-
175
-
176
-
177
-
178
-
179
-
180
-
181
-
182
-
183
-
184
-
185
-
186
-
187
-
188
-
189
-
190
-
191
-
192
-
193
-
194
-
195
-
196
-
197
-
198
-
199
-
200
-
201
-
202
-
203
-
204
-
205
-
206
-
207
-
208
-
209
-
210
-
211
-
212
-
213
-
214
-
215
-
216
-
217
-
218
-
219
-
220
-
221
-
222
-
223
-
224
-
225
-
226
-
227
-
228
-
229
-
230
-
231
-
232
-
233
-
234
-
235
-
236
-
237
-
238
-
239
-
240
-
241
-
242
-
243
-
244
-
245
-
246
 |
 |
