HP StorageWorks 4000s NAS 4000s and 9000s Administration Guide - Page 39
Installing the HP Network Teaming Utility, Login, Ctrl-Alt-Del, NIC Team Setup, Install, Close
 |
View all HP StorageWorks 4000s manuals
Add to My Manuals
Save this manual to your list of manuals |
Page 39 highlights
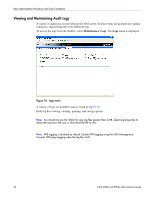
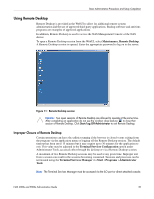
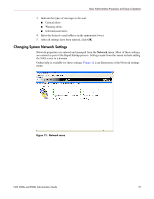
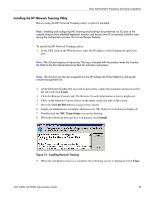
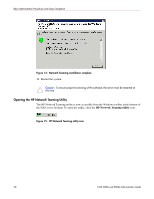
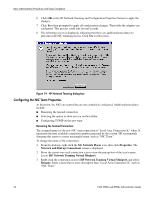
Basic Administrative Procedures and Setup Completion Installing the HP Network Teaming Utility Before using the HP Network Teaming utility, it must be installed. Note: Installing and configuring NIC teaming should always be performed via iLO port or the console using a direct attached keyboard, monitor, and mouse since IP connections could be reset during the configuration process. Do not use Remote Desktop. To install the HP Network Teaming utility: 1. In the URL field of the Web browser, enter the IP address of the Integrated Lights-Out port. Note: The iLO port requires a license key. The key is included with the product inside the Country Kit. Refer to the iLO Advanced License Pack for activation instructions. Note: The iLO port can also be accessed from the HP Utilities tab of the WebUI by clicking the remote management link. 2. At the Integrated Lights-Out Account Login screen, supply the username and password for the iLO and click Login. 3. Click the Remote Console tab. The Remote Console Information screen is displayed. 4. Click on the Remote Console choice in the menu on the left side of the screen. 5. Press the Ctrl-Alt-Del button to login to the console. 6. Supply an administrator username and password. The NAS server desktop is displayed. 7. Double-click the NIC Team Setup icon on the desktop. 8. When the following message box is displayed, click Install. Figure 13: Installing Network Teaming 9. When the installation process is complete, the following screen is displayed. Click Close. NAS 4000s and 9000s Administration Guide 39
-
 1
1 -
2
-
3
-
4
-
5
-
6
-
7
-
8
-
9
-
10
-
11
-
12
-
13
-
14
-
15
-
16
-
17
-
18
-
19
-
20
-
21
-
22
-
23
-
24
-
25
-
26
-
27
-
28
-
29
-
30
-
31
-
32
-
33
-
 34
34 -
 35
35 -
 36
36 -
 37
37 -
 38
38 -
 39
39 -
 40
40 -
 41
41 -
 42
42 -
 43
43 -
 44
44 -
45
-
46
-
47
-
48
-
49
-
50
-
51
-
52
-
53
-
54
-
55
-
56
-
57
-
58
-
59
-
60
-
61
-
62
-
63
-
64
-
65
-
66
-
67
-
68
-
69
-
70
-
71
-
72
-
73
-
74
-
75
-
76
-
77
-
78
-
79
-
80
-
81
-
82
-
83
-
84
-
85
-
86
-
87
-
88
-
89
-
90
-
91
-
92
-
93
-
94
-
95
-
96
-
97
-
98
-
99
-
100
-
101
-
102
-
103
-
104
-
105
-
106
-
107
-
108
-
109
-
110
-
111
-
112
-
113
-
114
-
115
-
116
-
117
-
118
-
119
-
120
-
121
-
122
-
123
-
124
-
125
-
126
-
127
-
128
-
129
-
130
-
131
-
132
-
133
-
134
-
135
-
136
-
137
-
138
-
139
-
140
-
141
-
142
-
143
-
144
-
145
-
146
-
147
-
148
-
149
-
150
-
151
-
152
-
153
-
154
-
155
-
156
-
157
-
158
-
159
-
160
-
161
-
162
-
163
-
164
-
165
-
166
-
167
-
168
-
169
-
170
-
171
-
172
-
173
-
174
-
175
-
176
-
177
-
178
-
179
-
180
-
181
-
182
-
183
-
184
-
185
-
186
-
187
-
188
-
189
-
190
-
191
-
192
-
193
-
194
-
195
-
196
-
197
-
198
-
199
-
200
-
201
-
202
-
203
-
204
-
205
-
206
-
207
-
208
-
209
-
210
-
211
-
212
-
213
-
214
-
215
-
216
-
217
-
218
-
219
-
220
-
221
-
222
-
223
-
224
-
225
-
226
-
227
-
228
-
229
-
230
-
231
-
232
-
233
-
234
-
235
-
236
-
237
-
238
-
239
-
240
-
241
-
242
-
243
-
244
-
245
-
246
 |
 |
