HP StorageWorks 4000s NAS 4000s and 9000s Administration Guide - Page 38
Setup Completion, Activating the iLO Port Using the License Key
 |
View all HP StorageWorks 4000s manuals
Add to My Manuals
Save this manual to your list of manuals |
Page 38 highlights
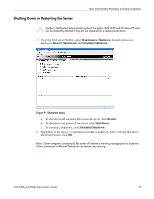
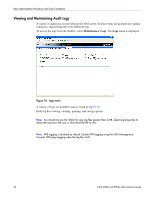
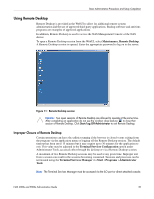
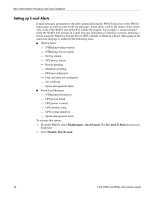
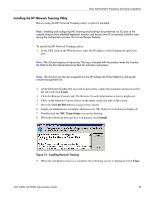
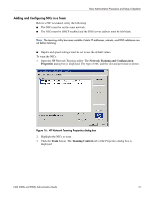
Basic Administrative Procedures and Setup Completion Setup Completion After the NAS device is physically set up and the basic configuration is established, additional setup steps must be completed. Depending on the deployment scenario of the NAS device, these steps may vary. Additional setup steps may include: ■ Activating the iLO port using the license key ■ Setting up Ethernet NIC teams (optional) ■ Managing system storage ■ Creating and managing users and groups ■ Creating and managing file shares Each of these setup steps is discussed in the following sections. Activating the iLO Port Using the License Key The Remote Desktop feature of the iLO port requires a license key. The key is included with the product inside the Country Kit. Refer to the iLO Advanced License Pack for activation instructions. To access the iLO port, click on HP Utilities, then click Remote Management. Setting up Ethernet NIC Teams (Optional) The NAS server is equipped with the HP Network Teaming and Configuration utility. The utility allows administrators to configure and monitor Ethernet network interface controllers (NIC) teams in a Windows-based operating system. These teams provide options for increasing fault tolerance and throughput. Fault tolerance provides automatic redundancy. If the primary NIC fails, the secondary NIC takes over. Load Balancing provides the ability to balance transmissions across NICs. Note: The NAS server ships with the NIC teaming utility available, however it must be installed and configured. Note: Installing NIC teaming requires a restart of the server. Procedures include: ■ Installing the HP Network Teaming utility ■ Opening the HP Network Teaming utility ■ Adding and configuring NICs in a team ■ Configuring the NIC team properties ■ Checking the status of the team ■ NIC teaming troubleshooting 38 NAS 4000s and 9000s Administration Guide
-
 1
1 -
2
-
3
-
4
-
5
-
6
-
7
-
8
-
9
-
10
-
11
-
12
-
13
-
14
-
15
-
16
-
17
-
18
-
19
-
20
-
21
-
22
-
23
-
24
-
25
-
26
-
27
-
28
-
29
-
30
-
31
-
32
-
 33
33 -
 34
34 -
 35
35 -
 36
36 -
 37
37 -
 38
38 -
 39
39 -
 40
40 -
 41
41 -
 42
42 -
 43
43 -
44
-
45
-
46
-
47
-
48
-
49
-
50
-
51
-
52
-
53
-
54
-
55
-
56
-
57
-
58
-
59
-
60
-
61
-
62
-
63
-
64
-
65
-
66
-
67
-
68
-
69
-
70
-
71
-
72
-
73
-
74
-
75
-
76
-
77
-
78
-
79
-
80
-
81
-
82
-
83
-
84
-
85
-
86
-
87
-
88
-
89
-
90
-
91
-
92
-
93
-
94
-
95
-
96
-
97
-
98
-
99
-
100
-
101
-
102
-
103
-
104
-
105
-
106
-
107
-
108
-
109
-
110
-
111
-
112
-
113
-
114
-
115
-
116
-
117
-
118
-
119
-
120
-
121
-
122
-
123
-
124
-
125
-
126
-
127
-
128
-
129
-
130
-
131
-
132
-
133
-
134
-
135
-
136
-
137
-
138
-
139
-
140
-
141
-
142
-
143
-
144
-
145
-
146
-
147
-
148
-
149
-
150
-
151
-
152
-
153
-
154
-
155
-
156
-
157
-
158
-
159
-
160
-
161
-
162
-
163
-
164
-
165
-
166
-
167
-
168
-
169
-
170
-
171
-
172
-
173
-
174
-
175
-
176
-
177
-
178
-
179
-
180
-
181
-
182
-
183
-
184
-
185
-
186
-
187
-
188
-
189
-
190
-
191
-
192
-
193
-
194
-
195
-
196
-
197
-
198
-
199
-
200
-
201
-
202
-
203
-
204
-
205
-
206
-
207
-
208
-
209
-
210
-
211
-
212
-
213
-
214
-
215
-
216
-
217
-
218
-
219
-
220
-
221
-
222
-
223
-
224
-
225
-
226
-
227
-
228
-
229
-
230
-
231
-
232
-
233
-
234
-
235
-
236
-
237
-
238
-
239
-
240
-
241
-
242
-
243
-
244
-
245
-
246
 |
 |
