HP StorageWorks 4000s NAS 4000s and 9000s Administration Guide - Page 168
Anonymous Access to an NFS Share, Maintenance, Remote Desktop, Start, Control Panel
 |
View all HP StorageWorks 4000s manuals
Add to My Manuals
Save this manual to your list of manuals |
Page 168 highlights
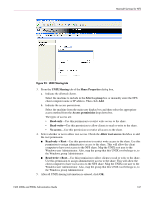
Microsoft Services for NFS Anonymous Access to an NFS Share It may be desirable to add anonymous access to a share. An instance would be when it is not desirable or possible to create and map a UNIX account for every Windows user. A UNIX user whose account is not mapped to a Windows account is treated by Server for NFS as an anonymous user. By default, the user indentifier (UID) and group identifier (GID) is -2. For example, if files are created on an NFS Share by UNIX users whose are not mapped to Windows users, the owner of those files will be listed as anonymous user and anonymous group, (-2,-2). By default, Server for NFS does not allow anonymous users to access a shared directory. When an NFS share is created, the anonymous access option can be added to the NFS share. The values can be changed from the default anonymous UID and GID values to the UID and GID of any valid UNIX user and group accounts. When allowing anonymous access to an NFS Share, the following must be performed by a user with administrative privileges due to Windows Storage Server 2003 security with anonymous users and the Everyone group. 1. From the WebUI, select Maintenance. 2. Click Remote Desktop. Log on to the NAS machine. 3. Click Start > Control Panel > Administrative Tools, and then click Local Security Policy. 4. In Security Settings, double-click Local Policies, and then click Security Options. 5. Right-click "Network access: Let Everyone permissions apply to anonymous users," and then click Properties. 6. To allow permissions applied to the Everyone group to apply to anonymous users, click Enabled. The default is Disabled. 7. The NFS server service will need to be restarted. From a command prompt, type net stop nfssvc. Then type net start nfssvc. Notify users before restarting the NFS service. 8. Assign the Everyone group the appropriate permissions on the NFS Share. 9. Enable anonymous access to the share. To enable anonymous access to an NFS share, do the following. 1. Open Windows Explorer by clicking Start > Run, and typing explorer. 2. Navigate to the NFS share. 3. Right-click the NFS Share and click Properties. 4. Click NFS Sharing. 5. Click the checkbox next to Allow Anonymous Access. 6. Change from the default of -2,-2 if desired. 7. Click Apply. 8. Click OK. 168 NAS 4000s and 9000s Administration Guide
-
 1
1 -
2
-
3
-
4
-
5
-
6
-
7
-
8
-
9
-
10
-
11
-
12
-
13
-
14
-
15
-
16
-
17
-
18
-
19
-
20
-
21
-
22
-
23
-
24
-
25
-
26
-
27
-
28
-
29
-
30
-
31
-
32
-
33
-
34
-
35
-
36
-
37
-
38
-
39
-
40
-
41
-
42
-
43
-
44
-
45
-
46
-
47
-
48
-
49
-
50
-
51
-
52
-
53
-
54
-
55
-
56
-
57
-
58
-
59
-
60
-
61
-
62
-
63
-
64
-
65
-
66
-
67
-
68
-
69
-
70
-
71
-
72
-
73
-
74
-
75
-
76
-
77
-
78
-
79
-
80
-
81
-
82
-
83
-
84
-
85
-
86
-
87
-
88
-
89
-
90
-
91
-
92
-
93
-
94
-
95
-
96
-
97
-
98
-
99
-
100
-
101
-
102
-
103
-
104
-
105
-
106
-
107
-
108
-
109
-
110
-
111
-
112
-
113
-
114
-
115
-
116
-
117
-
118
-
119
-
120
-
121
-
122
-
123
-
124
-
125
-
126
-
127
-
128
-
129
-
130
-
131
-
132
-
133
-
134
-
135
-
136
-
137
-
138
-
139
-
140
-
141
-
142
-
143
-
144
-
145
-
146
-
147
-
148
-
149
-
150
-
151
-
152
-
153
-
154
-
155
-
156
-
157
-
158
-
159
-
160
-
161
-
162
-
 163
163 -
 164
164 -
 165
165 -
 166
166 -
 167
167 -
 168
168 -
 169
169 -
 170
170 -
 171
171 -
 172
172 -
 173
173 -
174
-
175
-
176
-
177
-
178
-
179
-
180
-
181
-
182
-
183
-
184
-
185
-
186
-
187
-
188
-
189
-
190
-
191
-
192
-
193
-
194
-
195
-
196
-
197
-
198
-
199
-
200
-
201
-
202
-
203
-
204
-
205
-
206
-
207
-
208
-
209
-
210
-
211
-
212
-
213
-
214
-
215
-
216
-
217
-
218
-
219
-
220
-
221
-
222
-
223
-
224
-
225
-
226
-
227
-
228
-
229
-
230
-
231
-
232
-
233
-
234
-
235
-
236
-
237
-
238
-
239
-
240
-
241
-
242
-
243
-
244
-
245
-
246
 |
 |
