HP StorageWorks 4000s NAS 4000s and 9000s Administration Guide - Page 219
Adding New Storage to a Cluster, Creating Physical Disk Resources, Cluster, Cluster Resources, Create
 |
View all HP StorageWorks 4000s manuals
Add to My Manuals
Save this manual to your list of manuals |
Page 219 highlights
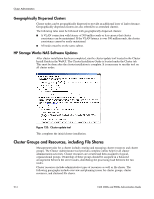
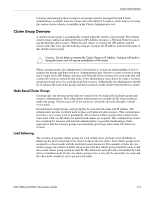
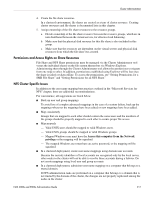
Cluster Administration Adding New Storage to a Cluster Present the new storage to one node in the cluster. This can be accomplished through selective storage presentation or through SAN switch zoning. Open the WebUI and navigate to the Disks tab. Select the Disks link under the disks tab. Select the disk which needs to be configured from the list of available disks and select Create New Volume. Follow the steps in the wizard to create the new volume. The LUN needs to be configured as a basic disk with a NTFS file system. Note: If the disk does not appear in the list of available disks on the Manage Disks page then select Rescan to rescan for new disks and refresh the page. Open the WebUI and select the Cluster tab. Follow the procedures listed below to create a physical disk resource. See the Cluster Storage Guide on the WebUI Cluster tab for detailed information on adding storage elements into the cluster. Creating Physical Disk Resources A physical disk resource must reside within a cluster group. An existing cluster group can be used or a new cluster group must be created. See "Creating a Cluster Group" earlier in this chapter. To create a physical disk resource: 1. In the Cluster tab select Cluster Resources. Figure 122: Cluster Resources page 2. Click Create. 3. On the Welcome Page select Next. NAS 4000s and 9000s Administration Guide 219
-
 1
1 -
2
-
3
-
4
-
5
-
6
-
7
-
8
-
9
-
10
-
11
-
12
-
13
-
14
-
15
-
16
-
17
-
18
-
19
-
20
-
21
-
22
-
23
-
24
-
25
-
26
-
27
-
28
-
29
-
30
-
31
-
32
-
33
-
34
-
35
-
36
-
37
-
38
-
39
-
40
-
41
-
42
-
43
-
44
-
45
-
46
-
47
-
48
-
49
-
50
-
51
-
52
-
53
-
54
-
55
-
56
-
57
-
58
-
59
-
60
-
61
-
62
-
63
-
64
-
65
-
66
-
67
-
68
-
69
-
70
-
71
-
72
-
73
-
74
-
75
-
76
-
77
-
78
-
79
-
80
-
81
-
82
-
83
-
84
-
85
-
86
-
87
-
88
-
89
-
90
-
91
-
92
-
93
-
94
-
95
-
96
-
97
-
98
-
99
-
100
-
101
-
102
-
103
-
104
-
105
-
106
-
107
-
108
-
109
-
110
-
111
-
112
-
113
-
114
-
115
-
116
-
117
-
118
-
119
-
120
-
121
-
122
-
123
-
124
-
125
-
126
-
127
-
128
-
129
-
130
-
131
-
132
-
133
-
134
-
135
-
136
-
137
-
138
-
139
-
140
-
141
-
142
-
143
-
144
-
145
-
146
-
147
-
148
-
149
-
150
-
151
-
152
-
153
-
154
-
155
-
156
-
157
-
158
-
159
-
160
-
161
-
162
-
163
-
164
-
165
-
166
-
167
-
168
-
169
-
170
-
171
-
172
-
173
-
174
-
175
-
176
-
177
-
178
-
179
-
180
-
181
-
182
-
183
-
184
-
185
-
186
-
187
-
188
-
189
-
190
-
191
-
192
-
193
-
194
-
195
-
196
-
197
-
198
-
199
-
200
-
201
-
202
-
203
-
204
-
205
-
206
-
207
-
208
-
209
-
210
-
211
-
212
-
213
-
 214
214 -
 215
215 -
 216
216 -
 217
217 -
 218
218 -
 219
219 -
 220
220 -
 221
221 -
 222
222 -
 223
223 -
 224
224 -
225
-
226
-
227
-
228
-
229
-
230
-
231
-
232
-
233
-
234
-
235
-
236
-
237
-
238
-
239
-
240
-
241
-
242
-
243
-
244
-
245
-
246
 |
 |
