HP rp7440 nPartition Administrator's Guide, Second Edition - Page 197
Summary of Changes, Notes and Warnings
 |
View all HP rp7440 manuals
Add to My Manuals
Save this manual to your list of manuals |
Page 197 highlights
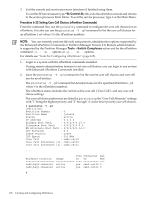
3. Modify the nPartition core cell choices using the parmodify -p# -r#... command. You can modify the core cell choices for the local nPartition or any remote nPartition in the server complex. Use the following command: parmodify -p# -r# -r#... Specify the nPartition number (-p#) and the cell ID (-r#) for all cells you wish to designate as core cell choices. # parmodify -p0 -r2 -r0 Command succeeded. # The order in which you list the cells is the order in which the nPartition core cell choices are established; the first cell listed is the first preferred core cell (choice 1), and the subsequent cells are lower-priority core cell choices (choices 2 through 4, if specified). Procedure 6-23 Setting Core Cell Choices (Partition Manager) You can set core cell choices by using Partition Manager. When using Partition Manager Version 1.0, select the nPartition to configure, select the Partition→Modify Partition action, and use the Core Cell Choices tab. When using Partition Manager Version 2.0, select the nPartition to configure, select the nPartition→Modify nPartition action, select the Set Cell Options tab, and use the Core Cell Choice column to set priorities. 1. Access Partition Manager. For details on accessing Partition Manager or other tools, see "Tools for Configuring nPartitions" (page 165). 2. Select the nPartition whose core cell choices you want to configure. 3. Initiate the nPartition modify action. If using Partition Manager Version 1.0, the Partition→Modify Partition action. If using Partition Manager Version 2.0, select the nPartition→Modify nPartition action. 4. Access the Partition Manager area for setting core cell choices and then make any changes to the core choices for the nPartition. From Partition Manager Version 1.0, select the Core Cell Choices tab. Highlight the cell whose core cell choice you want to configure, select the desired choice priority (1st, 2nd, none, etc.) from the Core Cell Choice pop-up list, and click the Modify button to modify the priority. From Partition Manager Version 2.0, select Set Cell Options tab, and use the Core Cell Choice column to set priorities. 5. After changing attribute values for all the cells you plan to modify, click the OK button. 6. Review all information presented in the Notes and Warnings, the Summary of Changes, and the HA Checks tabs. 7. Either cancel or proceed with changing the core cell choices. Click the Cancel button to cancel the changes. To proceed with the core cell changes, click the Finish button or click the OK button. 8. Exit Partition Manager. From Partition Manager Version 1.0, select the File→Exit action. From Partition Manager Version 2.0, select Log off parmgr or exit the Web browser when finished. Setting nPartition Core Cell Choices 197
-
 1
1 -
2
-
3
-
4
-
5
-
6
-
7
-
8
-
9
-
10
-
11
-
12
-
13
-
14
-
15
-
16
-
17
-
18
-
19
-
20
-
21
-
22
-
23
-
24
-
25
-
26
-
27
-
28
-
29
-
30
-
31
-
32
-
33
-
34
-
35
-
36
-
37
-
38
-
39
-
40
-
41
-
42
-
43
-
44
-
45
-
46
-
47
-
48
-
49
-
50
-
51
-
52
-
53
-
54
-
55
-
56
-
57
-
58
-
59
-
60
-
61
-
62
-
63
-
64
-
65
-
66
-
67
-
68
-
69
-
70
-
71
-
72
-
73
-
74
-
75
-
76
-
77
-
78
-
79
-
80
-
81
-
82
-
83
-
84
-
85
-
86
-
87
-
88
-
89
-
90
-
91
-
92
-
93
-
94
-
95
-
96
-
97
-
98
-
99
-
100
-
101
-
102
-
103
-
104
-
105
-
106
-
107
-
108
-
109
-
110
-
111
-
112
-
113
-
114
-
115
-
116
-
117
-
118
-
119
-
120
-
121
-
122
-
123
-
124
-
125
-
126
-
127
-
128
-
129
-
130
-
131
-
132
-
133
-
134
-
135
-
136
-
137
-
138
-
139
-
140
-
141
-
142
-
143
-
144
-
145
-
146
-
147
-
148
-
149
-
150
-
151
-
152
-
153
-
154
-
155
-
156
-
157
-
158
-
159
-
160
-
161
-
162
-
163
-
164
-
165
-
166
-
167
-
168
-
169
-
170
-
171
-
172
-
173
-
174
-
175
-
176
-
177
-
178
-
179
-
180
-
181
-
182
-
183
-
184
-
185
-
186
-
187
-
188
-
189
-
190
-
191
-
 192
192 -
 193
193 -
 194
194 -
 195
195 -
 196
196 -
 197
197 -
 198
198 -
 199
199 -
 200
200 -
 201
201 -
 202
202 -
203
-
204
-
205
-
206
-
207
-
208
-
209
-
210
-
211
-
212
-
213
-
214
-
215
-
216
-
217
-
218
-
219
-
220
-
221
-
222
-
223
-
224
-
225
-
226
-
227
-
228
-
229
-
230
-
231
-
232
-
233
-
234
-
235
-
236
-
237
-
238
-
239
-
240
-
241
-
242
-
243
-
244
-
245
-
246
-
247
-
248
-
249
-
250
-
251
-
252
-
253
-
254
-
255
-
256
-
257
-
258
-
259
-
260
-
261
-
262
-
263
-
264
-
265
-
266
 |
 |
