HP rp7440 nPartition Administrator's Guide, Second Edition - Page 220
Configuring and Deconfiguring Memory (DIMMs), Configuring and Deconfiguring Memory BCH Menu
 |
View all HP rp7440 manuals
Add to My Manuals
Save this manual to your list of manuals |
Page 220 highlights
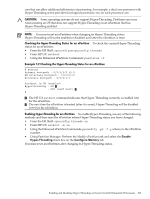
Example 7-3 Enabling Hyper-Threading for an nPartition Shell> cpuconfig threads 1 cpuconfig: Threads are turned off. Shell> Shell> cpuconfig threads on 2 cpuconfig: Threads will be on after a reset. Shell> 1 The EFI Shell cpuconfig threads command indicates that Hyper-Threading currently is disabled (turned off) for the nPartition. 2 This EFI Shell command configures Hyper-Threading to be enable after the nPartition is reset. Disabling Hyper-Threading for an nPartition To disable Hyper-Threading, use any of the following methods and then reset the nPartition whose Hyper-Threading status you have changed: • From the EFI Shell: cpuconfig threads off • From HP-UX: setboot -m off • Using the Enhanced nPartition Commands: parmodify -pn -T n, where n is the nPartition number. • Using Partition Manager: Perform the Modify nPartition task and deselect the Enable Hyper-Threading check box on the Configure Memory tab. You must reset an nPartition after changing its Hyper-Threading status. Configuring and Deconfiguring Memory (DIMMs) You can configure and deconfigure memory by using any one of the following procedures: • "Configuring and Deconfiguring Memory (BCH Menu)" (page 220) • "Configuring and Deconfiguring Memory (EFI Shell)" (page 221) You can configure and deconfigure memory modules (DIMMs) from any cell that is assigned to an nPartition. Deconfiguring memory causes it to not be available for use by the cell or its nPartition. Whenever you configure or deconfigure memory, you must reboot the corresponding nPartition for the configuration change to take effect. NOTE: DIMMs operate either in ranks of four or echelons of two, depending on memory architecture of the server. When you deallocate a DIMM, all other DIMMs in the rank or echelon also will not be used the next time the nPartition boots. Each rank or echelon is numbered (0, 1, 2, and so on up to hexadecimal number F as needed). The DIMMs in the rank or echelon are lettered (A to D). For example, rank 0 includes DIMMs 0A, 0B, 0C, and 0D; echelon 1 has DIMMs 1A and 1B. Procedure 7-14 Configuring and Deconfiguring Memory (BCH Menu) From the BCH Service Menu, use the DIMMDEALLOC command to configure or deconfigure memory modules (DIMMs) in cells assigned to the local nPartition. The BCH Menu is available only on HP 9000 systems. 220 Managing Hardware Resources
-
 1
1 -
2
-
3
-
4
-
5
-
6
-
7
-
8
-
9
-
10
-
11
-
12
-
13
-
14
-
15
-
16
-
17
-
18
-
19
-
20
-
21
-
22
-
23
-
24
-
25
-
26
-
27
-
28
-
29
-
30
-
31
-
32
-
33
-
34
-
35
-
36
-
37
-
38
-
39
-
40
-
41
-
42
-
43
-
44
-
45
-
46
-
47
-
48
-
49
-
50
-
51
-
52
-
53
-
54
-
55
-
56
-
57
-
58
-
59
-
60
-
61
-
62
-
63
-
64
-
65
-
66
-
67
-
68
-
69
-
70
-
71
-
72
-
73
-
74
-
75
-
76
-
77
-
78
-
79
-
80
-
81
-
82
-
83
-
84
-
85
-
86
-
87
-
88
-
89
-
90
-
91
-
92
-
93
-
94
-
95
-
96
-
97
-
98
-
99
-
100
-
101
-
102
-
103
-
104
-
105
-
106
-
107
-
108
-
109
-
110
-
111
-
112
-
113
-
114
-
115
-
116
-
117
-
118
-
119
-
120
-
121
-
122
-
123
-
124
-
125
-
126
-
127
-
128
-
129
-
130
-
131
-
132
-
133
-
134
-
135
-
136
-
137
-
138
-
139
-
140
-
141
-
142
-
143
-
144
-
145
-
146
-
147
-
148
-
149
-
150
-
151
-
152
-
153
-
154
-
155
-
156
-
157
-
158
-
159
-
160
-
161
-
162
-
163
-
164
-
165
-
166
-
167
-
168
-
169
-
170
-
171
-
172
-
173
-
174
-
175
-
176
-
177
-
178
-
179
-
180
-
181
-
182
-
183
-
184
-
185
-
186
-
187
-
188
-
189
-
190
-
191
-
192
-
193
-
194
-
195
-
196
-
197
-
198
-
199
-
200
-
201
-
202
-
203
-
204
-
205
-
206
-
207
-
208
-
209
-
210
-
211
-
212
-
213
-
214
-
 215
215 -
 216
216 -
 217
217 -
 218
218 -
 219
219 -
 220
220 -
 221
221 -
 222
222 -
 223
223 -
 224
224 -
 225
225 -
226
-
227
-
228
-
229
-
230
-
231
-
232
-
233
-
234
-
235
-
236
-
237
-
238
-
239
-
240
-
241
-
242
-
243
-
244
-
245
-
246
-
247
-
248
-
249
-
250
-
251
-
252
-
253
-
254
-
255
-
256
-
257
-
258
-
259
-
260
-
261
-
262
-
263
-
264
-
265
-
266
 |
 |
