Kodak 1252972 User Guide - Page 34
Connecting to an unlisted network, Scanning for wireless networks
 |
UPC - 041771252977
View all Kodak 1252972 manuals
Add to My Manuals
Save this manual to your list of manuals |
Page 34 highlights
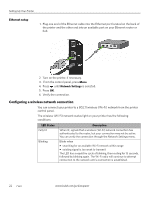
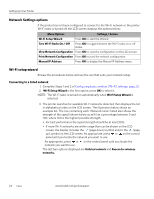
Setting Up Your Printer 8. After completing your entry, select the DONE key, and then press OK. LED Status Fully lit Blinking Description When lit, signals that a wireless (Wi-Fi) network connection has authenticated to the router, but your connection may not be active. You can verify the connection through the Network Settings menu. Blinks when • searching for an available Wi-Fi network within range • existing signal is too weak to transmit The LED has a repetitive cycle of blinking, then resting for 15 seconds, followed by blinking again. The Wi-Fi radio will continue to attempt connection to the network until a connection is established. The LED will be continuously lit when you are connected to a wireless network. This does not guarantee you are connected. You must verify that you are connected. See Verifying network configuration, page 27. Connecting to an unlisted network 1. Wi-Fi Setup Wizard is the first option; press OK to select it. 2. If you network does not appear in the list and is configured to not broadcast its SSID, select Unlisted Network and press OK. 3. Follow the prompts to enter the network name using the keyboard visible on the LCD screen. Press , , or to select a key. Enter the alphanumeric string accurately, using the same upper and lower case letters as your SSID. After completing your entry, select the DONE key, and then press OK. 4. Select WEP or WPA/WPA2 as required for your network's security setup, and then press OK. 5. Enter the security information required using the LCD screen keyboard. • Press , , or to select a key. Select to erase any incorrect characters. Then select DONE and press OK. 6. After the confirmation message appears on the LCD screen, press OK to display the Network Settings menu. Scanning for wireless networks If you don't see your network in a list or want to change your network: 1. Select Rescan for wireless networks. 2. Press OK. 26 www.kodak.com/go/aiosupport
-
 1
1 -
2
-
3
-
4
-
5
-
6
-
7
-
8
-
9
-
10
-
11
-
12
-
13
-
14
-
15
-
16
-
17
-
18
-
19
-
20
-
21
-
22
-
23
-
24
-
25
-
26
-
27
-
28
-
 29
29 -
 30
30 -
 31
31 -
 32
32 -
 33
33 -
 34
34 -
 35
35 -
 36
36 -
 37
37 -
 38
38 -
 39
39 -
40
-
41
-
42
-
43
-
44
-
45
-
46
-
47
-
48
-
49
-
50
-
51
-
52
-
53
-
54
-
55
-
56
-
57
-
58
-
59
-
60
-
61
-
62
-
63
-
64
-
65
-
66
-
67
-
68
-
69
-
70
-
71
-
72
-
73
-
74
-
75
-
76
-
77
-
78
-
79
-
80
-
81
-
82
-
83
-
84
-
85
-
86
-
87
-
88
-
89
-
90
-
91
-
92
-
93
-
94
-
95
-
96
-
97
-
98
-
99
-
100
-
101
-
102
-
103
-
104
-
105
-
106
-
107
-
108
-
109
-
110
-
111
-
112
-
113
-
114
-
115
-
116
-
117
-
118
-
119
-
120
 |
 |
