Konica Minolta Kodak Ngenuity 9090DB User Guide - Page 45
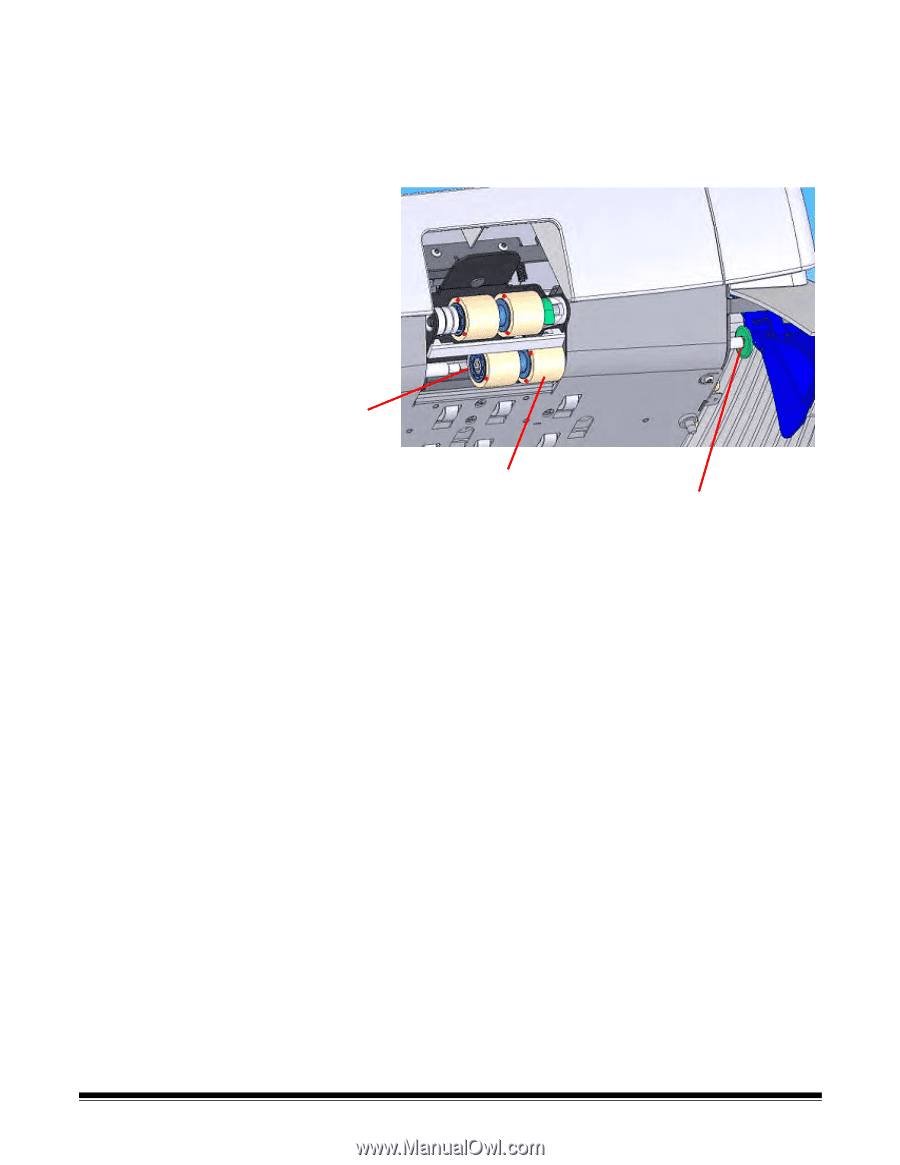
Push the roller onto the shaft and push the roller and shaft far
 |
View all Konica Minolta Kodak Ngenuity 9090DB manuals
Add to My Manuals
Save this manual to your list of manuals |
Page 45 highlights
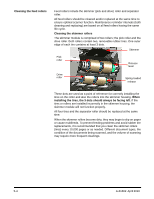
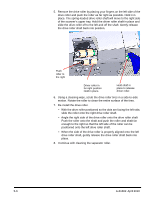
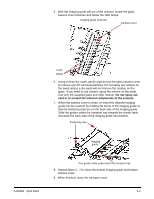
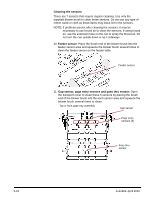
5. Remove the drive roller by placing your fingers on the left side of the drive roller and push the roller as far right as possible. Hold it in place. The spring-loaded drive roller shaft will move to the right side of the scanner's upper tray. Hold the driver roller shaft in place and slide the drive roller off to the left and off the shaft. Gently release the drive roller shaft back into position. Push roller to the right Driver roller in far right position Hold in place. Hold shaft in place to release driver roller. 6. Using a cleaning wipe, scrub the drive roller tires in a side-to-side motion. Rotate the roller to clean the entire surface of the tires. 7. Re-install the drive roller. • With the drive roller positioned so the dots are facing the left side, slide the roller onto the right drive roller shaft. • Angle the right side of the drive roller onto the drive roller shaft Push the roller onto the shaft and push the roller and shaft far enough to the right so that the left side of the roller can be positioned onto the left drive roller shaft. • When the side of the drive roller is properly aligned onto the left drive roller shaft, gently release the drive roller shaft back into place. 8. Continue with cleaning the separator roller. 5-6 A-61662 April 2010
-
 1
1 -
2
-
3
-
4
-
5
-
6
-
7
-
8
-
9
-
10
-
11
-
12
-
13
-
14
-
15
-
16
-
17
-
18
-
19
-
20
-
21
-
22
-
23
-
24
-
25
-
26
-
27
-
28
-
29
-
30
-
31
-
32
-
33
-
34
-
35
-
36
-
37
-
38
-
39
-
 40
40 -
 41
41 -
 42
42 -
 43
43 -
 44
44 -
 45
45 -
 46
46 -
 47
47 -
 48
48 -
 49
49 -
 50
50 -
51
-
52
-
53
-
54
-
55
-
56
-
57
-
58
-
59
-
60
-
61
-
62
-
63
-
64
-
65
-
66
-
67
-
68
-
69
-
70
-
71
-
72
-
73
-
74
-
75
-
76
-
77
-
78
 |
 |