Konica Minolta Kodak Ngenuity 9090DB User Guide - Page 47
Cleaning the optics, Cleaning the imaging guides and camera glass covers
 |
View all Konica Minolta Kodak Ngenuity 9090DB manuals
Add to My Manuals
Save this manual to your list of manuals |
Page 47 highlights
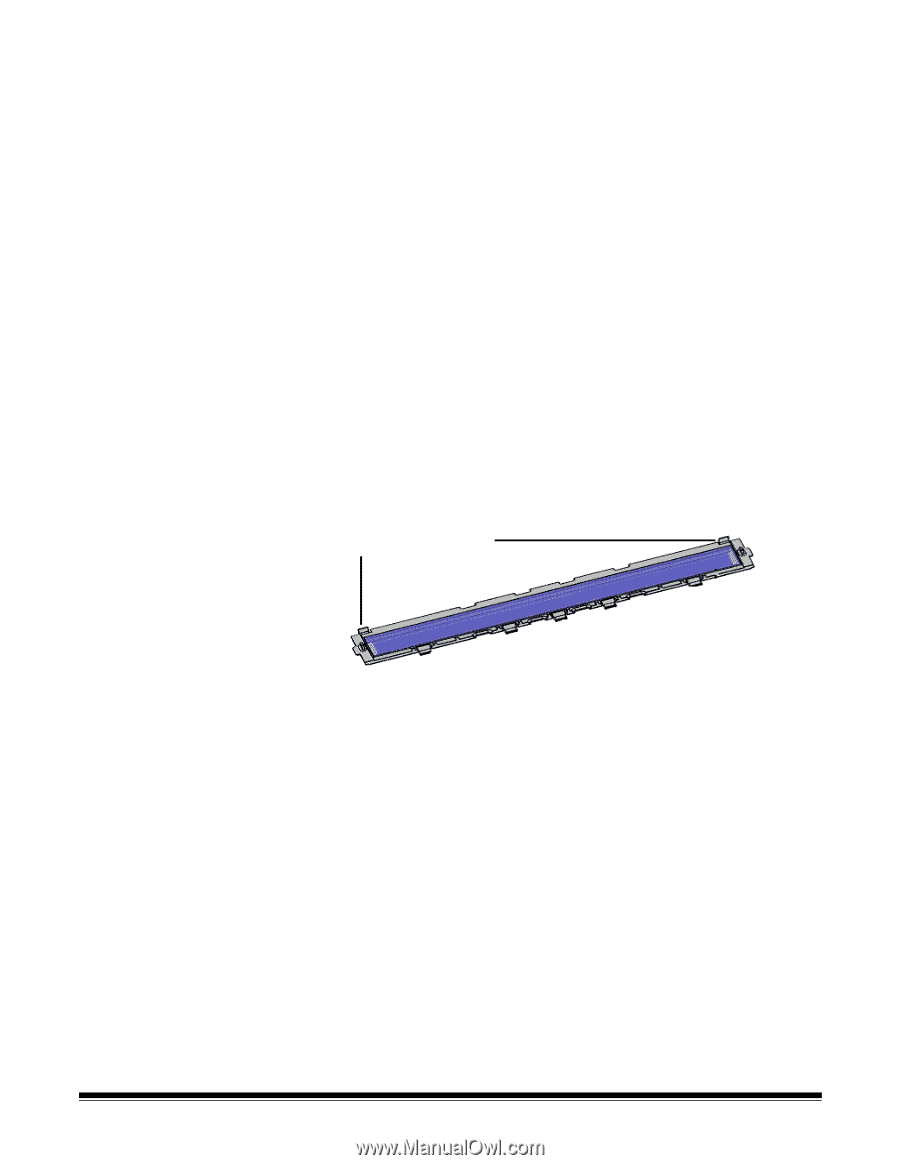
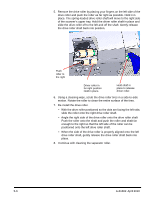
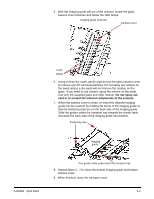
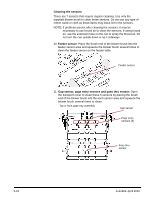
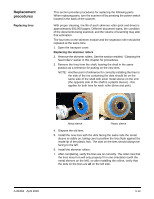
Cleaning the optics Optics include the imaging guides, camera glass covers and sensors. All of the optics components should be cleaned at the same time. NOTE: The lamps are not part of the optics. The lamps (LEDs) should not be cleaned with wipes or solvents. Cleaning the imaging guides and camera glass covers To prevent streaks in images, reduced OCR/ICR/Barcode recognition rates, blurred images, etc., you should clean the imaging guides every 50,000 pages. The two imaging guides which are inside black, plastic frames are located in the top and bottom transport trays. When removing a imaging guide for cleaning or replacement, the entire assembly (imaging guide and frame) are removed and replaced as one piece. Clean the camera glass covers at the same time you clean the imaging guides. CAUTION: Do not remove the imaging guide from the black frame. 1. Open the transport cover. 2. Gently pull the 2 fastening clips that secure the top imaging guide towards the front of the scanner to release and remove the imaging guide from the transport. Fastening clips (2) 3. Spray the glass cleaner on a lint free cloth, taking care that any overspray does not fall inside the scanner. 4. Wipe down both sides of the imaging guide. Be careful not to touch the cleaned glass. 5-8 A-61662 April 2010
-
 1
1 -
2
-
3
-
4
-
5
-
6
-
7
-
8
-
9
-
10
-
11
-
12
-
13
-
14
-
15
-
16
-
17
-
18
-
19
-
20
-
21
-
22
-
23
-
24
-
25
-
26
-
27
-
28
-
29
-
30
-
31
-
32
-
33
-
34
-
35
-
36
-
37
-
38
-
39
-
40
-
41
-
 42
42 -
 43
43 -
 44
44 -
 45
45 -
 46
46 -
 47
47 -
 48
48 -
 49
49 -
 50
50 -
 51
51 -
 52
52 -
53
-
54
-
55
-
56
-
57
-
58
-
59
-
60
-
61
-
62
-
63
-
64
-
65
-
66
-
67
-
68
-
69
-
70
-
71
-
72
-
73
-
74
-
75
-
76
-
77
-
78
 |
 |