Konica Minolta Kodak Ngenuity 9090DB User Guide - Page 68
Maintenance, Replacing the ink cartridge, Ink cartridge specifications, Subject, Specification
 |
View all Konica Minolta Kodak Ngenuity 9090DB manuals
Add to My Manuals
Save this manual to your list of manuals |
Page 68 highlights
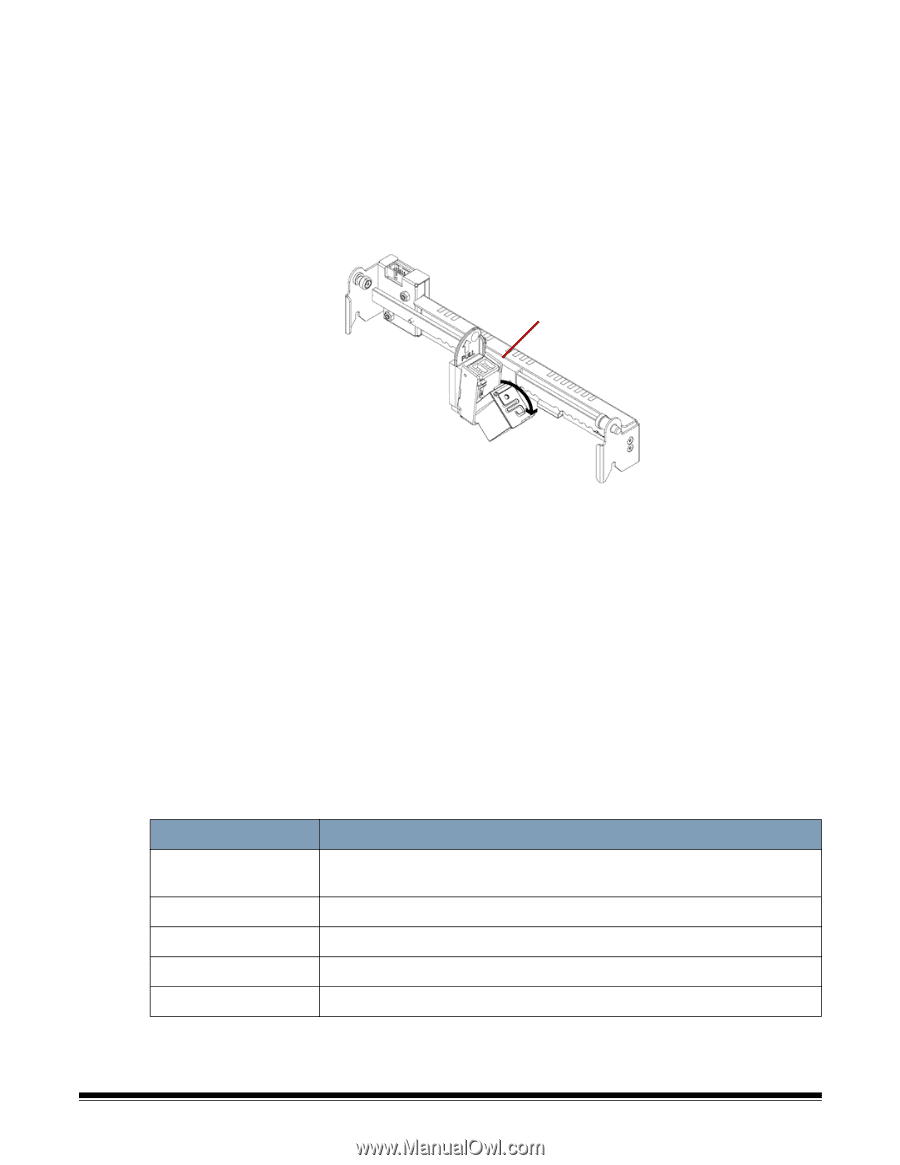
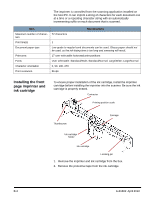
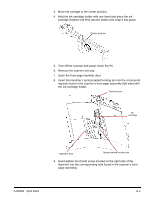
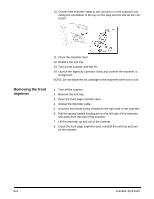
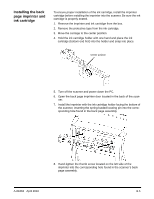
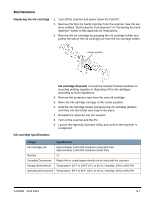
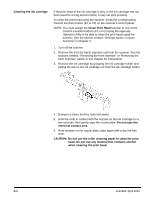
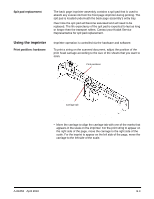
Maintenance Replacing the ink cartridge 1. Turn off the scanner and power down the host PC. 2. Remove the front (or back) imprinter from the scanner. See the sections entitled, "Removing the front imprinter" or "Removing the back imprinter" earlier in this appendix for instructions. 3. Remove the ink cartridge by grasping the ink cartridge holder and pulling the tab on the ink cartridge out from the ink cartridge holder. Center position Ink cartridge disposal: Consult the Hewlett-Packard website for recycling printing supplies or disposing of the ink cartridges according to local regulations. 4. Remove the protective tape from the new ink cartridge. 5. Move the ink cartridge carriage to the center position. 6. Hold the ink cartridge holder and place the ink cartridge (bottom end first) into the holder and snap it into place. 7. Reinstall the imprinter into the scanner. 8. Turn on the scanner and the PC. 9. Launch the Ngenuity Operator Utility and confirm the imprinter is recognized. Ink cartridge specifications Subject Specification Ink Cartridge Life Approximately 4,000,000 characters (standard font) Approximately 2,000,000 characters (bold font) Nozzles 12 Unusable Documents Plastic film or coated paper should not be used with the imprinter Storage Environment Temperature: 32°F to 104°F (0°C to 40°C); Humidity: 10% to 80% RH Operating Environment Temperature: 59°F to 86°F (15°C to 30°C); Humidity: 30% to 80% RH A-61662 April 2010 B-7
-
 1
1 -
2
-
3
-
4
-
5
-
6
-
7
-
8
-
9
-
10
-
11
-
12
-
13
-
14
-
15
-
16
-
17
-
18
-
19
-
20
-
21
-
22
-
23
-
24
-
25
-
26
-
27
-
28
-
29
-
30
-
31
-
32
-
33
-
34
-
35
-
36
-
37
-
38
-
39
-
40
-
41
-
42
-
43
-
44
-
45
-
46
-
47
-
48
-
49
-
50
-
51
-
52
-
53
-
54
-
55
-
56
-
57
-
58
-
59
-
60
-
61
-
62
-
 63
63 -
 64
64 -
 65
65 -
 66
66 -
 67
67 -
 68
68 -
 69
69 -
 70
70 -
 71
71 -
 72
72 -
 73
73 -
74
-
75
-
76
-
77
-
78
 |
 |