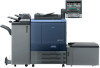
Konica Minolta bizhub PRESS C6000 IC-307 User Guide
Konica Minolta bizhub PRESS C6000 Manual
 |
View all Konica Minolta bizhub PRESS C6000 manuals
Add to My Manuals
Save this manual to your list of manuals |
Konica Minolta bizhub PRESS C6000 manual content summary:
- Konica Minolta bizhub PRESS C6000 | IC-307 User Guide - Page 1
User Guide English IC-307 Print Controller, Powered by Creo Color Server Technology Version 1.0 731-01921A Rev A - Konica Minolta bizhub PRESS C6000 | IC-307 User Guide - Page 2
- Konica Minolta bizhub PRESS C6000 | IC-307 User Guide - Page 3
requirements in part 15 of the FCC Rules for a Class B digital device. Equipment recycling In the European Union, this symbol indicates that when the last user wishes to discard this product, it must be sent to appropriate facilities for recovery and recycling. Contact your local Print On-Demand - Konica Minolta bizhub PRESS C6000 | IC-307 User Guide - Page 4
subsidiaries, and affiliates, assumes no liability for technical or editorial errors or omissions made herein, and shall not be liable for incidental without limitation, loss of use, loss or alteration of data, delays, or lost profits or savings arising from the use of this document. www.creoservers - Konica Minolta bizhub PRESS C6000 | IC-307 User Guide - Page 5
18 Creating a calibration table using the X-Rite i1 spectrophotometer 20 Troubleshooting calibration...21 4 Printing a file in Windows and Mac OS 23 Printing a file to the IC-307 print controller 23 Using a hot folder to print...24 Password protect jobs...24 5 Printing from the color server 27 - Konica Minolta bizhub PRESS C6000 | IC-307 User Guide - Page 6
Technology User Guide Replacing pages...30 Finding the CMYK values of a specific area 31 Verifying the content of the job...31 Performing a preflight check...32 Viewing and printing a preflight report 33 Preflight report window...33 Proofing the job using color sets...35 Printing and reviewing - Konica Minolta bizhub PRESS C6000 | IC-307 User Guide - Page 7
grayscale RGB elements using black toner 69 Preserving black color in a job containing grayscale CMYK elements 69 8 Production workflows 71 Printing using imposition...71 Imposition overview...71 Previewing an imposition layout...72 Printing a business card job...73 Printing a saddle-stitch job - Konica Minolta bizhub PRESS C6000 | IC-307 User Guide - Page 8
viii IC-307 Print Controller, Powered by Creo Color Server Technology User Guide Services tab in the job parameters window manually to your variable data job 166 Adding records from a database to your variable data job 166 Creating and printing the variable data job 167 14 Troubleshooting - Konica Minolta bizhub PRESS C6000 | IC-307 User Guide - Page 9
started Printing this guide Change the paper size to print this document on any printer. 1. Open the PDF file in Adobe Acrobat. 2. From the File menu, select Print. The Print dialog box appears. 3. Select the desired paper size, for example, A4 or letter. 4. In the Page Scaling list, select - Konica Minolta bizhub PRESS C6000 | IC-307 User Guide - Page 10
high-quality digital printing. The IC-307 print controller also streamlines the printing process by allowing you to print with preset workflows. In combination with the press, the IC-307 print controller enables you to efficiently print business cards, print flyers, brochures, pamphlets, catalogs - Konica Minolta bizhub PRESS C6000 | IC-307 User Guide - Page 11
. To activate the features in the software you need to install the dongle that is supplied with the kit. This kit includes the following features: ● Spot Variations ● Progressive Printing ● Enfocus PitStop Edit ● VDP Management Tool ● Imposition Template Builder ● Job Slug Line ● Dynamic Exceptions - Konica Minolta bizhub PRESS C6000 | IC-307 User Guide - Page 12
4 Chapter 1-Getting started Transaction Power Kit This kit is optional. A dongle is required. The kit enables the IC-307 print controller to print Intelligent Printer Data Stream (IPDS) origin from any AFP enabled system or application, and to product highly-optimized Adobe PostScript files. This - Konica Minolta bizhub PRESS C6000 | IC-307 User Guide - Page 13
Note: The icons that appear vary according to the optional kits in use. The Printer Status pane displays information about the current printer status-for example, Printing, Ready, Warming up. The printer icon changes according to the configuration of the printer and the finishing devices connected. - Konica Minolta bizhub PRESS C6000 | IC-307 User Guide - Page 14
Print Queue Under Server, you can also view the date that the printer was last calibrated. Progress bars display information about incoming and outgoing jobs. If there is a problem area lists the files to be processed. After a file has been processed successfully, it moves either to the Print Queue - Konica Minolta bizhub PRESS C6000 | IC-307 User Guide - Page 15
and editing the job parameters. Turning on the IC-307 print controller If the IC-307 print controller is connected to an 80 PPM press, verify that the 80 PPM press (UK- 103) dongle is connected to the USB port on the IC-307 print controller before you turn on the monitor and printer. 1. Turn on - Konica Minolta bizhub PRESS C6000 | IC-307 User Guide - Page 16
IC-307 print controller 1. From useful when you make a units from inches to mm. To restart the Workspace, right-click on the color server icon in the system tray and click Start. A confirmation message appears. 2. Click Yes. The IC-307 print controller print controller icon does not appear - Konica Minolta bizhub PRESS C6000 | IC-307 User Guide - Page 17
. The network printers are installed by default with the Print Driver software. You can change the default settings of the network printer to use the PPD parameters instead of the Print Driver software. The IC-307 print controller supports printing from the following operating systems: ● Mac OS X 10 - Konica Minolta bizhub PRESS C6000 | IC-307 User Guide - Page 18
(such as PS, PDF, VPS, and PPML). Print Driver software Use the Print Driver software to set job parameters when you are submitting a job to the IC-307 print controller from any application in your computer. The Print Driver software provides a graphical user interface that is similar to the IC-307 - Konica Minolta bizhub PRESS C6000 | IC-307 User Guide - Page 19
't want to set the printer as the default printer on your computer. 10. Click Next. 11. Click Finish to close the wizard. The IC-307 print controller network printer is added to your printer list. In addition, the Print Driver software and PPD file are automatically copied. - Konica Minolta bizhub PRESS C6000 | IC-307 User Guide - Page 20
then click Finish to complete the setup. The IC-307 print controller network printer is added to your printer list. When you add a network printer, the Print Driver software is installed on your computer. Loading the Print Driver software for the first time Requirements: A network printer must be - Konica Minolta bizhub PRESS C6000 | IC-307 User Guide - Page 21
for the desired network printer. The IC-307 print controller network printer is added to your printer list. Deactivating the Print Driver software Deactivate the Print Driver software if you want to access the PPD file parameters. The Print Driver software is active by default. 1. From the Windows - Konica Minolta bizhub PRESS C6000 | IC-307 User Guide - Page 22
307 print controller fonts directory. The HF_FontDownLoader hot folder can be used Print Driver software, the PPD file is automatically copied to your computer. 1. From the Go menu, select Connect to Server. 2. In the Server Address box, type your server address, and click Connect. 3. In the Connect - Konica Minolta bizhub PRESS C6000 | IC-307 User Guide - Page 23
password, and click OK. 16. Click Close. The Print Driver software and PPD are installed. Note: If you deactivate the Print Driver software, you can still use the 307 print controller ● Name of the network printer that you want to use with the Print Driver software 1. On your Mac computer, using the - Konica Minolta bizhub PRESS C6000 | IC-307 User Guide - Page 24
User Interface list, make sure that On is selected. 11. In the Server Hostname box, type the IP address of the server. 12. Click Apply, and then click Close. Removing the Print Driver the Print Driver software. Requirements: All applications must be closed. 1. From the Go menu, select Connect to - Konica Minolta bizhub PRESS C6000 | IC-307 User Guide - Page 25
print quality on your press depends on a number of issues. One of the most important issues is steady toner density. Toner density is affected by many factors such as heat, humidity, and service settings. Toner the scanned measurements. The IC-307 print controller uses the data in this table to - Konica Minolta bizhub PRESS C6000 | IC-307 User Guide - Page 26
is calibrated. 1. From the Tools menu, select Calibration. 2. In the Tray list, select the desired tray. The default tray is Tray 1. 3. In the Media Type list, select the desired media type-for example, Gloss Coated for Laser.You can print the calibration chart on any paper size that is equal to or - Konica Minolta bizhub PRESS C6000 | IC-307 User Guide - Page 27
, press Start to start scanning the charts. The charts are scanned and measured and a calibration table is created. In the IC-307 print controller Calibration Wizard, if the calibration is successful, step 3 of the Calibration wizard appears. If an error occurs during the scanning process, an error - Konica Minolta bizhub PRESS C6000 | IC-307 User Guide - Page 28
20 Chapter 3-Calibration Creating a calibration table using the X-Rite i1 spectrophotometer Requirements: ● Your spectrophotometer must be connected to the USB port on the IC-307 print controller. ● Install the driver when prompted for the first time connecting the device. Refer to the - Konica Minolta bizhub PRESS C6000 | IC-307 User Guide - Page 29
Troubleshooting calibration 21 9. After each color sweep, wait for the check mark to appear next to the appropriate icon, and follow the on-screen instructions ● If an error occurs while you calibration table using the screening Troubleshooting calibration Resolve common troubleshooting problems - Konica Minolta bizhub PRESS C6000 | IC-307 User Guide - Page 30
22 Chapter 3-Calibration Message The software cannot identify any calibration device. Check that a device is connected and that you have defined it. Recovery action Make sure the i1 is connected correctly to the USB port of the IC-307 print controller. When prompted, install the driver. - Konica Minolta bizhub PRESS C6000 | IC-307 User Guide - Page 31
to the IC-307 print controller Requirements: A network printer must be defined on your Windows and Mac computer. 1. Open a file with its corresponding application-for example, open a PDF file in Adobe Acrobat. 2. From the File menu, select Print. 3. In the Name list, select the desired network - Konica Minolta bizhub PRESS C6000 | IC-307 User Guide - Page 32
status on the IC-307 print controller must be in Ready mode. Using the Print Driver software, you can apply a password to a job that was created in any application. Whoever prints or reprints the job must use the password to unlock it and release it for printing. 1. On your computer, open a file - Konica Minolta bizhub PRESS C6000 | IC-307 User Guide - Page 33
OK. The job is password-protected, and nobody can print it without using the password. 8. In the Print Driver window, click OK. The password-protected job is submitted to the network printer, which sends it to the IC-307 print controller for processing and printing. 9. In the Print Queue area, right - Konica Minolta bizhub PRESS C6000 | IC-307 User Guide - Page 34
26 Chapter 4-Printing a file in Windows and Mac OS - Konica Minolta bizhub PRESS C6000 | IC-307 User Guide - Page 35
PDF or PostScript-is created on a computer that is not connected to the IC-307 print controller ● When a PDL file is located on a folder print controller 1. From the File menu, select Import. 2. In the upper list in the Import window, select the desired file(s) and click the Add button. Notes: ● Use - Konica Minolta bizhub PRESS C6000 | IC-307 User Guide - Page 36
RTP jobs may require reprocessing after you edit certain parameters. Printing copies of a job Reprint more copies of a job directly type the number of copies that you want to print. 4. Press Enter. 5. Drag the job to either the Process Queue area or Print Queue area. Editing a job You can preview - Konica Minolta bizhub PRESS C6000 | IC-307 User Guide - Page 37
Merge Job. Note: Only those RTP jobs that have the same page size and orientation as the job that you are editing appear in the list. - Konica Minolta bizhub PRESS C6000 | IC-307 User Guide - Page 38
30 Chapter 5-Printing from the color server 4. Select the job with the page that you want to merge In this case, you can create an RTP file of the page that you need to replace, and then use the Job Preview & Editor tool to replace this page. Requirements: The RTP job that includes the page you - Konica Minolta bizhub PRESS C6000 | IC-307 User Guide - Page 39
RTP file. 4. Delete the incorrect page. Finding the CMYK values of a specific area Use the Show Color Values tool in the Job Preview & Editor window to find out the ● Spot colors that are not defined in the IC-307 print controller spot color dictionary ● Dynamic exception commands for a file that - Konica Minolta bizhub PRESS C6000 | IC-307 User Guide - Page 40
Report dialog box. You can review the report and resolve the missing components and thus save processing time without error or failed messages constantly appearing. If you run a preflight check and all key components are found, the job is processed and printed according to the job flow that - Konica Minolta bizhub PRESS C6000 | IC-307 User Guide - Page 41
about the status (missing or found) of key job components prior to printing and enables you to correct your files accordingly. If more than one preflight wrong links to the high-resolution images folder exist, these are also listed. Lists the missing spot color names (spot colors that were not found - Konica Minolta bizhub PRESS C6000 | IC-307 User Guide - Page 42
5-Printing from the color server Fonts Exceptions Preflight options If the status is Missing, the original CMYK values that are embedded in the PostScript file are used to emulate the desired spot color. If the status is Found, the CMYK values that are in the spot color dictionary are used. Lists - Konica Minolta bizhub PRESS C6000 | IC-307 User Guide - Page 43
Show list Displays options that are missing. Proofing the job using color sets Select the most appropriate predefined color set to print your job using the recommended workflow, you can print a copy of your job with each color set, review the printed sample jobs, and select the best print. Then - Konica Minolta bizhub PRESS C6000 | IC-307 User Guide - Page 44
name> ● PeoplePhotos_ ● OutdoorPhotos_ ● Corporate_ ● Commercial_ Note: The entire job is processed, but just the specified pages are printed. Collect your printouts and review them. Choose the sample file that achieved the best color results. - Konica Minolta bizhub PRESS C6000 | IC-307 User Guide - Page 45
Assigning a color set to your job After printing and reviewing the five sample files, you now need to assign the most appropriate color set to your original job. 1. In the Storage area, double-click your job. 2. Under Print, select Color Set. 3. In the Set list, select one of the sets that achieved - Konica Minolta bizhub PRESS C6000 | IC-307 User Guide - Page 46
from the color server Running a rush job When you have a job that's urgent, you can submit it for processing or printing and run it before other jobs. If you submit a job for processing while another job is being processed, the latter job pauses temporarily but retains - Konica Minolta bizhub PRESS C6000 | IC-307 User Guide - Page 47
the Storage area. You can retrieve archived jobs and files later for further use. Archiving is a method of backing up and storing a job and enables job parameters and its Job History windows. Note: The IC-307 print controller archives large jobs to several cabinet files. When retrieved, the archived - Konica Minolta bizhub PRESS C6000 | IC-307 User Guide - Page 48
The selected job appears at the top of the list in the Storage area. 5. In the Job History window, verify that the file has been successfully retrieved. See also: Retrieving VDP elements on page 106 Forwarding a job to another IC-307 print controller Requirements: ● The job that you want to forward - Konica Minolta bizhub PRESS C6000 | IC-307 User Guide - Page 49
cannot forward a job if the operator password was changed on the destination IC-307 print controller. From the source IC-307 print controller, select Start > Run and connect to the destination IC-307 print controller. Log on using the new operator password. ● To process VDP or PDL external elements - Konica Minolta bizhub PRESS C6000 | IC-307 User Guide - Page 50
in the job parameters window. You can access the Accounting Viewer from the Info menu. See also: Printing a job in grayscale mode on page 68 Printing a job that contains grayscale RGB elements using black toner on page 69 Preserving black color in a job containing grayscale CMYK elements on page 69 - Konica Minolta bizhub PRESS C6000 | IC-307 User Guide - Page 51
column, right-click any column in the table, select Hide, and then from the list of columns that are currently displayed select the column that you want to hide. ● To 7. Select the columns that you want to display in the new view. Using the arrow buttons, move the names of the columns up and down, - Konica Minolta bizhub PRESS C6000 | IC-307 User Guide - Page 52
44 Chapter 6-Managing jobs presents the job parameters in a single window that can be printed or exported as a text file. The Job report window is available by right-clicking a job in the Storage area, and selecting Job report. Exporting files - Konica Minolta bizhub PRESS C6000 | IC-307 User Guide - Page 53
can export RTP files, and convert them to a PDF file. Exporting to PDF enables you to send a copy of your job for approval before printing. The IC-307 print controller is capable of exporting jobs that are standard PDF files, both before and after processing. For an exported RTP job, the PDF file - Konica Minolta bizhub PRESS C6000 | IC-307 User Guide - Page 54
46 Chapter 6-Managing jobs - Konica Minolta bizhub PRESS C6000 | IC-307 User Guide - Page 55
IC-307 print controller enables you to use these tools to adjust and improve the color quality in your jobs: ● Profile Manager, which enables you to import profiles that define the color space of the press, and are based on the combinations of the paper and toner that you are using. For different - Konica Minolta bizhub PRESS C6000 | IC-307 User Guide - Page 56
Profile Manager on the IC-307 print controller enables you to import profiles which define the color space of your printer and are based on the combinations of paper and toner that you are using. For different media types, you can use different destination profiles. Importing a destination profile - Konica Minolta bizhub PRESS C6000 | IC-307 User Guide - Page 57
to emulate other devices or color spaces. 1. From the Tools menu, select Resource Center. The Resource Center window appears. 2. In the Resource list, select Profile Manager. 3. Click the Import button. The Import Source ICC Profile window appears. 4. In the Source profile area, click the Browse - Konica Minolta bizhub PRESS C6000 | IC-307 User Guide - Page 58
using the Media and Color Manager tool The Media and Color Manager is a tool that automatically maps the media type to a destination profile. You can change the destination profile for each of the different media types listed in the Media and Color Manager. The IC-307 print controller is configured - Konica Minolta bizhub PRESS C6000 | IC-307 User Guide - Page 59
controller. You can find the calibration table information in Tools > Resource Center > Calibrations. Calibration table list Calibration tables created in the Calibration Wizard. None Jobs that have this option selected are processed and printed without using a calibration - Konica Minolta bizhub PRESS C6000 | IC-307 User Guide - Page 60
Calibration table Info Data tab Chapter 7-Managing color This tab includes the following: ● Output Density Measured The values that are measured from the printed target. Target The maximum accepted values of the output density. Notes: ● The target values are set higher than the expected values of - Konica Minolta bizhub PRESS C6000 | IC-307 User Guide - Page 61
Graph tab 53 Calibration table Info Graph tab During printing, the IC-307 print controller automatically replaces the CMYK values in the RTP file file. Adding an entry to a calibration table You can review a calibration table to make sure that the curves are relatively smooth and continuous. If - Konica Minolta bizhub PRESS C6000 | IC-307 User Guide - Page 62
In the Add Entry window, from the File Value and Printer Value lists, select the desired values. 7. Click OK. The value table is use to reproduce colors that are difficult to reproduce with CMYK inks. Individual job pages can contain RGB, CMYK, and spot color elements. The IC-307 print controller - Konica Minolta bizhub PRESS C6000 | IC-307 User Guide - Page 63
looks in the PANTONE color, HKS, DIC, and TOYO color dictionaries. If the spot color is not found in either dictionary, the IC-307 print controller uses the CMYK values embedded in the original file. Adding a spot color 1. From the Tools menu, select Spot Color Editor. 2. In the Spot Color Editor - Konica Minolta bizhub PRESS C6000 | IC-307 User Guide - Page 64
for an RTP job, re-RIP the job before printing. Editing a spot color 1. From the Tools menu, select Spot Color Editor. 2. Perform one Color list, search for the desired color. ● In the Spot color dictionary list, select the color dictionary that contains the color that you want to edit. Note: Use the - Konica Minolta bizhub PRESS C6000 | IC-307 User Guide - Page 65
Use the spectrophotometer to obtain spot color values from printed material, fabric, and so on, and then save the equivalent CMYK values in the custom color dictionary. Requirements: ● Your spectrophotometer must be connected to the USB port on the IC-307 print controller. ● Calibrate - Konica Minolta bizhub PRESS C6000 | IC-307 User Guide - Page 66
click Pick color , and wait for the Put device on top of measured spot and press key message to appear. 3. Place the spectrophotometer on the area of the color that you After boxes, or you can print the entire set of variations, and decide which best fits your requirements by examining the printout - Konica Minolta bizhub PRESS C6000 | IC-307 User Guide - Page 67
select Spot Color Editor. 2. In the Color list, type the name of the spot color or browse through the list of spot colors, and then select the spot to see the different variation steps between 1 to 7 color units of the original value. Each unit refers to a dot percentage of the original value. 5. ( - Konica Minolta bizhub PRESS C6000 | IC-307 User Guide - Page 68
8. Click Select. 9. Click Apply. The spot color with the new values is added to the custom dictionary. 10. Click Close. Printing a spot color variation Print a spot color variation chart. The Spot color variations tool is available only with the Professional Power Kit. Requirements: The printer must - Konica Minolta bizhub PRESS C6000 | IC-307 User Guide - Page 69
Do the following: ● In the Tray list, select the desired tray. ● In the Screening list, select the desired screening method. ● To print the variations without a background, clear the Print with background check box. 7. Click Print. Protecting specific spot colors Using the Spot Color Editor, you can - Konica Minolta bizhub PRESS C6000 | IC-307 User Guide - Page 70
your color. 5. In the RGB source values column and the CMYK target values column, type the desired values, or select a spot color from Entire Predefined List. 6. Click Save. 7. On the Protect RGB tab, select the color. The color information appears. - Konica Minolta bizhub PRESS C6000 | IC-307 User Guide - Page 71
9. Click Apply. 10. To apply this to your job, in the job parameters window, in the Color tab, select Protected Colors, and then select the Use protected RGB values check box. Protecting a gray color as a spot color The gray spot workflow applies to graphics and text elements. 1. From the Tools menu - Konica Minolta bizhub PRESS C6000 | IC-307 User Guide - Page 72
your color. 5. In the Gray source value column and the CMYK target values column, type the desired values, or select a spot color from Entire Predefined List. 6. Click Save. 7. On the Protect Gray tab, select the color. 8. If necessary, in the Corrected column, adjust the CMYK values. 9. Click Apply - Konica Minolta bizhub PRESS C6000 | IC-307 User Guide - Page 73
, type the desired values, or select a spot color from Entire Predefined List. 6. Click Save. 7. On the Protect CMYK tab, select the color Use protected CMY values check box. Color adjustment with the Gradation Tool Sometimes you need to perform tone corrections when you print a job. You can use - Konica Minolta bizhub PRESS C6000 | IC-307 User Guide - Page 74
50. All of the color separations are selected. The Gradation Table list also includes these predefined gradation tables: ● Cool: Displays blue contrast in RTP files, and preview your changes before you send your job to print. 1. From the Tools menu, select Gradation. 2. Next to the Preview File box - Konica Minolta bizhub PRESS C6000 | IC-307 User Guide - Page 75
Table name box, type the name of the new gradation table. 14. Click OK. The gradation table is saved and added to the Gradation Table list on the Color Adjustments tab in the job parameters window. - Konica Minolta bizhub PRESS C6000 | IC-307 User Guide - Page 76
image using Photo color cast: Correct underexposure, overexposure, and minor color-cast problems in photos. ● Image noise: Reduce noise (such as to the Process Queue. Printing color jobs as black and white Printing a job in grayscale mode 1. In the IC-307 print controller, open the job parameters - Konica Minolta bizhub PRESS C6000 | IC-307 User Guide - Page 77
contains grayscale RGB elements using black toner 69 Printing a job that contains grayscale RGB elements using black toner 1. In the IC-307 print controller, open the job parameters window and select Color > Ink Saving, and select Print grays using black toner. 2. Click Submit. Preserving black - Konica Minolta bizhub PRESS C6000 | IC-307 User Guide - Page 78
70 Chapter 7-Managing color - Konica Minolta bizhub PRESS C6000 | IC-307 User Guide - Page 79
8 Production workflows Printing using imposition Imposition overview Imposition is the process of positioning page images on a sheet of paper so that when a printer or digital printing press prints the sheet, the page images will be in the right order. It is part of the process of producing - Konica Minolta bizhub PRESS C6000 | IC-307 User Guide - Page 80
stapled along the spine, such as in a brochure or magazine. Perfect bound This method prints pages in a manner that is suited for perfect cover of the book is affixed to the glued spine. This method is used for most books. Previewing an imposition layout View your imposition layout and settings - Konica Minolta bizhub PRESS C6000 | IC-307 User Guide - Page 81
card job 73 Printing a business card job Use the step-and-repeat imposition method to print multiple copies of the same business card on one press sheet. Requirements 5. Click the Imposition tab. 6. In the Imposition method list, select Step & Repeat. 7. Select the Size parameter, and set the - Konica Minolta bizhub PRESS C6000 | IC-307 User Guide - Page 82
the Templates parameter, and set the values as follows: a. In the Layout list, select Best Fit. The IC-307 print controller determines how many business cards can fit on each sheet and calculates the best fit. b. For Print method, make sure that Simplex is selected, because your business cards are - Konica Minolta bizhub PRESS C6000 | IC-307 User Guide - Page 83
Printing using imposition 75 11. Leave the Preview window open, and, if necessary, drag it to the right. 12. Select the Spacing & Marks parameter. 13. In the Marks list automatically appears in the Preview window. The IC-307 print controller calculates that to accommodate a gutter of 0.2 inches or - Konica Minolta bizhub PRESS C6000 | IC-307 User Guide - Page 84
76 Chapter 8-Production workflows Printing a saddle-stitch job Use the saddle-stitch imposition method to print two sets of the same job on one press sheet to save paper and production time. Requirements: This example assumes the following: ● Your job is an eight-page brochure, with a custom trim - Konica Minolta bizhub PRESS C6000 | IC-307 User Guide - Page 85
to a specific job using the Imposition tab in the job parameters window. Creating an imposition template Use the Imposition Template Builder to Builder. 2. From the Method list, select an imposition method. 3. Click New. 4. Type the name of the new template, and press Enter. 5. In the Layout area - Konica Minolta bizhub PRESS C6000 | IC-307 User Guide - Page 86
78 Chapter 8-Production workflows 8. From the Binding list, select the appropriate binding method. Note: Binding is available only when Saddle Stitch and Perfect Bound imposition methods are selected. 9. Click Save. Imposition template viewer - Konica Minolta bizhub PRESS C6000 | IC-307 User Guide - Page 87
Job. The Preview window appears. A simulation of the job is displayed with the current imposition template applied. Editing an imposition template Rotating a page 180° The Imposition Template Builder is available only with the Professional Power Kit. Use the template viewer to rotate one or - Konica Minolta bizhub PRESS C6000 | IC-307 User Guide - Page 88
2. Select the Apply changes to front and back check box. 3. Click the Rotate 180 button. Changing the position of a specific page on the press sheet The Imposition Template Builder is available only with the Professional Power Kit. Changing the location of a page is often necessary when the stepand - Konica Minolta bizhub PRESS C6000 | IC-307 User Guide - Page 89
Adding exceptions to your job Add exceptions when you want to print ranges of pages on different types of media, or insert blank media between pages. 1. Open the job parameters window of your job. 2. Click Exceptions. 3. In the Type list, select the pages in your job in which the media type - Konica Minolta bizhub PRESS C6000 | IC-307 User Guide - Page 90
82 Chapter 8-Production workflows 4. Depending on the option you selected in the Type list, perform one of the following steps: ● For Page range, type the page range in the box. ● For Front cover or Back cover, select Duplex to print the first two (or last two) pages of the job as the cover - Konica Minolta bizhub PRESS C6000 | IC-307 User Guide - Page 91
them to the selected types of paper. The printer then uses those types of paper for the job. Page exceptions and inserts that include setpagedevice commands are called dynamic page exceptions. The IC-307 print controller supports dynamic page exceptions for the following file formats: ● PostScript - Konica Minolta bizhub PRESS C6000 | IC-307 User Guide - Page 92
Resource list, select Virtual Printers and either create a new virtual printer or edit an existing one. 3. Select the Support dynamic on SPD commands. Make sure the virtual printer has support dynamic page exceptions selected. Printing tabs using the Creo Color Server Tabs plug-in for Acrobat Tabs - Konica Minolta bizhub PRESS C6000 | IC-307 User Guide - Page 93
at 9 × 11, and for A4 jobs to A4+. Notes: ● After a job that includes tabs is printed on 9 in. x 11 in. size paper, you can use an index cutter to create 8.5 in. x 11 in. size tabs. ● You can't print on both sides of the tab. ● The A4+ size is the same as the A4 - Konica Minolta bizhub PRESS C6000 | IC-307 User Guide - Page 94
86 Chapter 8-Production workflows Text attributes - tabs Note: The units in the Tabs plug-in are set in the Acrobat Preferences dialog box. Bottom Offset The value for the distance between the lower edge of - Konica Minolta bizhub PRESS C6000 | IC-307 User Guide - Page 95
Printing tabs using the Creo Color Server Tabs plug-in for Acrobat 87 Text attributes - text Bold Bolds the tab text. Italic Makes the tab text italic. Underline - Konica Minolta bizhub PRESS C6000 | IC-307 User Guide - Page 96
88 Chapter 8-Production workflows Text attributes - text Text on both sides The same text appears on both sides of the tab. Direction Direction of the text. ● Vertical ● Counter-clockwise ● Clockwise Note: The Direction options are available only for portrait jobs. Content # The tab - Konica Minolta bizhub PRESS C6000 | IC-307 User Guide - Page 97
or tab. Settings Saved Settings Save Delete Lists the saved settings files. Saves the currently selected settings in a file. This settings file can be applied to other PDF or PostScript files. Deletes the selected settings file. Creating and printing tabs Requirements: You can only create tabs - Konica Minolta bizhub PRESS C6000 | IC-307 User Guide - Page 98
-click your unprocessed job, and select Job Preview & Editor. The job opens in Acrobat software. 2. From the Plug-Ins menu, select Tabs Printing. The Tabs Printing window opens, displaying the Text Attributes tab. 3. In the Tabs area, set the tab attributes. 4. (Optional) In the Text area, set the - Konica Minolta bizhub PRESS C6000 | IC-307 User Guide - Page 99
Printing tabs using the Creo Color Server Tabs plug-in for Acrobat 91 5. Click and 7. 9. Click Apply to apply the tab settings to your document. The Tabs Printing window closes, and the tabs that you added become part of the document. 10. From the Acrobat File menu, select Save, and then close Acrobat - Konica Minolta bizhub PRESS C6000 | IC-307 User Guide - Page 100
92 Chapter 8-Production workflows Managing tabs 11. In the IC-307 print controller software, right-click the job that contains the tabs, and select Job Parameters. 12. Under Print, select Paper Stock. 13. Under Print, select Mixed page size. 14. Select the Mixed page size document check box. 15. - Konica Minolta bizhub PRESS C6000 | IC-307 User Guide - Page 101
-click your unprocessed job, and select Job Preview & Editor. The job opens in Acrobat software. 2. From the Plug-Ins menu, select Tabs Printing. The Tabs Printing window opens, displaying the Text Attributes tab. 3. Click the Content tab. 4. In the thumbnail area, right-click the page or tab that - Konica Minolta bizhub PRESS C6000 | IC-307 User Guide - Page 102
In the upper part of the Tabs Printing window, click Save. list, select the desired saved settings. 4. Click Delete. Working with near-line finishers Near-line finisher overview The IC-307 print controller supports two near-line finishers, Duplo DC-645 and DSF-2000. Using the IC-307 print controller - Konica Minolta bizhub PRESS C6000 | IC-307 User Guide - Page 103
job. 2. In the Finishing tab, select Near-line finisher. 3. In the Device list, select the finisher that you want to use-for example, Duplo DSF-2000. Note: Depending on the finisher you select, some of the options may vary. 4. To print a corner mark, select the Generate corner mark check box. 5. To - Konica Minolta bizhub PRESS C6000 | IC-307 User Guide - Page 104
96 Chapter 8-Production workflows - Konica Minolta bizhub PRESS C6000 | IC-307 User Guide - Page 105
PPM press. Using the RSA, you can retrieve files saved on the printer's hard disk and save them on any remote computer on the network. The predefined scan boxes are as follows: ● Calibration. This box is used for off-the-glass calibration. The calibration database on the IC-307 print controller is - Konica Minolta bizhub PRESS C6000 | IC-307 User Guide - Page 106
Server. 2. In the Server Address box, type the name of the IC-307 print controller, and then click Connect. 3. In the Connect to Server dialog box, select Guest, and click Connect. 4. Select the Utilities volume, and click OK. 5. Double-click the MAC Utilities folder. 6. Copy the RemoteScanInstaller - Konica Minolta bizhub PRESS C6000 | IC-307 User Guide - Page 107
Creating a scan box From your computer, create a scan box on the printer's hard disk. Requirements: The exact name of the IC-307 print controller to which you want to connect Scanned jobs are saved to a scan box on the printer's hard disk. You can also save a copy of your scanned files to a folder - Konica Minolta bizhub PRESS C6000 | IC-307 User Guide - Page 108
100 Chapter 9-Scanning documents 4. Click ScanBox Manager. 5. Click Add. 6. In the Scan Box Name box, type a name for the scan box. 7. In the Network Path box, perform one of the following actions to specify where you want to save copies of the scanned files. Note: The Automatic Copy check box, - Konica Minolta bizhub PRESS C6000 | IC-307 User Guide - Page 109
Scanning a document on the 80 PPM press and 70/60 PPM press 101 8. In the File Type list, select the format in which you want to save the copies of your scanned files. 9. (Optional) To password-protect your scan box, perform the following actions: a. Select Security. b. Select the Secure Scan Box - Konica Minolta bizhub PRESS C6000 | IC-307 User Guide - Page 110
on the IC-307 print controller. After you scan a file, you can also save it to a different location. 1. Open the Remote Scan Application. 2. In the Server Name or IP box, type the name of the server connected to the press that you used for scanning. 3. Click Connect. The connect icon changes from - Konica Minolta bizhub PRESS C6000 | IC-307 User Guide - Page 111
PDF Variable data printing (VDP) jobs are created using VDP authoring programs that support Variable Print Specification formats. Most VDP authoring programs can convert VDP files to conventional PostScript files, which can also be processed by the IC-307 print controller although less efficiently - Konica Minolta bizhub PRESS C6000 | IC-307 User Guide - Page 112
jobs files. Each authoring program creates VDP code that instructs the RIP where to place the VDP elements, and standard that makes use of personalized print applications. Various vendors have created software that can generate PPML files. The IC-307 print controller supports PPML formats and - Konica Minolta bizhub PRESS C6000 | IC-307 User Guide - Page 113
cache global VDP elements check box is selected. 4. Click Save. Archiving VDP elements If you have finished printing a large VDP job and you know that you will need to reprint it in the future, you 1. From the Tools menu, select Resource Center. 2. In the Resource list, select Cached VDP Elements. - Konica Minolta bizhub PRESS C6000 | IC-307 User Guide - Page 114
106 Chapter 10-Variable data printing jobs 3. Select the VDP folder in which to archive, and then click Archive. 4. In the Archive dialog box, select the location where you want to - Konica Minolta bizhub PRESS C6000 | IC-307 User Guide - Page 115
the desired file and then click Add (+) . Note: Use SHIFT or CTRL to select several files or CTRL +A to select all the files. 4. Click Retrieve. The IC-307 print controller retrieves the archived VDP elements and displays them at the end of the file list in the Cached VDP elements dialog box. Next - Konica Minolta bizhub PRESS C6000 | IC-307 User Guide - Page 116
108 Chapter 10-Variable data printing jobs 3. Select the element that you want to delete, and then click Delete. Note: Select Delete All, in order to delete all the cached elements. - Konica Minolta bizhub PRESS C6000 | IC-307 User Guide - Page 117
70/60 PPM press, the custom paper size range is 100 mm × 148 mm to 330 mm × 1200 mm. For paper sizes that range from 330 mm and are larger than 487 mm, contact a service representative. ● After a job that includes tabs is printed on 9 in. x 11 in. size paper, you can use an index - Konica Minolta bizhub PRESS C6000 | IC-307 User Guide - Page 118
that contains different paper sizes and orientations. Tab Flow-Enables you to print a job that contains tabs and mixed paper sizes. Note: For a list of the supported paper weights, see the documentation that accompanies your press. Enables you to print your job on pre-punched paper Enables you to - Konica Minolta bizhub PRESS C6000 | IC-307 User Guide - Page 119
loaded in this tray. Force tray-forces the printer to use the paper stock from the tray selected from the list. When you select Force tray, the job is printed centered on the paper size that is loaded in the user selected tray. All other paper properties are ignored. Note: When Auto is selected - Konica Minolta bizhub PRESS C6000 | IC-307 User Guide - Page 120
technique in which multiple copies of an image are printed to fill up a large sheet. This method is used mainly for business cards. Note: The number of spine fold-for example, in brochures. ● Sets per sheet-Enables you to select the number of sets of the job to print on the defined printable area. - Konica Minolta bizhub PRESS C6000 | IC-307 User Guide - Page 121
a larger trim size results in a larger border on the printed page. Trim orientation Displays the orientation, portrait or landscape, for Places pages 180° from each other, on the same side of the imposed sheet. Use this option when a step-and-repeat 2x1 or 1x2 template is selected. Rotates the - Konica Minolta bizhub PRESS C6000 | IC-307 User Guide - Page 122
options: ● None-Does not apply any marks on the imposition layout for the printed job. ● Crop marks-Prints the lines that indicate where the sheet should be cropped to the trim size. Notes: ● If you want to use crop marks that were incorporated in the DTP application, make sure that enough space - Konica Minolta bizhub PRESS C6000 | IC-307 User Guide - Page 123
when imposition is set to Saddle stitch. Creep is used to compensate for the physical shift of the inner sheets job according to the standard resolution of the press. Improve text/line in Image Smooth gradients Image -307 print controller is able to identify such images and convert them into - Konica Minolta bizhub PRESS C6000 | IC-307 User Guide - Page 124
the originating application, it is not necessary to use IC-307 print controller trapping. Provides the following options: ● Frame thickness can use this option for small or complex images, since thicker frames can decrease quality by hiding parts of an image. Ensures that black text prints cleanly - Konica Minolta bizhub PRESS C6000 | IC-307 User Guide - Page 125
quality of the image. Printers can work with constant amounts of toner and still produce a wide range of colors when you use screening. The darker the color, the larger the dot. To print an image on a digital printer or press, the color server needs to digitally approximate the grayscale values with - Konica Minolta bizhub PRESS C6000 | IC-307 User Guide - Page 126
or Line 2 option for a job that will be printed, make sure that you also select Permission in the image-Applies the screen that is selected in the Image screening list ● Dot 1-Applies a high dot-type screen ● Dot minuscule dots, many more than are used for conventional halftone screening. Notes: ● - Konica Minolta bizhub PRESS C6000 | IC-307 User Guide - Page 127
as black and white instead of color in both the IC-307 print controller and in the printer billing meters. ● CMYK-Prints the job in color using cyan, magenta, yellow, and black toner. Color adjustments Brightness Contrast Controls the brightness level for the job. The options range from Lightest - Konica Minolta bizhub PRESS C6000 | IC-307 User Guide - Page 128
Color Flow Chapter 11-Job parameters Option Gradation Toner limiting Toner saving Print grays using black toner Use Embedded ICC profile Description Contains a list of gradation tables that were created in the IC-307 print controller Gradation Tool window. Each gradation table contains specific - Konica Minolta bizhub PRESS C6000 | IC-307 User Guide - Page 129
compresses out-of-gamut colors into the color capability of the press you are using. When working with ICC profiles, it is important that you can be used for mixed pages that contain both presentation graphics and photographs. Note: Select Saturation to achieve smoothness when you print RGB vector - Konica Minolta bizhub PRESS C6000 | IC-307 User Guide - Page 130
the front side will be printed using the tint emulation. ● If you select Emulate source paper tint, Absolute is used as the rendering intent. Black Profile Provides the following options: ● Linked-Uses the destination profile that was linked using the Media and Color Manager in the Resource Center - Konica Minolta bizhub PRESS C6000 | IC-307 User Guide - Page 131
tool. The spot color dictionaries supported are: HKS, DIC Color Guide, Pantone, Pantone GOE, Pantone Plus, and TOYO. Refer to the Spot Color Editor window for the complete list. ● Original file values-Uses the CMYK values from your file. ● Destination Profile-Uses the destination profile that is - Konica Minolta bizhub PRESS C6000 | IC-307 User Guide - Page 132
● Exposure and color cast-Corrects underexposure, overexposure, and minor color-cast problems in photos. ● Image noise-Reduces noise (such as granularity caused by option is available only if the multi hole punch module is connected. ● Staples ● None ● Rear ● Front ● Dual ● Multi hole punch-This - Konica Minolta bizhub PRESS C6000 | IC-307 User Guide - Page 133
Finishing tab in the job parameters window 125 Tray Multi fold sub tray Option ● Fold type ● Tri-fold-in ● Tri-fold-out ● Double parallel fold ● Gate fold ● Punch-The values vary according to the type of punch unit connected. The number of holes is 2, 3, or 4. - Konica Minolta bizhub PRESS C6000 | IC-307 User Guide - Page 134
126 Tray Multi fold main tray Option ● Fold type ● Half fold Chapter 11-Job parameters ● Z fold ● Tri-fold-in ● Tri-fold-out ● Double parallel fold ● Gate fold - Konica Minolta bizhub PRESS C6000 | IC-307 User Guide - Page 135
fold-in ● Punch-The values vary according to the type of punch unit connected. The number of holes is 2, 3, or 4. Saddle stitch sub that cannot be opened until the entire job is completed), you can use the sample print function to print a separate page or finished output set to an open output tray - Konica Minolta bizhub PRESS C6000 | IC-307 User Guide - Page 136
sub tray Chapter 11-Job parameters Option ● Offset ● Staples ● None ● Rear ● Front ● Dual ● Punch-The values vary according to the type of punch unit connected. The number of holes is 2, 3, or 4. ● Fold type ● Multi half fold ● Multi tri-fold-in Center staples-Staples the center of the booklet - Konica Minolta bizhub PRESS C6000 | IC-307 User Guide - Page 137
that contains the paper on which the cover will be printed ● Cover content ● Blank/Preprinted-Cover is not printed as part of the job ● Compose from file (Simplex)- Front and back covers are part of the file and should be composed and printed on the outside of the cover sheet ● Compose from file - Konica Minolta bizhub PRESS C6000 | IC-307 User Guide - Page 138
Auto in the Tray list, jobs that include specific must be installed on the press. ● When the stacker used only if you want to use a preset job number. Otherwise, you can select it manually on the Duplo DC-645. ● DSF-2000 finisher is a sheet feeder, that is configured with a barcode reader. Prints - Konica Minolta bizhub PRESS C6000 | IC-307 User Guide - Page 139
image) Enables you to define the sheet's edge near the rear of the printer, where the printing stops. The edge of a sheet where printing begins. Tip: Use this option to move duplex page data away from the spine. Prints your job in the center of the page. Exceptions tab in the job parameters window - Konica Minolta bizhub PRESS C6000 | IC-307 User Guide - Page 140
destination profile that is selected for the job, or select a different profile from the list. ● Trim orientation-Enables you to select the orientation for the pages that include exceptions the sheet. ● You can also manually define the shift for odd and even pages, and center the pages on the sheet. - Konica Minolta bizhub PRESS C6000 | IC-307 User Guide - Page 141
, the job needs to be re-RIPed. Defines the flow that the job associated with this job ticket follows when submitted to the IC-307 print controller Provides the following options: ● Print-RIPs, prints, and stores the PDL files in the Storage area (unless the Job Deletion parameter is set to Delete - Konica Minolta bizhub PRESS C6000 | IC-307 User Guide - Page 142
CPSI RIP is applied. Notes: ● The Run immediately option can't be used with the native PDF workflow. ● Native PDF workflow options are not available via the Print Driver software. ● Native PDF workflow supports the CMYK workflow only. Delete printed jobs Removes jobs from the Storage area after - Konica Minolta bizhub PRESS C6000 | IC-307 User Guide - Page 143
Unexpected results might occur when you use this option for VDP jobs that which the IC-307 print controller searches for high-resolution Prints a measurable color bar. Looking at this bar, you can tell the state of the press and whether the quality is consistent. You might need to calibrate the press - Konica Minolta bizhub PRESS C6000 | IC-307 User Guide - Page 144
were selected from the job parameters window. Calibration date Prints the date calibration was last performed in the margin of the sheets. Job title Displays the original name of the file related to this job. Sender Displays the user name of the system from which this job originated. Account - Konica Minolta bizhub PRESS C6000 | IC-307 User Guide - Page 145
window is available from the File menu. Most of these settings are configured when the system is set up for the first time. You should WebViewer setup-Enables you to use the Web Viewer to connect over the network from your computer to the IC-307 print controller. ● Remote workspace setup-Enables - Konica Minolta bizhub PRESS C6000 | IC-307 User Guide - Page 146
log on check box, and then enter a password for each access level. Provides the following options: ● Operator-Enables the user to operate the IC-307 print controller and configure the general settings in the Preferences window. ● Administrator-Enables the user to access all features and settings on - Konica Minolta bizhub PRESS C6000 | IC-307 User Guide - Page 147
including the region, units of measure, and user interface language. You and language must be made on the IC-307 print controller and not in the Windows operating system. Deletion holds the jobs in the Storage area until you manually delete them. Provides the following options: ● PostScript - Konica Minolta bizhub PRESS C6000 | IC-307 User Guide - Page 148
jobs that do not have a specified target path. If a JDF job has a specified target path, JDF output is always created. The IC-307 print controller receives the JDF job ticket via hot folders, returns JDF output with job accounting information, and submits JMF (Job Messaging Format) signals with the - Konica Minolta bizhub PRESS C6000 | IC-307 User Guide - Page 149
the internal file name that the print driver found in the PostScript file. ● Use files name (Use when Printing via LPR): Uses the job's given file name. Selecting this option ensures that the job appears in the queue with the name last given by the user. ● Cache global VDP elements-Enables you to - Konica Minolta bizhub PRESS C6000 | IC-307 User Guide - Page 150
your settings will be saved. Setting up a virtual printer Virtual printers The IC-307 print controller provides several default virtual printers (network printers). Virtual printers are used for automating workflows, which then define job streaming. A virtual printer contains preset workflows that - Konica Minolta bizhub PRESS C6000 | IC-307 User Guide - Page 151
printing. The files remain in PDL format (such as: PS, PDF, VPS, and PPML). In addition to using that you want to add. 5. From the Based on list, select an existing printer with similar settings. 6. The Publish Support dynamic page exceptions check box if you would like the virtual printer to support - Konica Minolta bizhub PRESS C6000 | IC-307 User Guide - Page 152
that Virtual Printers is selected. 3. From the virtual printer list, select the virtual printer that you want to delete, and then click Remove (-). 4. Click Yes. Maintaining your settings Backing up the configuration You can back up your configuration to a local hard disk, network drive, or to CD - Konica Minolta bizhub PRESS C6000 | IC-307 User Guide - Page 153
. 4. Locate the desired folder for backup. 5. Enter the file name. Note: It is recommended that you use the current date as part of the file name. 6. Click Save. 7. In the Configuration backup area, click Start Backup. After a few moments, the backup complete message appears. Note: The last path - Konica Minolta bizhub PRESS C6000 | IC-307 User Guide - Page 154
version. 1. From the File menu, select Preferences. The Preferences window appears. 2. In the Preferences window, under Administrator, select Configuration Backup. 3. In the Restore configuration area, click Browse. The Open dialog box appears. 4. Locate the folder in which you backed up the - Konica Minolta bizhub PRESS C6000 | IC-307 User Guide - Page 155
Tools for maintaining your system 147 Tools for maintaining your system The IC-307 print controller includes a number of tools to help you maintain your system. Some of the tools that are available are: ● Disk wipe: Enables you to work in a - Konica Minolta bizhub PRESS C6000 | IC-307 User Guide - Page 156
148 Chapter 12-Setting up your color server - Konica Minolta bizhub PRESS C6000 | IC-307 User Guide - Page 157
the Remote Site Manager on your desktop while you use other applications on your computer. The Remote Site Manager does not disrupt server activity. Activating the remote tools Set up a network connection between a Windows computer and the IC-307 print controller. You need to select the Enable the - Konica Minolta bizhub PRESS C6000 | IC-307 User Guide - Page 158
how many clients are connected. 5. Use the arrows in the Logoff Automatically after option to enter the amount of hours that you want the IC-307 print controller maintain the connection before logging off automatically. 6. Click Remote Connections Viewer to see the list of connections. 7. Click Save - Konica Minolta bizhub PRESS C6000 | IC-307 User Guide - Page 159
4. In the \Utilities\PC Utilities folder on the IC-307 print controller, locate the Remote_Site_Manager.exe file. 5. On your computer, double- Setup. A message notifies you that you need to add a server before using the EZ Connect tool. 3. Click OK. The Remote Site Manager Setup window appears. 4. - Konica Minolta bizhub PRESS C6000 | IC-307 User Guide - Page 160
add another server, repeat steps 4-8. Using the EZ Connect tool to view the printer status Requirements: Before you can use the EZ Connect tool, you must add a : Make sure that you have activated the remote connection option on the IC-307 print controller. 1. On the taskbar, right-click the Remote - Konica Minolta bizhub PRESS C6000 | IC-307 User Guide - Page 161
VDP File Creator for creating variable data printing files. Connecting to the Web Center Note: To connect to the Web Center from a client workstation, you must first enable the remote connection in the preferences of the IC-307 print controller. 1. On your desktop, double-click Internet Explorer - Konica Minolta bizhub PRESS C6000 | IC-307 User Guide - Page 162
Office versions are supported: ● Microsoft Office XP ● Microsoft Office 2003 ● Microsoft Office 2007 Installing the Office Hot Folder tool Requirements: Microsoft Office must be installed on your computer in order to work with Office Hot Folder tool. 1. On the IC-307 print controller, locate the - Konica Minolta bizhub PRESS C6000 | IC-307 User Guide - Page 163
the virtual printer for which you want to create a hot folder. 2. Click Create HF. You can now print Microsoft Office files through this hot folder. Using the Office Hot Folder tool to print Requirements: One of the following Microsoft file formats must already be submitted to one of the hot folders - Konica Minolta bizhub PRESS C6000 | IC-307 User Guide - Page 164
job ticket. You can assign a job ticket to of the supported file types. With the Creo Color Server Job Ticket software you can: ● Create a job ticket ● Open a job ticket ● Load job parameters from a selected server ● Send a job to print using a job ticket that you created Language settings The Creo - Konica Minolta bizhub PRESS C6000 | IC-307 User Guide - Page 165
Setup window, click OK. 3. From the Tools menu, select Use JT Settings From and in the list that appears, click the server that you just added. The following is C:\Documents and Settings\All Users\Color_Server_Client_Tools\CreoColorServer_JT \V1_0\CreoColorServer_JT \CreoColorServer_Server_JT_ - Konica Minolta bizhub PRESS C6000 | IC-307 User Guide - Page 166
. e. Click Add. The job ticket settings for the server are loaded. f. In the Setup window, click OK. 3. From the Tools menu, select Use JT Settings From and in the list that appears, click the server that you just added. The following message appears if unsaved changes were made to the current open - Konica Minolta bizhub PRESS C6000 | IC-307 User Guide - Page 167
dialog box, locate the file that you want to print using the job ticket, and click Open. 5. Click Submit. The file is sent to the color Submit to Digital Print window opens. 4. Set the Order Quantity. 5. Select the Press Settings tab. 6. Select the digital press that you want to print the file to - Konica Minolta bizhub PRESS C6000 | IC-307 User Guide - Page 168
the Submit to Digital Print window, click Submit to send the file to be processed and printed. Note: Select Submit to Press Immediately, to send the Proof template dialog box, click the Include JDF for Digital Print tab. 4. In the Device Selection list, select Creo Color Server. 5. In the PDF Path - Konica Minolta bizhub PRESS C6000 | IC-307 User Guide - Page 169
box, type a name for the server that you want to use. 4. In the IP / Host Name box, type the IP address or host name of the server that you want to use. 5. Click Add. 6. Click OK. The new server appears in the list. Removing a server Requirements: The Remove button is available only if - Konica Minolta bizhub PRESS C6000 | IC-307 User Guide - Page 170
from the list. Renaming a server 1. From the Tools menu, select Use JT Settings press Enter. Note: The name of a server must be unique. 4. If a server with the same name already exists, you are prompted with a message. To replace the existing server, click Yes. 5. To close the Device Configuration - Konica Minolta bizhub PRESS C6000 | IC-307 User Guide - Page 171
. 4. In the Preferences dialog box, click OK. Job tickets that you create from now on are saved in the new location. The update feature You use the Check for Updates feature to check if a new version of the Creo Color Server Job Ticket software is available, or if the job parameters - Konica Minolta bizhub PRESS C6000 | IC-307 User Guide - Page 172
Creo Color Server Job Ticket software must be connected to a server when checking for updates. 2. using the Easy VDP File Creator tool: 1. Select a template. 2. Assign data. Enter the data manually or import an existing database. 3. Create the job and print it to one of the IC-307 print controller - Konica Minolta bizhub PRESS C6000 | IC-307 User Guide - Page 173
File Creator template The first step in creating a variable data job is to select the type of job and template that will be printed. 1. Open the IC-307 print controller Web Center, select Links, and then select Easy VDP File Creator. 2. In the Templates area, select the category and subject of the - Konica Minolta bizhub PRESS C6000 | IC-307 User Guide - Page 174
Chapter 13-Working with color server tools on your computer Adding records manually to your variable data job The next step in defining a job using the Easy VDP File Creator tool is to assign the information that will appear on the printed variable data job. In this step you add the variable data - Konica Minolta bizhub PRESS C6000 | IC-307 User Guide - Page 175
variable data job using the Easy VDP File Creator tool is to create the job and submit it for printing to one of the IC-307 print controller. 1. After you have added all the data, click Create Job. 2. Type a name for the variable data job. 3. From the Virtual Printers list, select a virtual printer - Konica Minolta bizhub PRESS C6000 | IC-307 User Guide - Page 176
168 Chapter 13-Working with color server tools on your computer - Konica Minolta bizhub PRESS C6000 | IC-307 User Guide - Page 177
Troubleshooting Job History window The Job History window lists all of the messages that were generated during the workflow of the selected job. You can view the job title and owner (the user name. The user that sent the file to print. Click one of the icon types (Information, Warning, or Error) to - Konica Minolta bizhub PRESS C6000 | IC-307 User Guide - Page 178
170 Chapter 14-Troubleshooting Date & Time Stage Message Job Information The date and time on message about the failed or frozen job. 1. In the workspace, do one of the following: ● In the Print Queue, click the frozen icon that appears next to the frozen job. ● In the Storage area click the - Konica Minolta bizhub PRESS C6000 | IC-307 User Guide - Page 179
the directions in the alert message to correct the situation (incorrect or missing paper stock or finisher). Aborting a job Requirements: A job that is processing or printing. Right-click the running job in one of the queues, and select Abort and then click Yes. The job moves from the queue to the - Konica Minolta bizhub PRESS C6000 | IC-307 User Guide - Page 180
any message type icon -for example, Error-in order not to list such messages. ● Click a column header to sort the list by that column. 3. Click Print List. The Print window is displayed. 4. Set the printing options as desired, and click OK. The data is printed according to the current filtering and - Konica Minolta bizhub PRESS C6000 | IC-307 User Guide - Page 181
absolute colorimetric A method of color matching during the translation of files from one device to another. The absolute colorimetric method refers to the use of device-independent color space. amplitude-modulated (AM) screening A type of halftone screening in which the size of the dots varies but - Konica Minolta bizhub PRESS C6000 | IC-307 User Guide - Page 182
at which the software adjusts an original tint during screening to produce the target output. click charge A fee that vendors charge for each printed or copied page. Click charges are part of the maintenance agreement between the vendor and the customer. CMYK A color representation scheme (or color - Konica Minolta bizhub PRESS C6000 | IC-307 User Guide - Page 183
the color components of an image to compensate for deficiencies in printing inks, to solve problems in the color separation itself, or to fulfill a customer from one color space to another. color mapping A color-correction method used to convert an input file's color space to a target's color space - Konica Minolta bizhub PRESS C6000 | IC-307 User Guide - Page 184
color are created and then skewed at angles to reproduce the image in print. creep The extension of middle pages of a folded signature slightly beyond converted to CT format. database A software module that holds site configuration information, edition plan information, and the current state of each - Konica Minolta bizhub PRESS C6000 | IC-307 User Guide - Page 185
for use in electronic page layout. DCS1 format has five separate files. One file acts as the preview and the other four contain the information for printing densitometer is used to measure films while a reflection densitometer is used to measure photographs and ink laydown on press sheets. density - Konica Minolta bizhub PRESS C6000 | IC-307 User Guide - Page 186
-independent color space may be used as an intermediate color space device link profile A one-way link or connection between two color imaging devices. Such a one printing effect which results in dots being printed larger than they should be. It occurs as a result of ink spreading on the printed - Konica Minolta bizhub PRESS C6000 | IC-307 User Guide - Page 187
in which the image is engraved through a screen below the surface of a cylinder. The ink is transferred to paper when pressed to the cylinder. Gravure is used for very long print runs and on many substrates. gray balance The values for yellow, magenta, and cyan that produce a neutral gray with no - Konica Minolta bizhub PRESS C6000 | IC-307 User Guide - Page 188
B (blue/yellow). It may be used as an intermediate color space used when converting from one color space to the required dot size for a given set of printing conditions based on the stored gray level. Color setups including fonts, line screens, offset margins, supported page sizes, and so on. pre- - Konica Minolta bizhub PRESS C6000 | IC-307 User Guide - Page 189
to reproduce many colors of the spectrum. PSImage A low-resolution EPS file that is part of the Automatic Picture Replacement (APR) workflow. You use PSImage files to position images in page layout. You can create and edit a PSImage file in various applications, such as PSImage Exporter in Photoshop - Konica Minolta bizhub PRESS C6000 | IC-307 User Guide - Page 190
angles minimize moiré patterns. shadows The darkest part of an image (original and reproduction). A shadow has densities near the maximum. In a reproduction, shadows are printed with dot areas between 80 percent and 100 percent. sheet Both surfaces of one printed press sheet. short-edge first (SEF - Konica Minolta bizhub PRESS C6000 | IC-307 User Guide - Page 191
when displayed or output through a given device. spine trim size The space between adjacent pages on a printed sheet. spot color A special ink color, not included in the process color set, that is used to specify the color of a graphic design element. spot color library A collection of spot colors - Konica Minolta bizhub PRESS C6000 | IC-307 User Guide - Page 192
File Format. TIFF is a file format used to describe, store, and exchange bitmap and illustrations. Most page makeup and image editing software supports TIFF. TIFF/IT-P1 Acronym for Tagged Image File a proof, press sheet, or plate. trapping A printing technique in which adjacent printed colors are - Konica Minolta bizhub PRESS C6000 | IC-307 User Guide - Page 193
using i1 20 printing off-the-glass calibration chart 18 troubleshooting 21 color sets 35-37 assigning to your job 37 printing 36 Color tab Color Adjustments 119 Color flow 119 Color mode 119 Protected colors 119 Spot color 119 Toner saving 119 color tools overview 47 configuration 80 simulating job - Konica Minolta bizhub PRESS C6000 | IC-307 User Guide - Page 194
186 IC-307 Print Controller, Powered by Creo Color Server Technology User Guide M Media and Color Manager tool mapping media 50 N Near-line finishers generate a corner mark and barcode 95 overview 94 network printer 9, 11, 12 adding to - Konica Minolta bizhub PRESS C6000 | IC-307 User Guide - Page 195
spot color using the i1 spectrophotometer 57 protecting a CMYK color as a spot color 65 protecting a gray color as spot color 63 protecting an RGB color as a spot color 62 test-printing spot colors 57 system messages 172 system overview 2 hardware and software components 2 supported formats 2 T Tabs - Konica Minolta bizhub PRESS C6000 | IC-307 User Guide - Page 196
-
 1
1 -
 2
2 -
 3
3 -
 4
4 -
 5
5 -
 6
6 -
 7
7 -
8
-
9
-
10
-
11
-
12
-
13
-
14
-
15
-
16
-
17
-
18
-
19
-
20
-
21
-
22
-
23
-
24
-
25
-
26
-
27
-
28
-
29
-
30
-
31
-
32
-
33
-
34
-
35
-
36
-
37
-
38
-
39
-
40
-
41
-
42
-
43
-
44
-
45
-
46
-
47
-
48
-
49
-
50
-
51
-
52
-
53
-
54
-
55
-
56
-
57
-
58
-
59
-
60
-
61
-
62
-
63
-
64
-
65
-
66
-
67
-
68
-
69
-
70
-
71
-
72
-
73
-
74
-
75
-
76
-
77
-
78
-
79
-
80
-
81
-
82
-
83
-
84
-
85
-
86
-
87
-
88
-
89
-
90
-
91
-
92
-
93
-
94
-
95
-
96
-
97
-
98
-
99
-
100
-
101
-
102
-
103
-
104
-
105
-
106
-
107
-
108
-
109
-
110
-
111
-
112
-
113
-
114
-
115
-
116
-
117
-
118
-
119
-
120
-
121
-
122
-
123
-
124
-
125
-
126
-
127
-
128
-
129
-
130
-
131
-
132
-
133
-
134
-
135
-
136
-
137
-
138
-
139
-
140
-
141
-
142
-
143
-
144
-
145
-
146
-
147
-
148
-
149
-
150
-
151
-
152
-
153
-
154
-
155
-
156
-
157
-
158
-
159
-
160
-
161
-
162
-
163
-
164
-
165
-
166
-
167
-
168
-
169
-
170
-
171
-
172
-
173
-
174
-
175
-
176
-
177
-
178
-
179
-
180
-
181
-
182
-
183
-
184
-
185
-
186
-
187
-
188
-
189
-
190
-
191
-
192
-
193
-
194
-
195
-
196
 |
 |

User Guide
English
IC-307 Print Controller, Powered by
Creo Color Server Technology
Version 1.0
731-01921A Rev A