Konica Minolta bizhub PRESS C6000 IC-307 User Guide - Page 110
Saving scanned files to your computer, Scan Settings, File Type, Start, Requirements
 |
View all Konica Minolta bizhub PRESS C6000 manuals
Add to My Manuals
Save this manual to your list of manuals |
Page 110 highlights
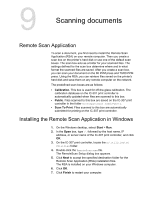
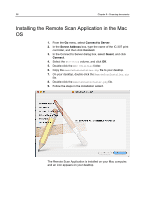
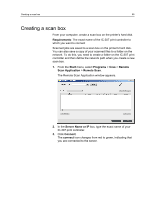
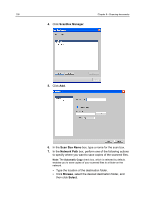
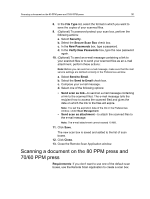
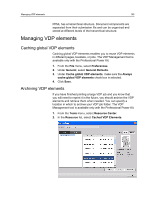
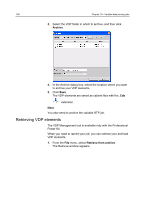
102 Chapter 9-Scanning documents 1. On the press touch screen, touch the Scan button. 2. Touch the HDD button. 3. Touch the scan box to which you want to save your scanned documents. 4. Touch Scan Settings. 5. Using the touch screen keyboard, define the settings for your scanned files-for example, paper size and resolution. 6. Under File Type, select the file format in which you want to save the scanned files. 7. Position the original printout on the platen glass of the 80 PPM press and 70/60 PPM press. 8. Press the Start button. The 80 PPM press and 70/60 PPM press scans the file. It is automatically saved on the IC-307 print controller in the folder D:\Output\Scan Jobs\Public. Saving scanned files to your computer Requirements: The exact name of the IC-307 print controller to which you want to connect Scanned files are saved to the scan box that you create on the printer's hard disk. Depending on the scan box settings, a copy of the scanned file is saved in a folder on the IC-307 print controller. After you scan a file, you can also save it to a different location. 1. Open the Remote Scan Application. 2. In the Server Name or IP box, type the name of the server connected to the press that you used for scanning. 3. Click Connect. The connect icon changes from red to green, indicating that you are connected to the server. 4. In the ScanBox list, select the scan box that your scanned files are in. Note: If the selected scan box is password protected, you must type the password before you can view the list of scanned files. All files scanned to the selected scan box are displayed. 5. Select the desired scanned file, and click Save as. 6. Select a location on your computer, and click Save. You can now open a copy of the scanned file on your computer.
-
 1
1 -
2
-
3
-
4
-
5
-
6
-
7
-
8
-
9
-
10
-
11
-
12
-
13
-
14
-
15
-
16
-
17
-
18
-
19
-
20
-
21
-
22
-
23
-
24
-
25
-
26
-
27
-
28
-
29
-
30
-
31
-
32
-
33
-
34
-
35
-
36
-
37
-
38
-
39
-
40
-
41
-
42
-
43
-
44
-
45
-
46
-
47
-
48
-
49
-
50
-
51
-
52
-
53
-
54
-
55
-
56
-
57
-
58
-
59
-
60
-
61
-
62
-
63
-
64
-
65
-
66
-
67
-
68
-
69
-
70
-
71
-
72
-
73
-
74
-
75
-
76
-
77
-
78
-
79
-
80
-
81
-
82
-
83
-
84
-
85
-
86
-
87
-
88
-
89
-
90
-
91
-
92
-
93
-
94
-
95
-
96
-
97
-
98
-
99
-
100
-
101
-
102
-
103
-
104
-
 105
105 -
 106
106 -
 107
107 -
 108
108 -
 109
109 -
 110
110 -
 111
111 -
 112
112 -
 113
113 -
 114
114 -
 115
115 -
116
-
117
-
118
-
119
-
120
-
121
-
122
-
123
-
124
-
125
-
126
-
127
-
128
-
129
-
130
-
131
-
132
-
133
-
134
-
135
-
136
-
137
-
138
-
139
-
140
-
141
-
142
-
143
-
144
-
145
-
146
-
147
-
148
-
149
-
150
-
151
-
152
-
153
-
154
-
155
-
156
-
157
-
158
-
159
-
160
-
161
-
162
-
163
-
164
-
165
-
166
-
167
-
168
-
169
-
170
-
171
-
172
-
173
-
174
-
175
-
176
-
177
-
178
-
179
-
180
-
181
-
182
-
183
-
184
-
185
-
186
-
187
-
188
-
189
-
190
-
191
-
192
-
193
-
194
-
195
-
196
 |
 |
