Kyocera FS-6525MFP Fax System (U) Operation Guide Rev-4.2012.3 - Page 57
Checking the Send Status, Selecting the functions, Send Start
 |
View all Kyocera FS-6525MFP manuals
Add to My Manuals
Save this manual to your list of manuals |
Page 57 highlights
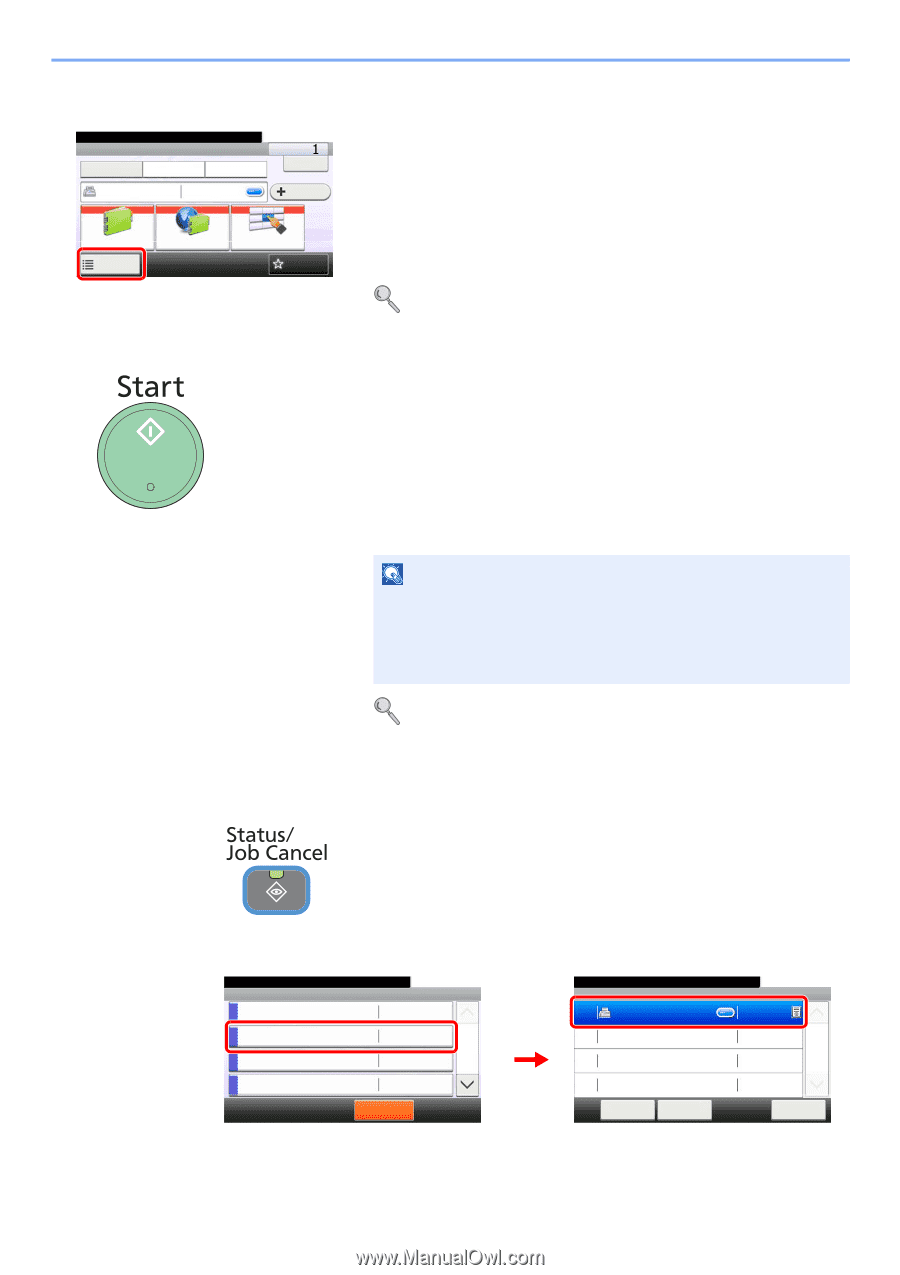
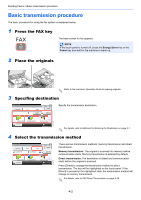
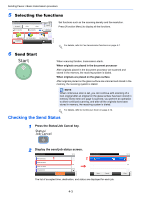
Sending Faxes > Basic transmission procedure 5 Selecting the functions Ready to send. FAX On Hook 0123456789 Chain Direct 0123456789 10:10 Dest. : Check Add Dest. Set functions such as the scanning density and fax resolution. Press [Function Menu] to display all the functions. Address Book Functions Ext Address Book One Touch Key Favorites GB0669_05 For details, refer to Fax transmission functions on page 4-7. 6 Send Start When scanning finishes, transmission starts. When originals are placed in the document processor After originals placed in the document processor are scanned and stored in the memory, the receiving system is dialed. When originals are placed on the glass surface After originals placed on the glass surface are scanned and stored in the memory, the receiving system is dialed. NOTE When continuous scan is set, you can continue with scanning of a next original after an original on the glass surface has been stored in memory. Every time one page is scanned, you perform an operation to allow continued scanning, and after all the originals have been stored in memory, the receiving system is dialed. For details, refer to Continuous Scan on page 4-14. Checking the Send Status 1 Press the Status/Job Cancel key. 2 Display the send job status screen. Status/Job Cancel. Status Print Job Status Send Job Status Store Job Status Scheduled Job 1 Pause All Print Jobs 10:10 1/4 Status/Job Cancel. Send Job Status 2 0005 0123456 Menu Cancel The list of accepted time, destination, and status are displayed for each job. 10:10 Process 1/1 Close 4-3 GB0052_02 GB0183_00
-
 1
1 -
2
-
3
-
4
-
5
-
6
-
7
-
8
-
9
-
10
-
11
-
12
-
13
-
14
-
15
-
16
-
17
-
18
-
19
-
20
-
21
-
22
-
23
-
24
-
25
-
26
-
27
-
28
-
29
-
30
-
31
-
32
-
33
-
34
-
35
-
36
-
37
-
38
-
39
-
40
-
41
-
42
-
43
-
44
-
45
-
46
-
47
-
48
-
49
-
50
-
51
-
 52
52 -
 53
53 -
 54
54 -
 55
55 -
 56
56 -
 57
57 -
 58
58 -
 59
59 -
 60
60 -
 61
61 -
 62
62 -
63
-
64
-
65
-
66
-
67
-
68
-
69
-
70
-
71
-
72
-
73
-
74
-
75
-
76
-
77
-
78
-
79
-
80
-
81
-
82
-
83
-
84
-
85
-
86
-
87
-
88
-
89
-
90
-
91
-
92
-
93
-
94
-
95
-
96
-
97
-
98
-
99
-
100
-
101
-
102
-
103
-
104
-
105
-
106
-
107
-
108
-
109
-
110
-
111
-
112
-
113
-
114
-
115
-
116
-
117
-
118
-
119
-
120
-
121
-
122
-
123
-
124
-
125
-
126
-
127
-
128
-
129
-
130
-
131
-
132
-
133
-
134
-
135
-
136
-
137
-
138
-
139
-
140
-
141
-
142
-
143
-
144
-
145
-
146
-
147
-
148
-
149
-
150
-
151
-
152
-
153
-
154
-
155
-
156
-
157
-
158
-
159
-
160
-
161
-
162
-
163
-
164
-
165
-
166
-
167
-
168
-
169
-
170
-
171
-
172
-
173
-
174
-
175
-
176
-
177
-
178
-
179
-
180
-
181
-
182
-
183
-
184
-
185
-
186
-
187
-
188
-
189
-
190
-
191
-
192
-
193
-
194
-
195
-
196
-
197
-
198
-
199
-
200
-
201
-
202
-
203
-
204
-
205
-
206
-
207
-
208
-
209
-
210
-
211
-
212
-
213
-
214
-
215
-
216
-
217
-
218
-
219
-
220
-
221
-
222
-
223
-
224
-
225
-
226
-
227
-
228
-
229
-
230
-
231
-
232
-
233
-
234
-
235
-
236
-
237
-
238
 |
 |