Motorola MOTOMING A1200 User Guide - Page 76
create a personal folder, set up the email inbox, Password, Reenter Password, Setup Manually - user manual
 |
View all Motorola MOTOMING A1200 manuals
Add to My Manuals
Save this manual to your list of manuals |
Page 76 highlights
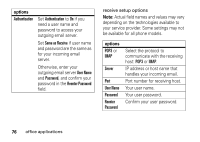
create a personal folder The procedures for creating and using a personal folder are similar to the corresponding message center procedures. See page 63 for more information. set up the email inbox If the phone cannot locate your email mailbox, it opens the mailbox setup screen for you to configure your mailbox settings. automatic setup Note: This feature may not be available in all regions. 1 Select your email service provider from the mailbox setup list, then tap OK. 2 Enter your User Name and Password in the appropriate fields, confirm your password in the Reenter Password field, then tap OK. 74 office applications 3 To edit email sending, receiving, signature, connections options, tap the mail box name you wish to edit. Then enter settings as described in the following section. manual setup If your service provider is not listed on the mailbox setup list, you can manually set up your email mailbox as follows: 1 Tap Setup Manually on the mailbox setup screen to manually enter email settings, then tap OK. 2 Tap the Mailbox Name field and enter your mailbox name. 3 Tap Send Setup and Receive Setup to configure your email sending server and receiving server settings as described below. 4 Tap Signature Setup, If you want your phone to automatically append your signature to
-
 1
1 -
2
-
3
-
4
-
5
-
6
-
7
-
8
-
9
-
10
-
11
-
12
-
13
-
14
-
15
-
16
-
17
-
18
-
19
-
20
-
21
-
22
-
23
-
24
-
25
-
26
-
27
-
28
-
29
-
30
-
31
-
32
-
33
-
34
-
35
-
36
-
37
-
38
-
39
-
40
-
41
-
42
-
43
-
44
-
45
-
46
-
47
-
48
-
49
-
50
-
51
-
52
-
53
-
54
-
55
-
56
-
57
-
58
-
59
-
60
-
61
-
62
-
63
-
64
-
65
-
66
-
67
-
68
-
69
-
70
-
 71
71 -
 72
72 -
 73
73 -
 74
74 -
 75
75 -
 76
76 -
 77
77 -
 78
78 -
 79
79 -
 80
80 -
 81
81 -
82
-
83
-
84
-
85
-
86
-
87
-
88
-
89
-
90
-
91
-
92
-
93
-
94
-
95
-
96
-
97
-
98
-
99
-
100
-
101
-
102
-
103
-
104
-
105
-
106
-
107
-
108
-
109
-
110
-
111
-
112
-
113
-
114
-
115
-
116
-
117
-
118
-
119
-
120
-
121
-
122
-
123
-
124
-
125
-
126
-
127
-
128
-
129
-
130
-
131
-
132
-
133
-
134
-
135
-
136
-
137
-
138
-
139
-
140
-
141
-
142
-
143
-
144
-
145
-
146
-
147
-
148
-
149
-
150
-
151
-
152
-
153
-
154
-
155
-
156
-
157
-
158
-
159
-
160
-
161
-
162
-
163
-
164
-
165
-
166
-
167
-
168
-
169
-
170
-
171
-
172
-
173
-
174
 |
 |