Netgear RND4475 Software Manual - Page 39
Connect, You can log in with administrator or user credentials. If you log in as a user
 |
UPC - 606449056761
View all Netgear RND4475 manuals
Add to My Manuals
Save this manual to your list of manuals |
Page 39 highlights
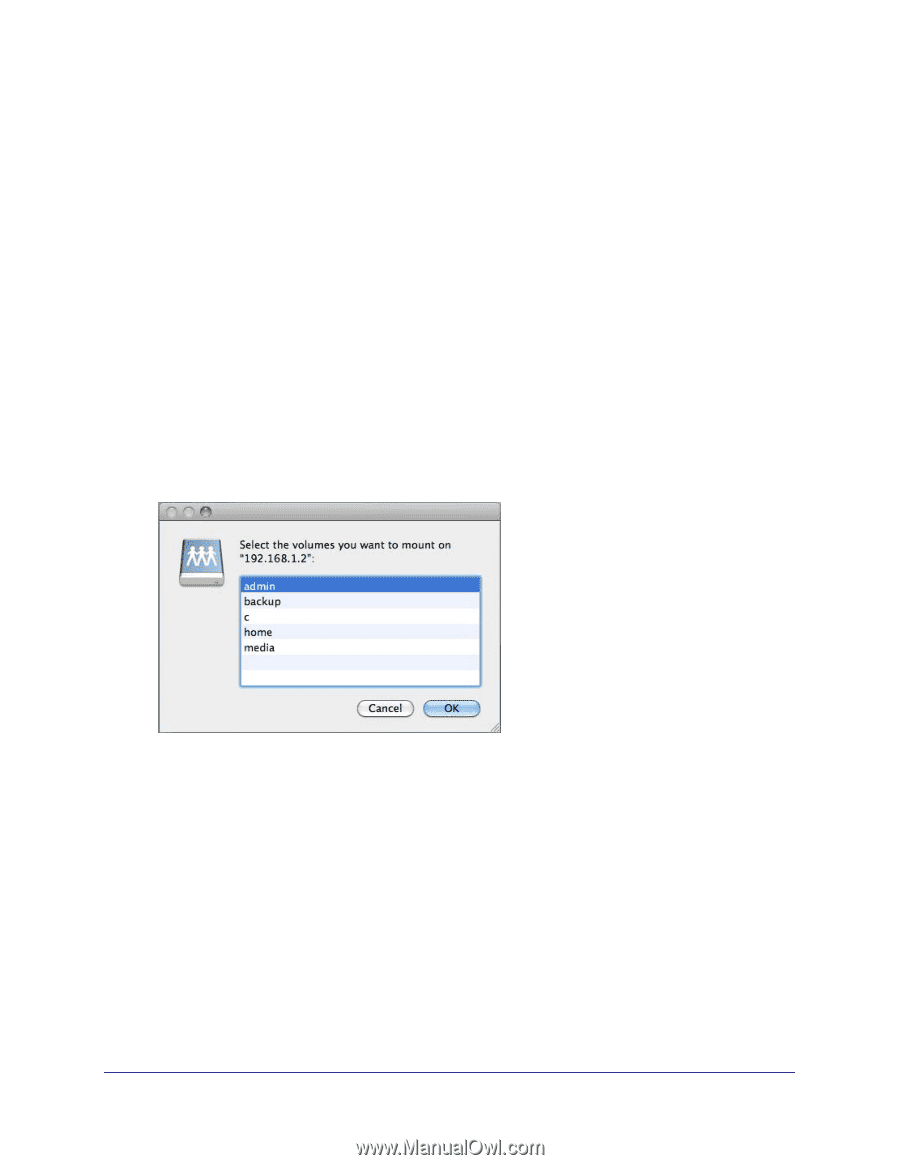
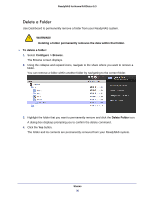
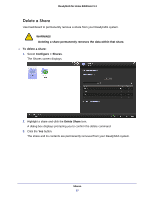
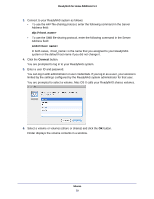
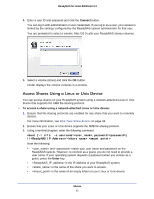
ReadyNAS for Home RAIDiator 5.3 3. Connect to your ReadyNAS system as follows: • To use the AFP file-sharing protocol, enter the following command in the Server Address field: afp:// • To use the SMB file-sharing protocol, enter the following command in the Server Address field: smb:// In both cases, is the name that you assigned to your ReadyNAS system or the default host name if you did not change it. 4. Click the Connect button. You are prompted to log in to your ReadyNAS system. 5. Enter a user ID and password. You can log in with administrator or user credentials. If you log in as a user, your access is limited by the settings configured by the ReadyNAS system administrator for that user. You are prompted to select a volume. Mac OS X calls your ReadyNAS shares volumes. 6. Select a volume or volumes (share or shares) and click the OK button. Finder displays the volume contents in a window. Shares 39
-
 1
1 -
2
-
3
-
4
-
5
-
6
-
7
-
8
-
9
-
10
-
11
-
12
-
13
-
14
-
15
-
16
-
17
-
18
-
19
-
20
-
21
-
22
-
23
-
24
-
25
-
26
-
27
-
28
-
29
-
30
-
31
-
32
-
33
-
 34
34 -
 35
35 -
 36
36 -
 37
37 -
 38
38 -
 39
39 -
 40
40 -
 41
41 -
 42
42 -
 43
43 -
 44
44 -
45
-
46
-
47
-
48
-
49
-
50
-
51
-
52
-
53
-
54
-
55
-
56
-
57
-
58
-
59
-
60
-
61
-
62
-
63
-
64
-
65
-
66
-
67
-
68
-
69
-
70
-
71
-
72
-
73
-
74
-
75
-
76
-
77
-
78
-
79
-
80
-
81
-
82
-
83
-
84
-
85
-
86
-
87
-
88
-
89
-
90
-
91
-
92
-
93
-
94
-
95
-
96
-
97
-
98
-
99
-
100
-
101
-
102
-
103
-
104
-
105
-
106
 |
 |