Netgear RND4475 Software Manual - Page 54
Email Alert Contacts, To manage alert email contacts, Con gt; System > Alerts
 |
UPC - 606449056761
View all Netgear RND4475 manuals
Add to My Manuals
Save this manual to your list of manuals |
Page 54 highlights
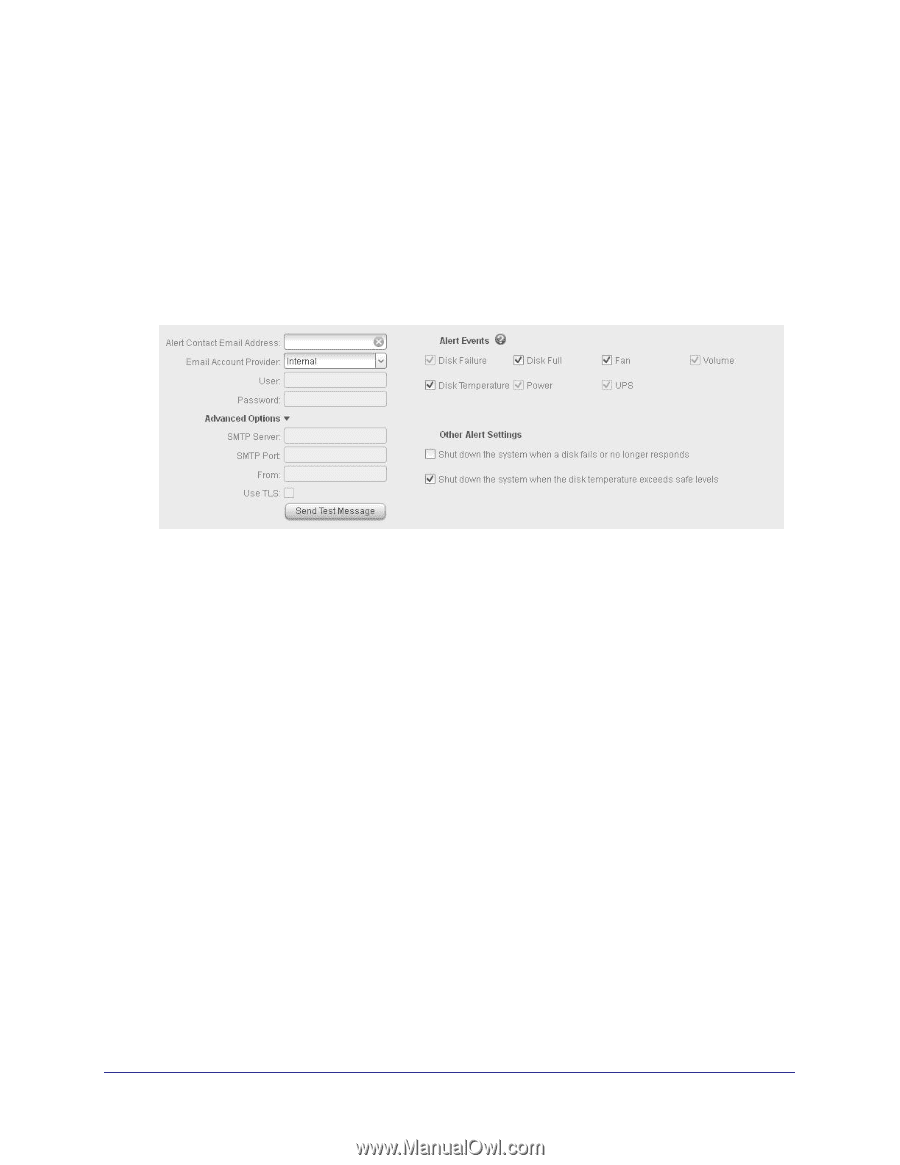
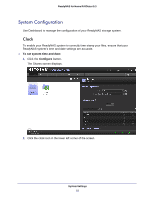
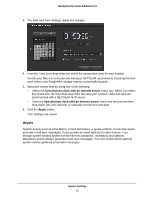
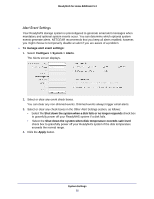
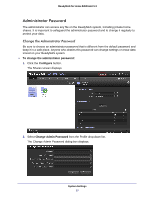
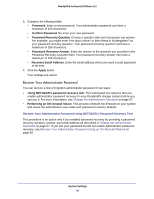
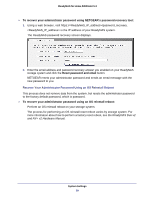
ReadyNAS for Home RAIDiator 5.3 Email Alert Contacts To receive an email message alerting you if a system event that requires your attention occurs, provide an email address for alert messages. You can use an email address that is accessible from a smart phone to help you monitor your ReadyNAS system when you are away from it. To manage alert email contacts: 1. Select Configure > System > Alerts. The Alerts screen displays. 2. In the Alert Contact Email Address field, enter an email address. You can also edit an existing alert contact or delete it by clearing the field. 3. From the Email Provider drop-down list, select your email service provider. If you select the internal email service provider option, your ReadyNAS system acts as a mail transfer agent (MTA). This setting works well in many corporate environments. 4. (Optional) If your email service provider is not listed, expand the Advanced Options section and customize the outgoing mail server (STMP) settings for your provider. 5. (Optional) Enter the details for your email service provider. These are often available on the Internet, or you can contact your email service provider for the information. 6. In the User field, enter your email address, and in the Password field, enter your email password. Your storage system uses these credentials to authenticate with your email service provider's outgoing mail server so that it can send email alerts. 7. (Optional) Click the Send Test Message button to determine if you configured the contact information correctly. If you do not receive the test message, change the settings. For example, if you selected Internal as your email provider and the test message is not delivered, select Custom instead and configure the advanced options. 8. Click the Apply button. System Settings 54
-
 1
1 -
2
-
3
-
4
-
5
-
6
-
7
-
8
-
9
-
10
-
11
-
12
-
13
-
14
-
15
-
16
-
17
-
18
-
19
-
20
-
21
-
22
-
23
-
24
-
25
-
26
-
27
-
28
-
29
-
30
-
31
-
32
-
33
-
34
-
35
-
36
-
37
-
38
-
39
-
40
-
41
-
42
-
43
-
44
-
45
-
46
-
47
-
48
-
 49
49 -
 50
50 -
 51
51 -
 52
52 -
 53
53 -
 54
54 -
 55
55 -
 56
56 -
 57
57 -
 58
58 -
 59
59 -
60
-
61
-
62
-
63
-
64
-
65
-
66
-
67
-
68
-
69
-
70
-
71
-
72
-
73
-
74
-
75
-
76
-
77
-
78
-
79
-
80
-
81
-
82
-
83
-
84
-
85
-
86
-
87
-
88
-
89
-
90
-
91
-
92
-
93
-
94
-
95
-
96
-
97
-
98
-
99
-
100
-
101
-
102
-
103
-
104
-
105
-
106
 |
 |