Netgear RND4475 Software Manual - Page 86
Optional Click the, Test Connection, Enabled, WARNING
 |
UPC - 606449056761
View all Netgear RND4475 manuals
Add to My Manuals
Save this manual to your list of manuals |
Page 86 highlights
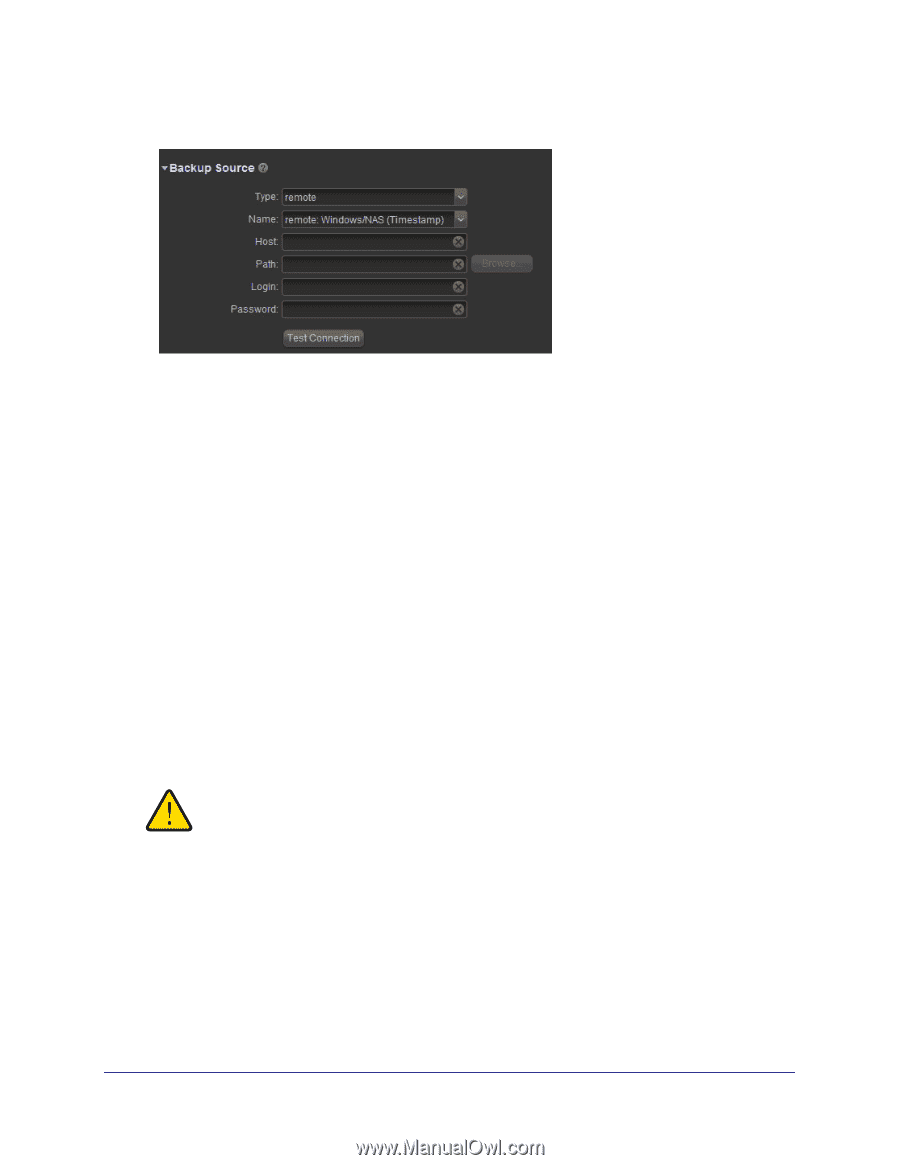
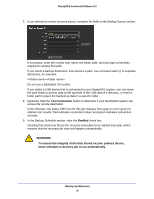
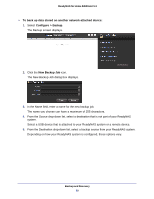
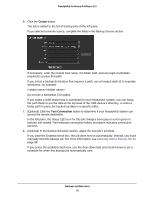
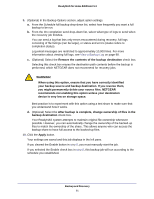
ReadyNAS for Home RAIDiator 5.3 7. If you selected a remote recovery source, complete the fields in the Backup Source section. If necessary, enter the remote host name, the folder path, and any login credentials required to access that path. If you select a backup destination that requires a path, use a forward slash (/) to separate directories, for example: // Do not use a backslash (\) in paths. If you select a USB device that is connected to your ReadyNAS system, you can leave the path blank to put the data at the top level of the USB device's directory, or enter a folder path to place the backed-up data in a specific folder. 8. (Optional) Click the Test Connection button to determine if your ReadyNAS system can access the remote destination. In the left pane, the status LED icon for this job changes from gray to red or green to indicate test results. Red indicates connection failure and green indicates connection success. 9. In the Backup Schedule section, clear the Enabled check box. Clearing this check box forces the recovery procedure to be started manually, which ensures that the recovery job does not happen automatically. WARNING! To ensure the integrity of the data stored on your primary device, never schedule a recovery job to run automatically. Backup and Recovery 86
-
 1
1 -
2
-
3
-
4
-
5
-
6
-
7
-
8
-
9
-
10
-
11
-
12
-
13
-
14
-
15
-
16
-
17
-
18
-
19
-
20
-
21
-
22
-
23
-
24
-
25
-
26
-
27
-
28
-
29
-
30
-
31
-
32
-
33
-
34
-
35
-
36
-
37
-
38
-
39
-
40
-
41
-
42
-
43
-
44
-
45
-
46
-
47
-
48
-
49
-
50
-
51
-
52
-
53
-
54
-
55
-
56
-
57
-
58
-
59
-
60
-
61
-
62
-
63
-
64
-
65
-
66
-
67
-
68
-
69
-
70
-
71
-
72
-
73
-
74
-
75
-
76
-
77
-
78
-
79
-
80
-
 81
81 -
 82
82 -
 83
83 -
 84
84 -
 85
85 -
 86
86 -
 87
87 -
 88
88 -
 89
89 -
 90
90 -
 91
91 -
92
-
93
-
94
-
95
-
96
-
97
-
98
-
99
-
100
-
101
-
102
-
103
-
104
-
105
-
106
 |
 |